Thermo Fisher Scientific CyberScan CON 400/410 (For units manufactured before March 2010, discontinued) User Manual
Page 16

Instruction Manual
CON 400/410
- 10 -
4.4 Conductivity
Calibration
The CON 400 and CON 410 meters are capable of up
to 5-point conductivity calibration at one point per
conductivity range (0.00 - 19.99
μS; 0.0 - 199.9 μS; 0 -
1999
μS; 0.00 - 19.99 mS; 0.0 - 199.9 mS).
All new calibration data will over-ride existing stored
calibration data for each measuring range calibrated.
Calibrating for Conductivity:
1.
If necessary, press the MODE key to select
conductivity mode.
2.
Rinse the probe thoroughly with de-ionized (DI)
water or a rinse solution, then rinse with a small
amount of calibration standard.
3.
With the yellow probe guard attached, dip the
probe into the calibration standard. Immerse the
probe tip beyond the upper steel band. Stir the
probe gently to create a homogeneous sample.
Allow time for the reading to stabilise.
See Figure 7.
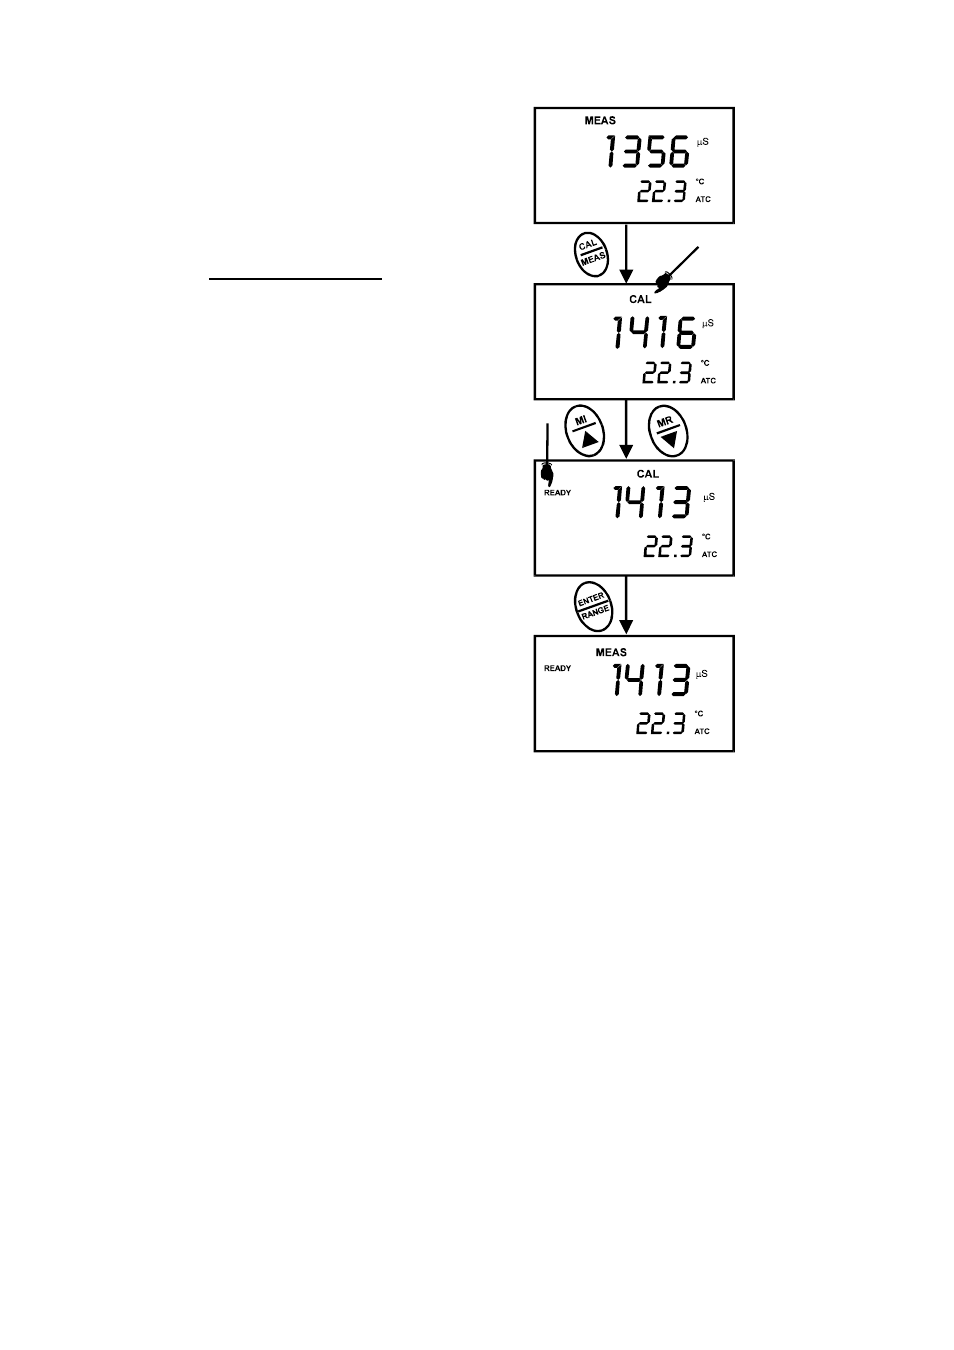
4. Press CAL/MEAS to enter conductivity
calibration mode. The CAL indicator will appear
in the upper right corner of the display.
5. Press
the
MI/S or MR/T key to change the
value on the primary display to match the value
of the calibration standard referenced to your
normalisation temperature (usually 25
°C).
6. Press ENTER to confirm calibration value. The
meter returns to the MEAS (measurement) mode.
7.
Repeat steps 1 to 6 for other measuring ranges.
See figure 6.
Figure 6 - Conductivity Calibration
