Martel Electronics MC1210 User Manual
Page 10
10
1.
Turn on the unit while holding down the “HOME” key.
2.
Hold the key down for a count of 10 seconds to restore contrast default settings.
If the display is so dim that you cannot tell if the unit is on or off, use the backlight key to
determine if the power is on or off.
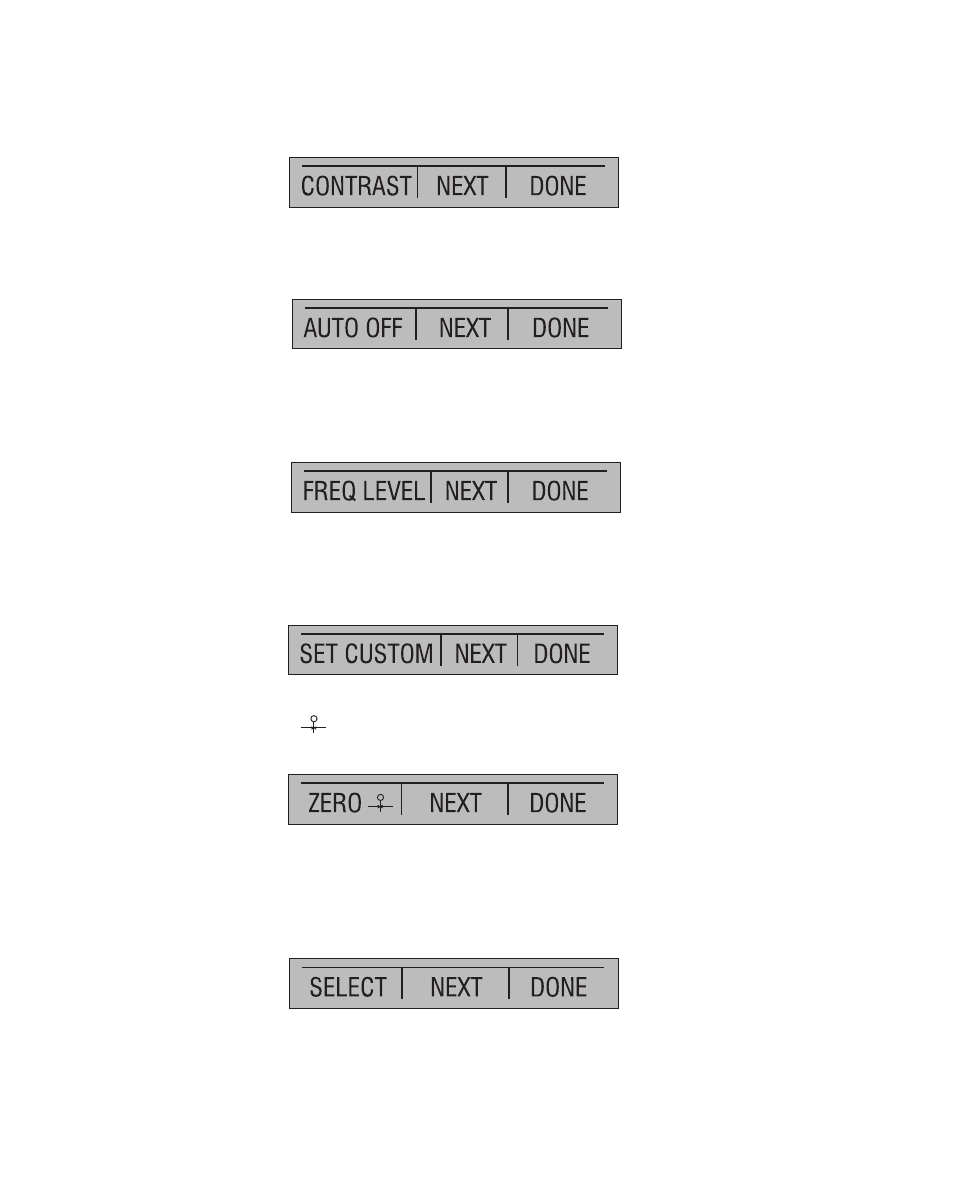
The auto off main menu contains the options [AUTO OFF], [NEXT], and [DONE].
The [AUTO OFF] option is used to turn the automatic shutoff on and off and set the amount of
time the unit needs to stay dormant to shut off. [NEXT] and [DONE] both return to home menu.
When the lower display is in the frequency or pulse mode, the frequency level menu is added
after the main menu. The options available in this menu are [FREQ LEVEL], [NEXT], and
[DONE]. The [FREQ LEVEL] option is used to adjust the amplitude of the wave. [NEXT] is
used to access the contrast main menu, and [DONE] returns to the home menu.
When the calibrator is in RTD CUSTOM mode, the RTD custom setup menu, is inserted after
the main menu. Options [SET CUSTOM], [NEXT], and [DONE] are available. [SET CUSTOM]
is used to enter a custom PRT into the calibrator. Refer to Section 4.1-8a for instructions.
[NEXT] is used to enter the contrast main menu, and [DONE] to return to the home menu.
The pressure zeroing main menu is the final variation to choosing [MORE] in the main menu.
It has the options [ZERO
], used to zero pressure, [NEXT] and [DONE], which have the
same function as above. Refer to the Section 5.3 for instructions on zeroing.
The parameter selection menu is called up when [UPPER] or [LOWER] is selected from the
main menu. It contains the following options: [SELECT], [NEXT], and [DONE]. When the
display is selected, a parameter will start to flash. Use the [SELECT] option to change the
parameter, and the [NEXT] option to switch to another variable. [DONE] returns to the home
menu and enables the selected mode.