9 calibrate the rugged dissolved oxygen sensor, 11 prepare the flow cell, 12 install the pump – In-Situ smarTROLL Low-Flow Sampling System Quick Start Guide User Manual
Page 2: 13 set up a low flow test from a template, 14 set up a low-flow test without a template, 15 start a low-flow test, 16 guidelines and precautions, Calibrate the rugged dissolved oxygen sensor, Calibrate multiple sensors with quick-cal solution, Prepare the flow cell
Information subject to change without notice. In-Situ, In-Situ logo, BaroMerge, BaroTROLL, HERMIT, iSitu, Pocket-Situ, RDO, RuggedCable, RuggedReader, TROLL, and Win-Situ are trademarks or registered trademarks of In-Situ Inc.
©
2013. All rights reserved.
Calibrate the Rugged Dissolved Oxygen
Sensor
The RDO sensor requires very little maintenance. The
zero oxygen calibration is optional.
1. Tap the Calibration icon
to access a list of sensors
that are available for calibration.
2. Tap RDO Sensor.
3. Select the method by which you intend to calibrate the
sensor. This example demonstrates a two-point
calibration. Tap 100% and 0% Saturation.
4. Place a water-saturated sponge in the bottom of the
calibration cup. Place the instrument into the calibration
cup, and tap Start.
5. When the calibration is stable, tap the Accept button.
6. Remove the sponge and add fresh sodium sulfite
solution to the fill line. Place the instrument into the
calibration cup, and tap Start.
7. When the calibration is stable, tap the Accept button.
8. To view the calibration report, tap View Report.
9. Rinse the sensors thoroughly with DI water.
Calibrate Multiple Sensors with Quick-Cal
Solution
1. Tap the Calibration icon
to access a list of
sensors that are available for calibration.
2. Tap Quick-Cal.
3. The conductivity, pH, and ORP sensors are
automatically selected. Tap the green check mark next to
a sensor if you want to exclude it from the quick
calibration.
4. Tap OK.
5. Fill the calibration cup to the fill line with Quick-Cal
solution.
6. Place the instrument into the calibration cup, and tap
Start.
7. When the calibration is stable, tap the Accept button.
8. Rinse the sensors with DI water.
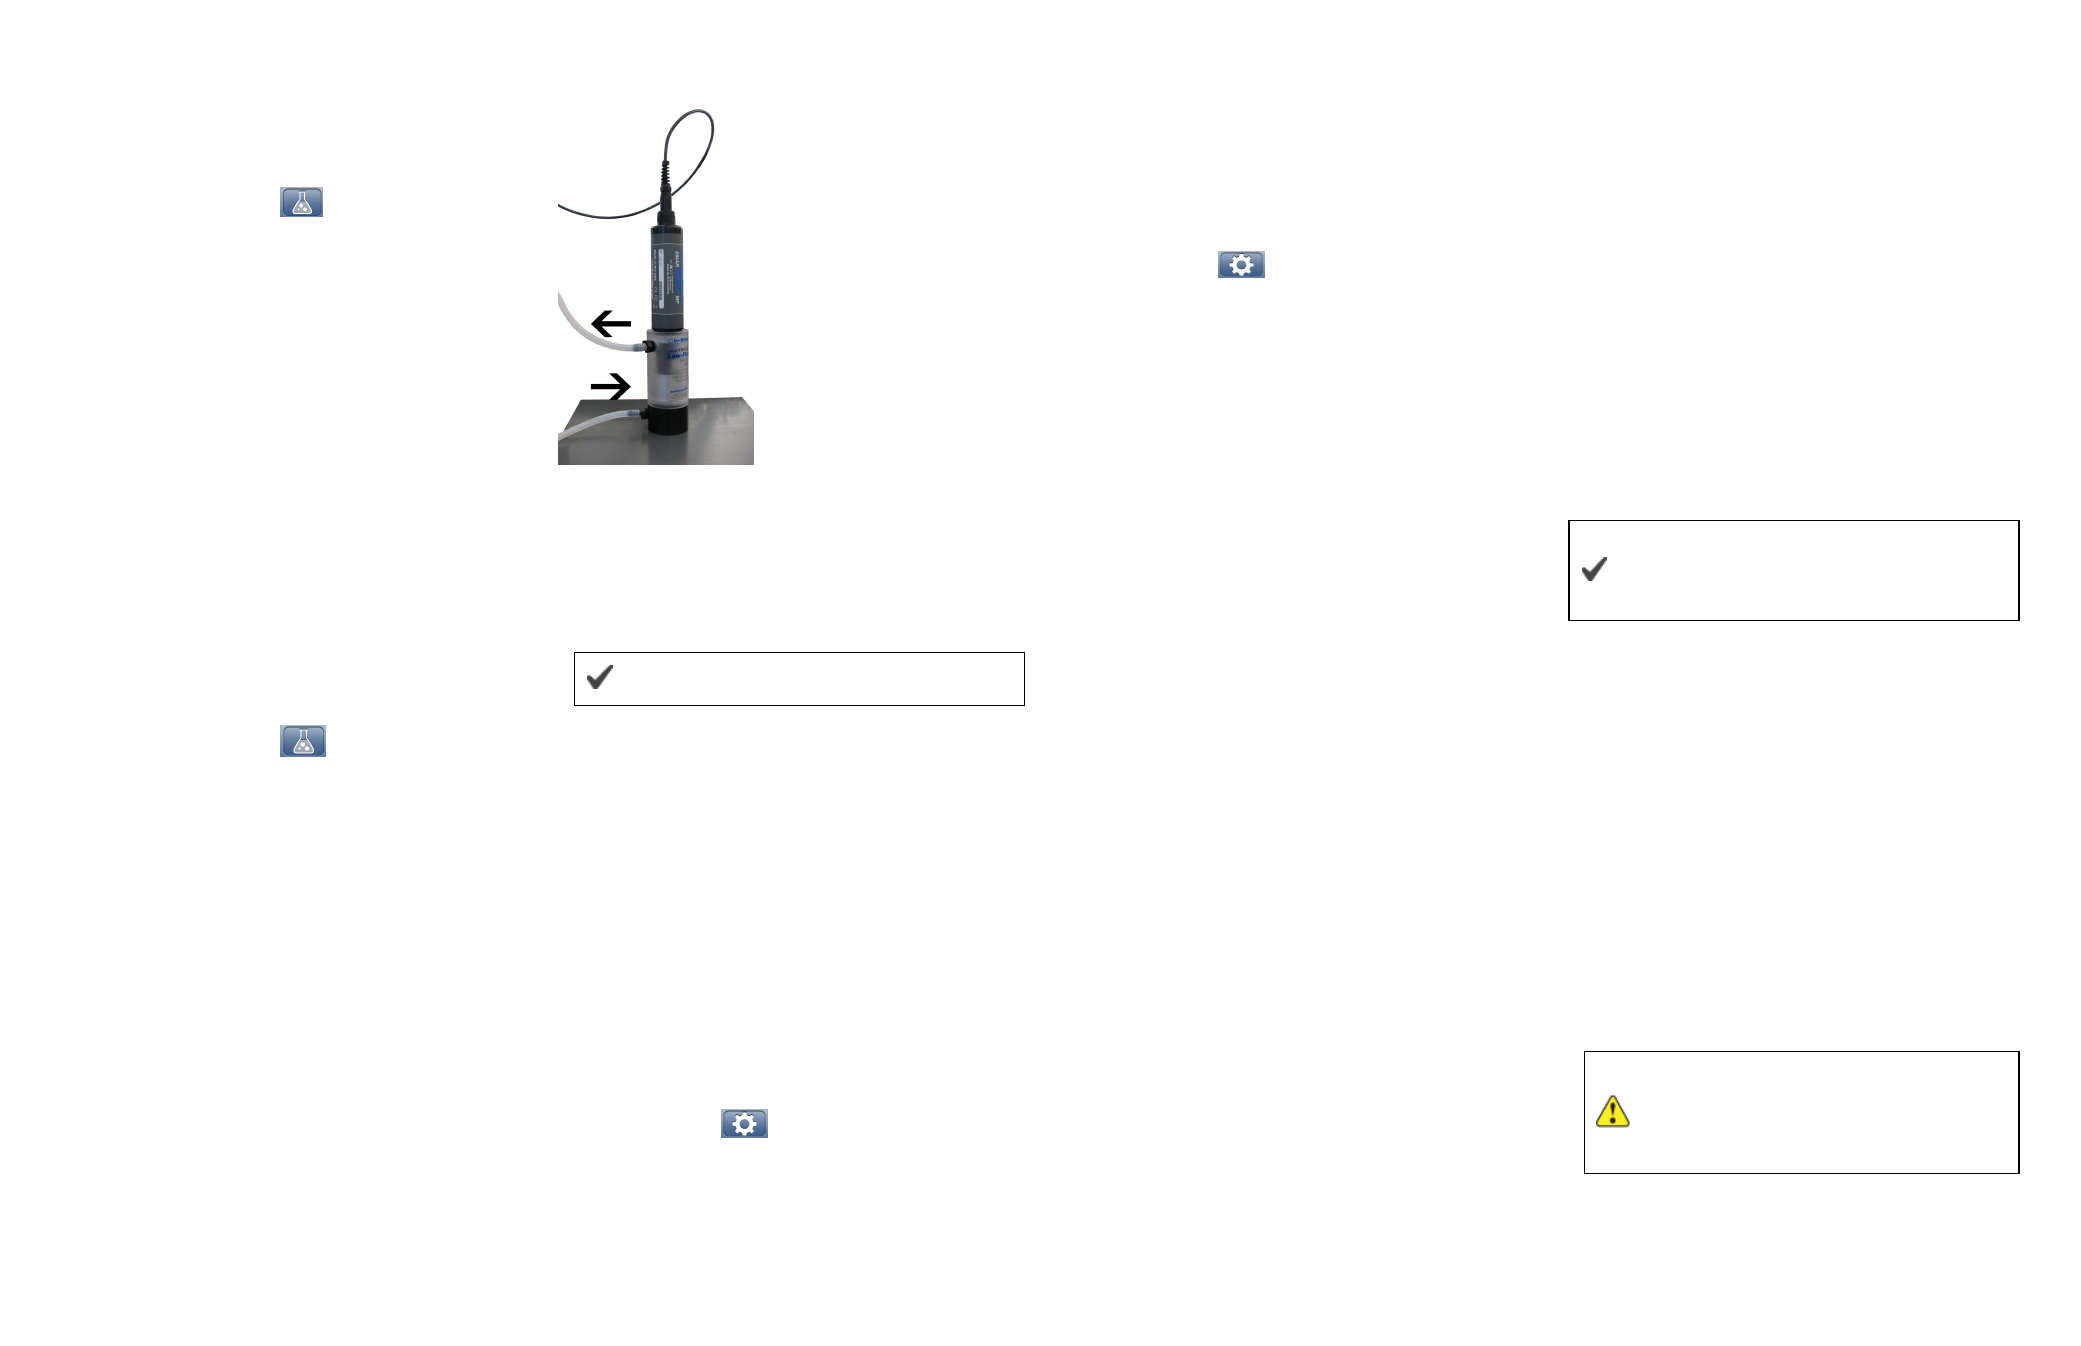
Prepare the Flow Cell
1. Select the barbed NPT fitting that will fit with the tubing
size.
2. Tape the threads with plumbing tape.
3. Attach a fitting to the inflow port at base of the cylinder
and to the outflow port at the top of the cylinder. Tighten
until hand-tight. Do not tighten with a wrench.
The 3-way valve and check valve are optional.
4. Attach the tubing.
5. Use the attachment screw to connect the flow cell to the
base plate.
6. Insert the calibrated
SMAR
TROLL™ MP Instrument.
Install the Pump
1. Determine the static water level.
2. Install the pump in the well.
3. Start the pump and determine the optimum final
pumping rate and final stabilized drawdown from static
water level. This can be calculated using a graduated
cylinder, stopwatch, and water level tape.
Set up a Low Flow Test From a Template
1. Tap the Gear icon
to access the Low-Flow section
of the App.
2. The Project screen appears.
3. Tap the Template button. A list of all saved templates
appears.
4. Tap on the template you intend to load, and tap the Load
button.
Set up a Low-Flow Test without a
Template
1. Tap the Gear icon
to access Low-Flow.
2. The Project screen appears.
3. Tap a text-entry field to open the keyboard.
4. Enter the project information. Tap the Return button on
the keyboard to close the keyboard.
5. Tap the Next button to continue to the Units screen.
6. If you want to change units, tap the units button and
select a different value.
7. Tap the Next button to continue to the Well screen.
8. Enter the well information.
9. Tap the Next button to continue to the Stabilization
screen.
10. A green checkmark indicates that the stabilization
criterion for the parameter is based on percentage rather
than an absolute value. Tap a gray box to change from
absolute to percentage.
11. Tap the Next button to continue to the Pump screen.
12. Enter the pump information. The total system volume is
calculated using the internal pump volume, the tubing
inner diameter, and the tubing length.
13. Tap the Next button to continue to the Purge screen.
14. Enter the pumping rate you intend to use during the test.
15. Enter the sampling rate you intend to use, or select Use
System Purge Time if you want the software to assign
a sample rate.
16. Enter an estimate of the drawdown you expect during
the testing. It is optional to enter notes in the Notes field.
17. If you would like to save the test set up information as a
template to use again later, tap the Save button. You can
save it using the default name, or tap the field and enter a
new name.
Start a Low-Flow Test
1. After you have entered the setup information, installed
the pump, and set up the flow cell you are ready to start
the Low-Flow test.
2. From the Purge screen tap the Start button.
3. The test begins and the sample rate countdown is
displayed on screen. The parameters appear after the
first countdown is complete.
4. When you are satisfied with the stability of the test, tap
the Accept button.
5. Enter the final values for drawdown, pumping rate, and
total volume pumped.
6. You can accept the default file name, or enter a different
name. It is optional to enter notes.
7. Click the Next button. The report appears. You can
pinch and drag the report to resize the view.
The test report is saved as a PDF file, which
can be emailed or transferred to a computer via
iTunes
®
.
Guidelines and Precautions
l
Ensure that the RDO Sensor Cap is pressed firmly
over the sensor lens and is flush with the instrument
before submerging in liquid.
l
Ensure that the pH/ORP sensor is completely
inserted into the port, so that no liquid can enter the
instrument. Keep the pH/ORP sensor hydrated
between uses and during transport.
l
Air bubbles are unavoidable in low-flow sampling.
Because of this, expect a longer stabilization time for
the RDO sensor than for the other sensors.
l
For more detailed instructions see the
SMAR
TROLL
MP Operator's Manual.
l
Do not submerge the battery pack or the mobile
display device in liquid.
You must follow the directions on the
enclosed Cleaning and Decontamination
form before returning the equipment to In-
Situ Inc.