2 channel x details screen – Detcon 880RS-N4X User Manual
Page 17
880R-N4X
880R-N4X Instruction Manual
Rev. 0.1
Page 13 of 18
will go through an initialization of the drive and the “USB Out” button will change to green, displaying “USB
Eject”. To eject the USB Drive, touch the button with the wand. When the button turns gray and displays
“USB Out” it is safe to remove the USB Drive from the port.
“Reset” will clear alarms that have been set as latching after the alarm condition has passed. This will only
work when alarms have been set as “Latching”, and only after the alarm condition has been cleared.
“Alarm History” is a select button that will open the “Alarm History Screen” (Section 5.3).
“System Configuration” is a select button that opens the “System Configuration” Screen (Section 4.3).
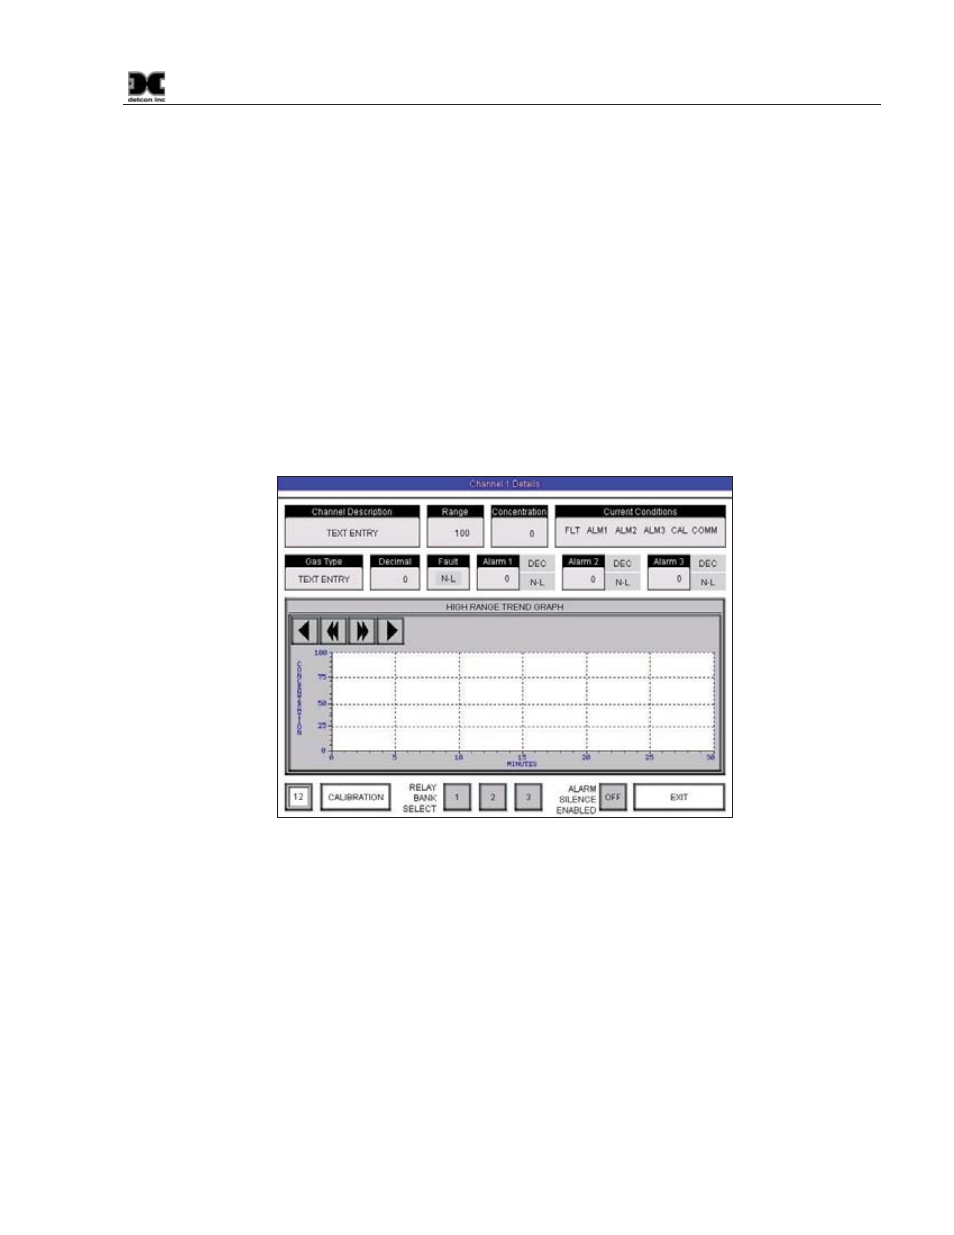
5.2 Channel X Details Screen
When selected, each channel will open its own detail screen (Figure 22). This screen provides a graphic
representation of the last 30 minutes of the sensor’s activity. The display allows the user to move forward or
backward in the graphic to display activity before or after the displayed time using the arrow keys in the upper
left of the graphic display.
Figure 22 Channel Details Screen
When the sensor goes into a fault or alarm condition the “Current Conditions” box will highlight and blink the
associated fault(s) or alarm(s). Each fault or alarm has a different color for ease in dissociating the condition.
These conditions will remain highlighted and blinking until the conditions to correct them are met. I.E., a
‘CAL’ fault will not clear until the sensor returns to normal operation and, if set to non-latching and ascending,
Alarm 1 will not clear until the “Concentration” falls below the set “Alarm 1 Level.”