COSA Xentaur Optical Flow Meter User Manual
Page 7

Photon Control Inc
.
~
Making Light Work
7
3.2 Procedure – Calculating Insertion Depth – 6” and Larger Pipes:
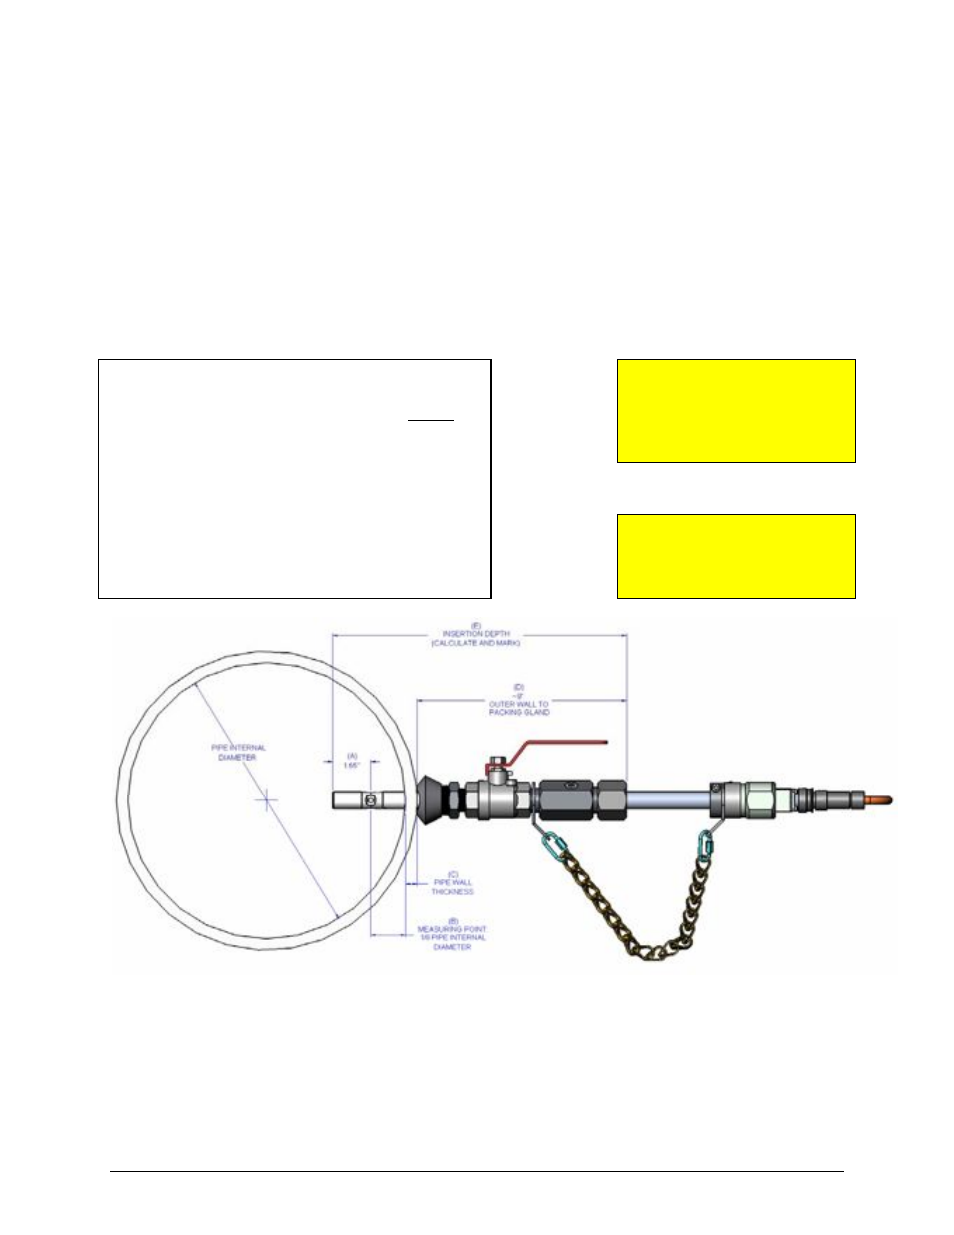
Before progressing with the installation of the probe it is necessary to calculate and mark the
correct insertion depth. The actual measuring point for the Focus TM Probe is 1.65” (42mm)
from the end of the probe. For 6” and larger pipe diameters this measuring point should be
positioned at the quarter radius point of the pipe for accurate readings. This is calculated using
the following method. Refer to Figure 5 for a diagram of the measurements to be taken.
1. Measure and record distances A, B, C and D.
2. Calculate and record distance E = A+B+C+D. (Keep this record for future reference as it will be
needed for reinstallation should the probe be removed.)
3. Mark the probe at distance E from the probe end as shown.
M
easure and record the following:
A = End to Measuring Point
= 1.65” +
B = 0.125 x Pipe ID
= _____ +
C = Pipe Wall Thickness
= _____ +
D = Outer Wall to Packing Gland
= _____ =
E = Insertion Depth = A+B+C+D
= _____
Figure 5: Insertion Depth Calculations for 6” and Larger Pipe Diameters
NOTE:
Pipe internal diameter and wall
thickness may be found in
Appendix A.
NOTE:
Insertion depth tolerance:
±0.5%
of nominal pipe size.
