Step 3 – Catskill Craftsmen 1521 User Manual
Page 8
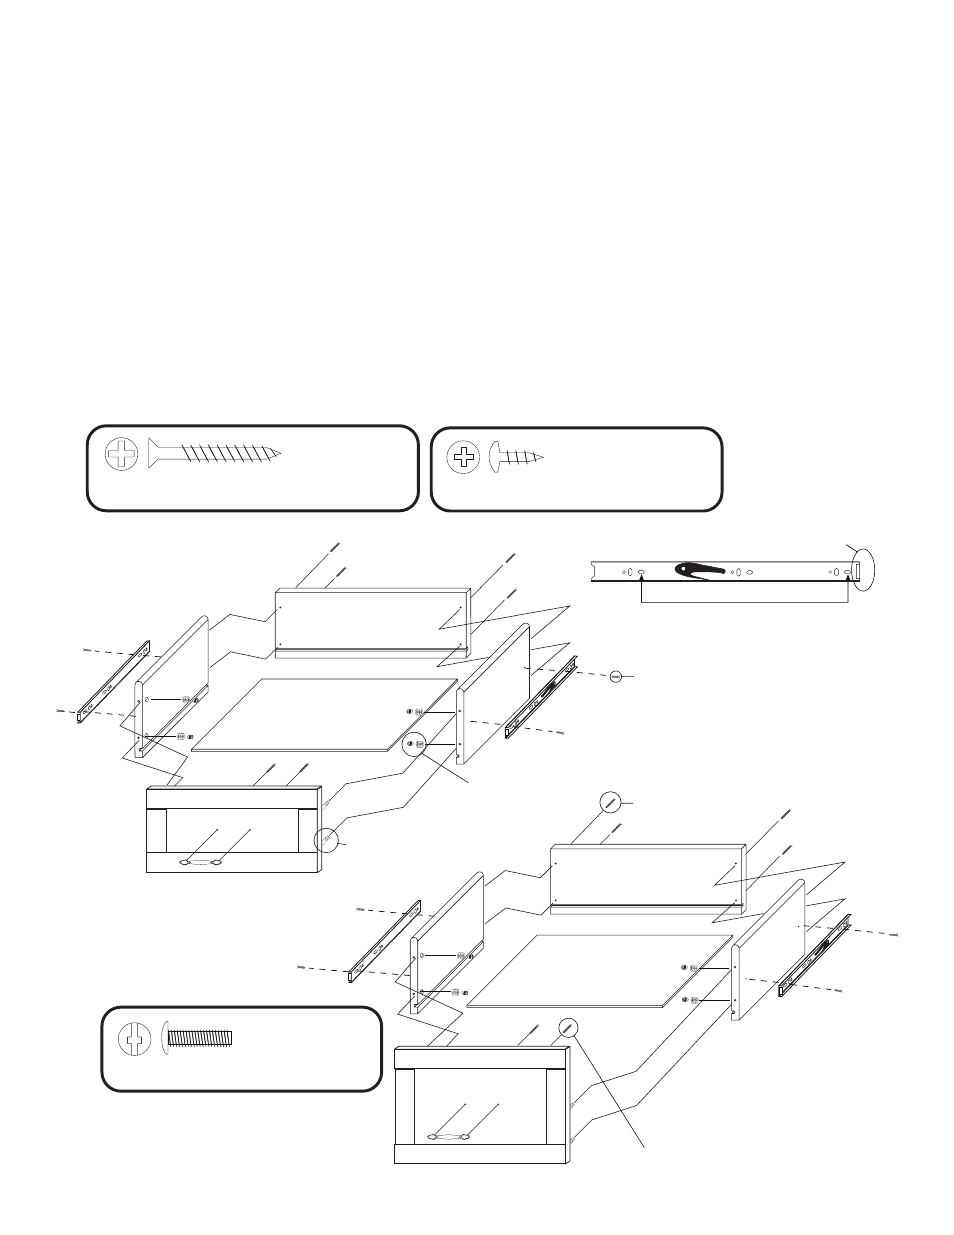
STEP 3
Perform a similar drawer assembly as Step 2 for the lower drawers.
A. Using 1-1/4” #8 screws, attach the drawer back to the drawer sides as shown below.
B. Slide the drawer bottom into the slots.
C. Insert Bastion Posts into the drawer front and tighten into position.
D. Insert Barrel Nuts into the holes on the drawer sides, and slide the drawer front into place.
Tighten with the set screws. Use hand screwdriver or hex wrench.
E. Attach the full extention glides to the drawer sides. See step 1B to locate the correct part of the
glide for this step.
F. Using 1/2” Truss head screws with two washers each, attach the handle to the drawer front.
FOR TIPS ON HOW THE BASTION SYSTEM WORKS SEE LAST PAGE!
This end goes flush against
the drawer front.
Use these holes to attach to
the drawer side.
1-1/4” #8 Screw
1/2” Truss Head M4x10 Screw
3/8” #8 Pan Head
Screw
8 Used
in this step
1-1/4” Phillips Flat Head #8 Screw
1/2” Truss Head M4x10 Screw
4 Used
in this step
8 Used
in this step
3/8” Phillips Pan Head #8 Screw
Barrel Nut &
Set Screw
Bastion Post
Note: On one side the black lever is up and
on the other side the lever is down.