Step 6 – Catskill Craftsmen 1521 User Manual
Page 10
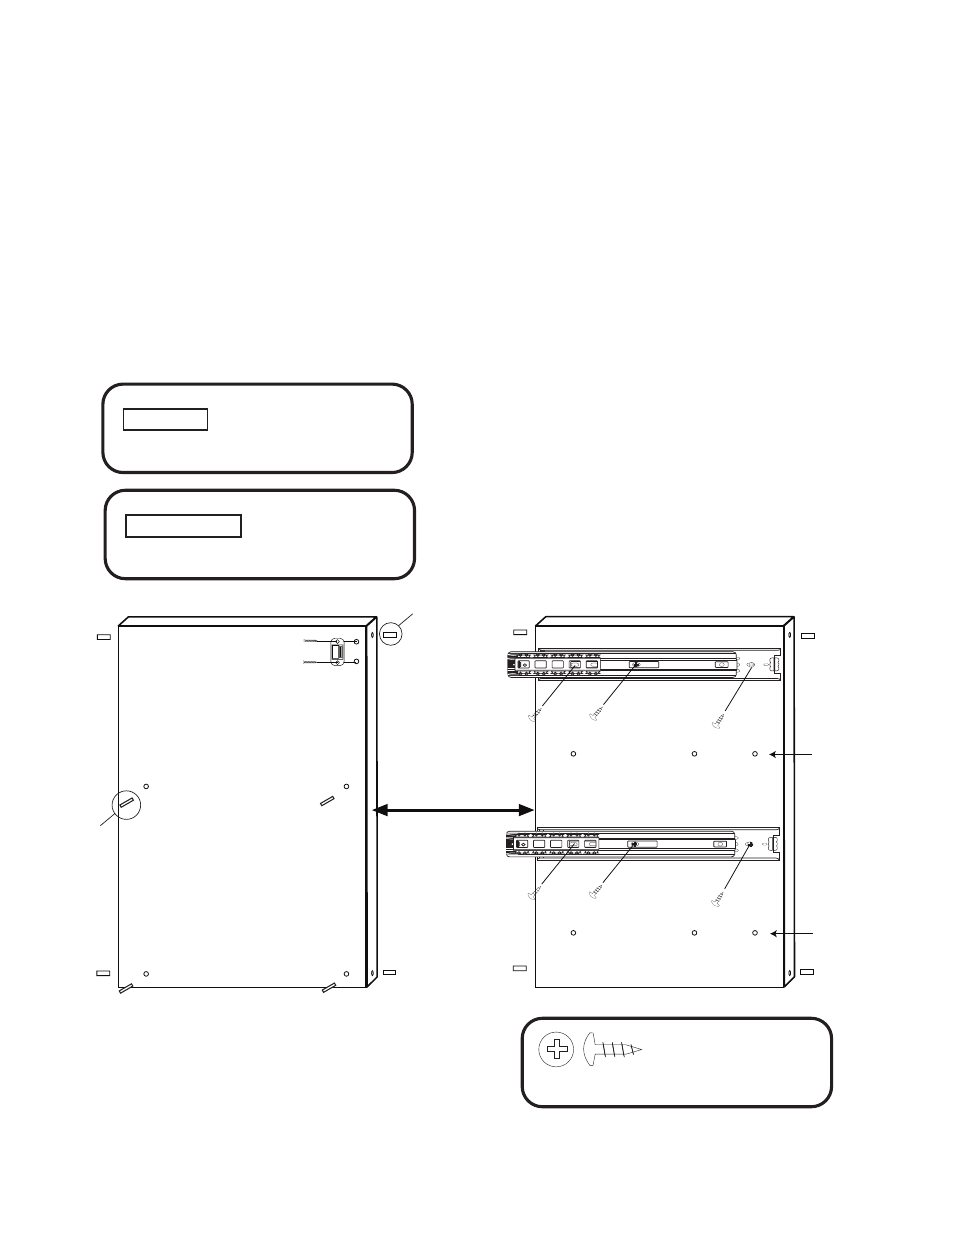
STEP 6
A. Tap/insert 3/4” pin into each long edge of the center divider. DON’T OVERDRIVE PINS! Pins
should stick up about 1/4” when seated.
B. Attach the magnet with 1/2” #4 screws to the top of the door.
C. Attach full extention glides to the center divider as shown. Note that the glides should slide out
towards the same edge with the attached magnet.
D. Tap 1” steel pins into the left side of the center divider to be used as shelf supports in a later step.
4 Used
in this step
The finished
edge faces the
front of the cart
6 Used
in this step
3/8” Phillips Pan Head #6 Screw
3/4” Long 3/16” DIA. Steel Pin
3/4” Pin
Left Side View
Right Side View
4 Used
in this step
1” Long 3/16” DIA. Steel Pin
1” Pin
Not Used
Not Used
This side forms the right
inside of the door cavity.
This side is the left inside
of the door cavity.
Note: Look ahead to Step 8
- 1426 (13 pages)
- 1447 (5 pages)
- 1429 (14 pages)
- 1481 (16 pages)
- 1533 (12 pages)
- 1448 (14 pages)
- 1536 (12 pages)
- 1537 (13 pages)
- 1538 (14 pages)
- 1544 (14 pages)
- 1563 (12 pages)
- 1569 (12 pages)
- 1575 (13 pages)
- 1576 (14 pages)
- 1580 (14 pages)
- 1582 (17 pages)
- 1622 (7 pages)
- 1842 (18 pages)
- 1925 (6 pages)
- 2005 (11 pages)
- 2007 (11 pages)
- 2008 (11 pages)
- 1531 (13 pages)
- 1529 (14 pages)
- 1527 (12 pages)
- 1526 (13 pages)
- 1480DOR (17 pages)
- 1476 (13 pages)
- 1470 (12 pages)
- 1461 (8 pages)
- 1428 (15 pages)
- 3314 (6 pages)
- 3310 (6 pages)
- 7237 (12 pages)
- 14485 (14 pages)
- 15445 (14 pages)
- 43017 (13 pages)
- 51524 (12 pages)
- 51526 (13 pages)
- 51527 (11 pages)
- 51531 (12 pages)
- 51533 (11 pages)
- 51536 (11 pages)
- 51537 (12 pages)