Step 7, Step 8 – Catskill Craftsmen 1521 User Manual
Page 11
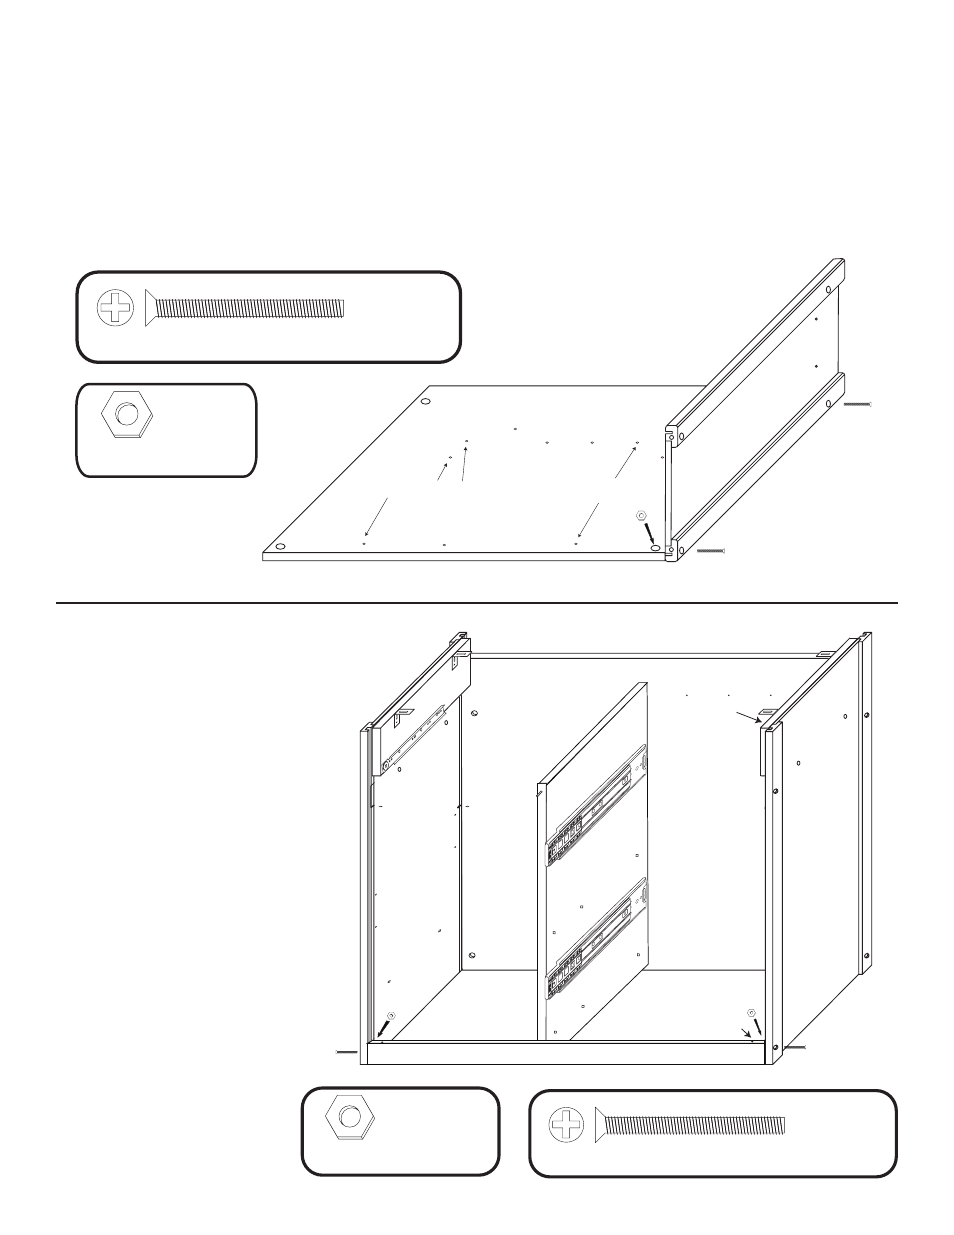
STEP 7
A. Lay Back Panel flat on a smooth surface with holes up.
B. Attach Side Panels with 1 3/4” machine screws (bolts) and hex nuts. After inserting bolts(s) thru the
holes in the Side Panels, thru the holes in the long edges of the Back Panel, place a hex nut on the
tip of your finger, align nut with bolt and tighten.
C. Look ahead to step 8 which shows side panels attached to back panel.
STEP 8
A. Place the center divider pins
into the holes int he back panel.
B. Take the Bottom Front Brace
and insert the pin in the right
end of the brace into the slot in
the top of the right front leg and
slide down as in the illustration.
The pin in the left end of the
brace will be outside the slot at
this time. Loosely secure the
right side of teh brace with 1 3/4
in. machine screw/nut. Align the
bottom pin in the divider with the
hole (closest to the left side) on
the inside of the brace. Spread
the left side panel until the pin
in the left end of the brace can
enter the slot and secure
brace with 1 3/4 in.
machine screw/nut.
Tighten right side bolt/nut.
10-24 Hex Nut
4 Used
in this step
1 3/4” Phillips Flat Head Bolt
4 Used
in this step
Not used if present
Not used if present
2 Used
in this step
1 3/4” Phillips Flat Head Bolt
10-24 Hex Nut
2 Used
in this step
Slot
Left
Side
Door Pin Hole Not Used