Easy installation instructions, Step iii connecting and starting softener – Star Water Systems S15DC39DR User Manual
Page 6
6
© Copyright 2011 Star Water Systems. All rights reserved.
STAR WATER SYSTEMS
| 95 North Oak St. | Kendallville, IN 46755 | starwatersystems.com
EASY INSTAllATION INSTRuCTIONS
Step iii
connecting and Starting SoFtener
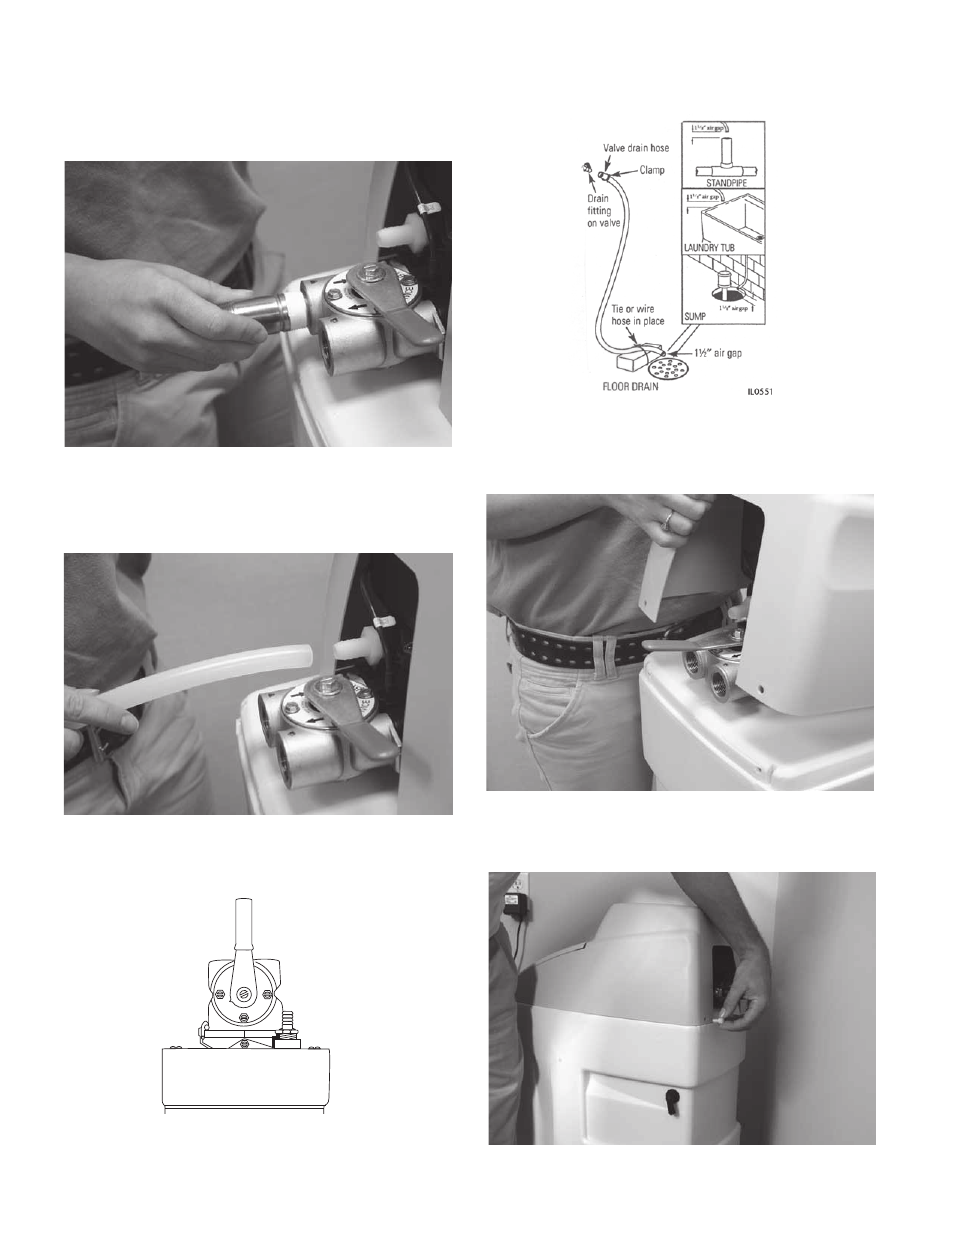
1. Connect the plumbing fittings to manifold and tighten.
Use thread tape. CAUTION: Do not overtighten, as dam-
age to manifold and/or valve may result. Do not sweat fit-
tings onto unit, as heat may damage components.
2. Press 1/2” ID plastic tubing (included) onto drain line hose
barb until snug and secure with a hose clamp (not includ-
ed). NOTE: Do not run 1/2” drain line over 20 ft. If over 20
ft., increase tube size to 3/4”
IL0635
3. Make sure the bypass valve is in the service position as
shown above. Rotat handle 90 degrees to go into the
bypass position, and close off the valve when needed.
4. Typical drain line with proper air gap.
Note: An air gap is required by most local plumbing
codes to prevent waste water back flow. Check and fol-
low your local codes.
5. Reinstall upper hood assembly. NOTE: Take care not to
move assembly further than necessary as control panel
is connected to control valve by wires.
6. Reinstall two thumb screws that were removed earlier.