Operation, Fig. 36 fig. 37, Fig. 38 fig. 39 – RIKON Power Tools 25-200H User Manual
Page 19
PLANER OPERATION
Thickness planing is used to reduce a workpiece with one
already surface planed surface to a desired thickness.
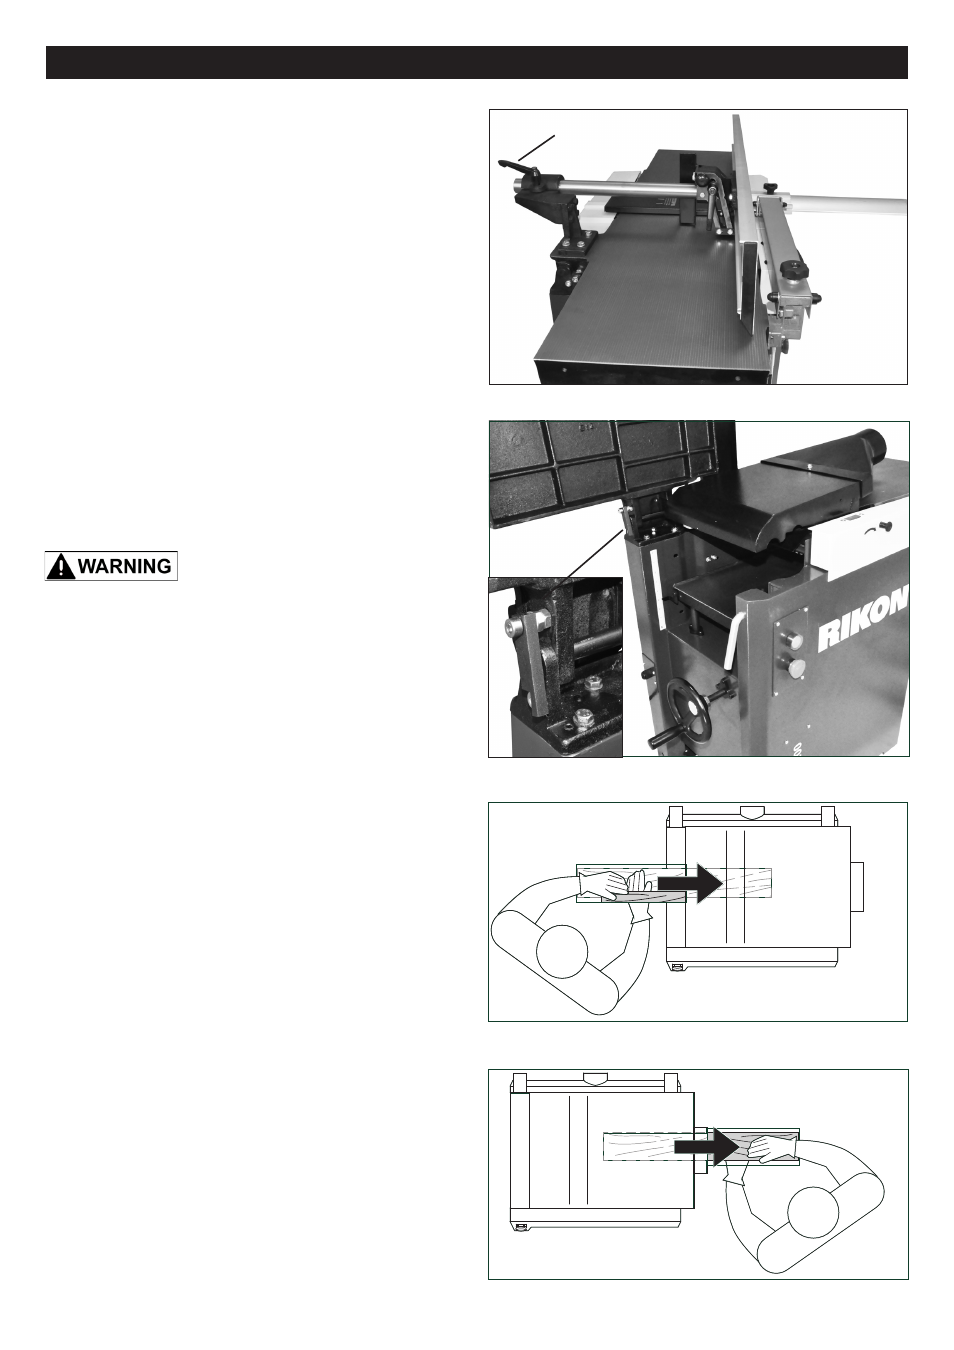
To use the planer, the upper, outfeed jointer table & fence
assembly must be tilted up and out of the way. FIG. 37.
1. Pull the jointer fence fully forward, and tighten the
locking handle (FIG. 36, A)
2. Twist the clamping Handle (#143, FIG. 37, B) up and
then pull it outward to release the outfeed table. Swing the
table (C) and fence assembly up and to the back of the
machine. Make sure the outfeed table's locking Bracket
(#147, D) is engaged to keep the table in the upward /
open position.
NOTE: When closing the outfeed table,
don't forget to release the locking bracket, or damage to
the machine may occur.
3. Pivot the Dust Chute (#30, FIG. 37, E) up and over the
jointer infeed table where it will automatically lock in place
with the Locking Pin (F). Attach your dust collector's 4"
hose to the dust port before any planing is done.
It is extremely important that a dust
collection system is used with this planer to eliminate
harmful airborne dust, prevent the build-up of chips that
may jam the roller system in the cutterhead, and to keep
the working area clean of debris.
To use the planer:
- The board surface that has been already jointed flat
rests down onto the planer's table.
- The board will be cut on its upper surface by the
cutterhead as it passes through the planer.
- When planing, the feeding direction of the workpiece is
left-to-right under the cutterhead. FIG. 38.
NOTE: Workpiece dimensions for planing;
- Length: minimum 12"; for lumber over 60" use roller
supports.
- Width: maximum 12".
- Thickness: minimum 1/4"; maximum 8".
- Depth of Cut: maximum 1/8". Multiple cuts of 1/16" or
less, produce better finish results.
A
19
FIG. 36
FIG. 37
OPERATION
FIG. 38
FIG. 39
1. To feed the workpiece into the machine, assume
proper operating position, FIG. 38. Stand offset to one side
of the feed opening to avoid any kick-back, should it occur.
Do not push the lumber once the infeed roller has been
engaged. Let the infeed roller move the workpiece into the
planer at its own pace.
2. To remove the workpiece from the machine, position
yourself offset to one side of the outfeed opening. FIG. 39.
Do not pull the lumber as it exits the machine. Let the out-
feed roller move the workpiece out of the planer at its own
rate, but support the lumber as it extends past the exten-
sion rollers, if needed.
continued page 20
B
C
D
E
F