Main cover installation – Rhino Shelter ROUND-30W X 40L X 15H User Manual
Page 9
Assembly Instructions
30x40x15 Round Style Portable Building With Single Door
9
Version 2.0
Please DO NOT return unit to store or dealer. For all questions or shortages please contact
Customer Service at: 800-447-7079 or 203-877-7070
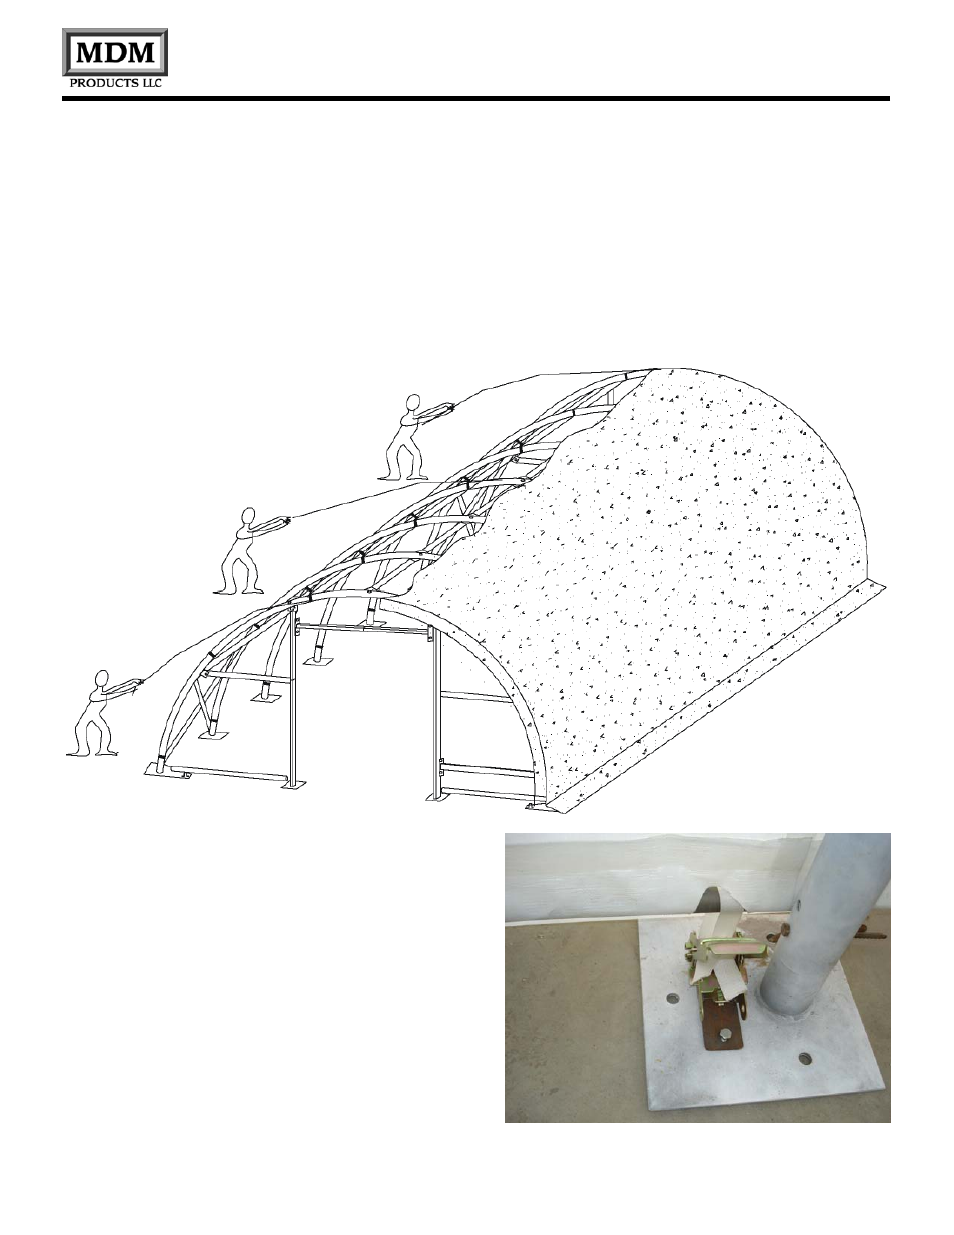
Attach Tie Down Ratchet Assemblies to each Base
Flange along Sidewall. Use two Bolts 10 mm x 15 mm
(26) for each sidewall ratchet to secure to Baseplate.
MAIN COVER INSTALLATION
Step #8 – Prepare Frame and Position Main Cover
To elongate the life of Main Cover, put a small square of
duct tape (field supplied) over each bolt head on frame
that comes in contact with cover. The tape acts as a
cushion to avoid rubbing damage to the cover over
years. As an alternative, foam rubber pipe insulation
makes a good cushion between the bolt heads and the
main cover as well.
When ready to install Main Cover (30), unpack cover
and lay parallel to building frame on one side. Cover
must be pulled over top of frame assembly without being
snagged or stressed on any frame members. Use
multiple ropes over top of frame as shown in picture
below. Having another person inside frame on a ladder
to assist in getting Main Cover (30) over frame will insure
cover will go on without any damage.
Step #9 – Tension Cover On Frame Side-To-Side
Center Main Cover over Frame assembly both side-to-
side and front to back. Next insert Tensioning Tube
Plastic Caps (37) into the ends of the Tensioning Tubes
(17) as shown in Figure 13. Insert the Tensioning Tubes
into the pockets in inside edge of Main Cover on each
side. Align one side of Main Cover evenly front to back.
Put Band for Tie Down Ratchets (36) over Tensioning
Tubes at each Base Flange along one side. Bands do
not attach to Tensioning Tubes, but loop around and
secure at both ends on ratchet.