Rhino Shelter ROUND-30W X 40L X 15H User Manual
Page 7
Assembly Instructions
30x40x15 Round Style Portable Building With Single Door
7
Version 2.0
Please DO NOT return unit to store or dealer. For all questions or shortages please contact
Customer Service at: 800-447-7079 or 203-877-7070
Once right sidewall tube is placed into right corner base
flange, insert a 10 mm x 75 mm bolt and nut (24A) to
prevent it from popping out of the socket while assembly
continues.
Next stand first interior arch up to repeat insertion into
Base Flanges. Place left sidewall tube into the upright
socket of first interior Base Flange. Put 10 mm x 75 mm
bolt through base flange and sidewall tube to secure in
place.
Supporting the left side of arch, pressure arch assembly
inward to put right sidewall tube into right side Base
flange upright socket.
Immediately after putting first interior arch into place,
connect Front Arch and Interior arch using Cross Rail
Tubes (4) at top ridge and side shoulder cures of arches.
Secure the Cross Rail tubes (4) into place using 10 mm
x 85 mm Carriage bolts (24B) and nuts.
Note: Cross Rails (Purlin Horizontal Tubes) (4) are
secured inside the arch assemblies.
Use 10 mm x 75 mm Bolts with Washers and Nuts (24A)
through pre-drilled holes in frame members. Refer to
detail drawing for correct hardware. Be certain to insert
carriage bolts from the outside into the interior of the
unit, with the washers and nuts on the inside of the
frame. Do not tighten down the nuts completely.
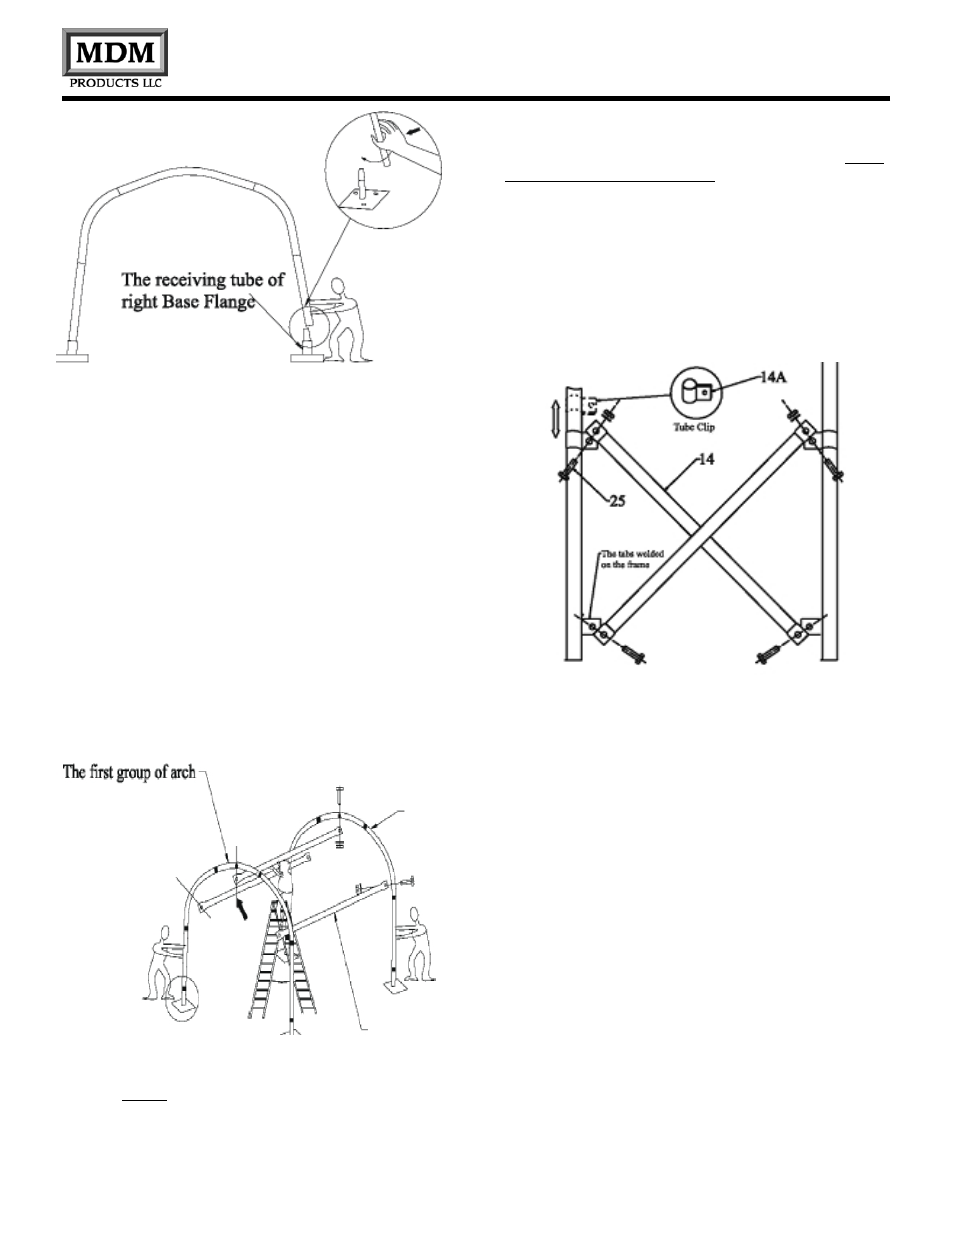
Next install the Wind Brace supports that connect the
Front Arch to the first Interior Arch (#2). Use two Wind
Brace Supports (14) in an ‘X’ fashion between the
sidewall tubes. Use a Wind Brace Clip (14A) at the end
of each Wind Brace support tube. The Wind Braces give
the arch assemblies strength as a unit.
Use Bolt 10 mm x 30 mm (25) at the end of each Wind
Brace Support to secure. Check level of arch upright
before final tightening of Wind Brace Clip (14A). Slide
clips as needed on Arch Sidewall until Arch is level and
plumb.
Continue to install Interior Arch Assemblies #2, #3, and
#4, in the same manner. Overlap pinched ends of Cross
Rails (Purlin Horizontal Tubes) onto same 10 mm x 85
mm carriage bolts inside frame assembly.