Step 7, Step 8 – Anthro Utility Bench II Assembly Instructions User Manual
Page 6
6
Questions? Call us at
800.325.3841 or visit anthro.com. We’re happy to walk you through the assembly!
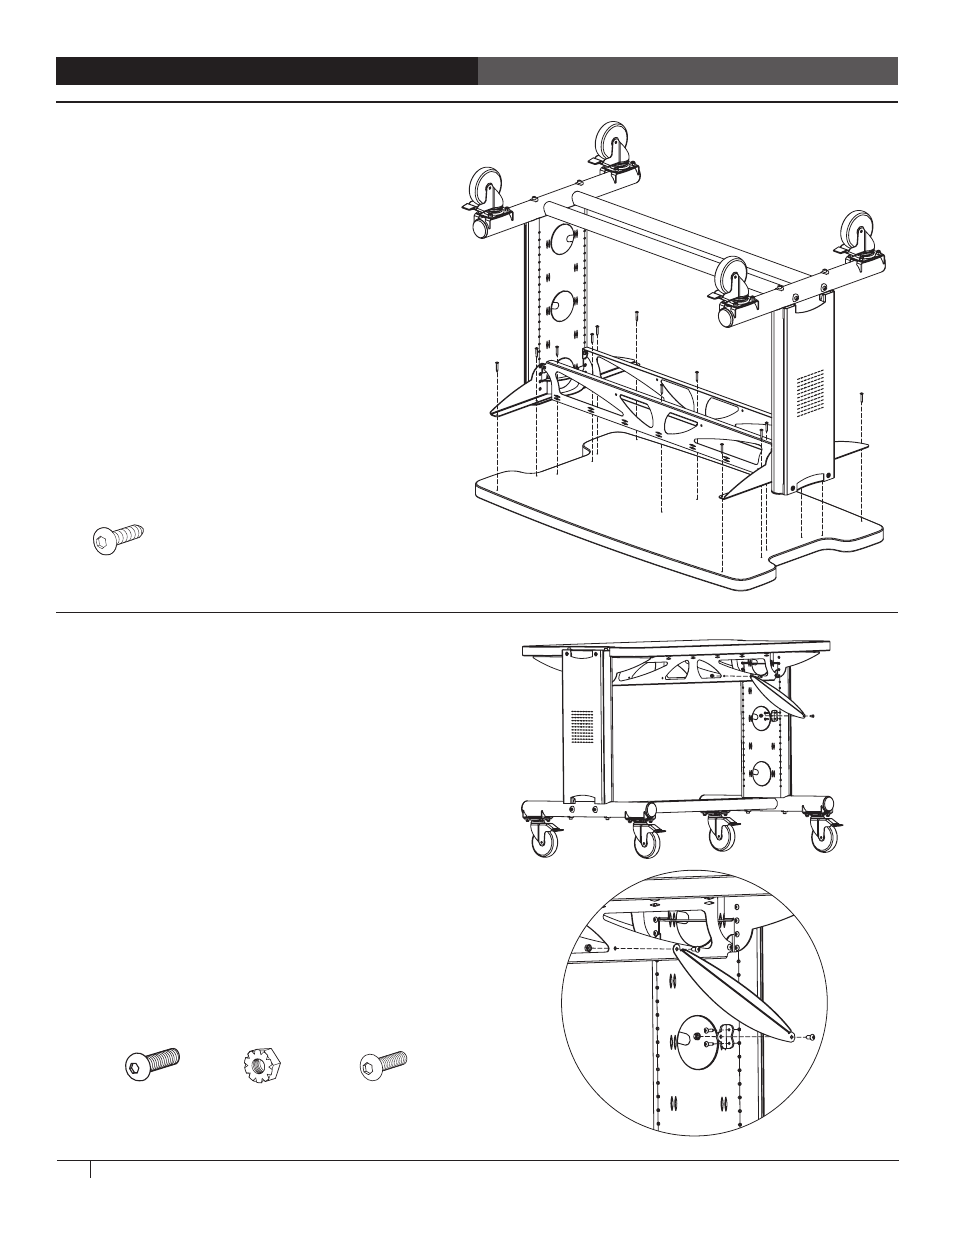
STEP 7
Install the Shelf
NOTE: This is a 2-person step.
¡
Place the Utility Bench Shelf upside down onto the
floor. (Providing a soft surface will protect the finish
on the Shelf.)
¡
With the help of a second person, carefully rotate
the Leg Assembly onto the Shelf.
¡
Align the holes on the Pans and Arms with the
pre-drilled holes on the Shelf. Insert Wood Screws
through the center openings of each Bench Pan.
¡
Install the remaining Wood Screws into each of the
Arms and Pans. A total of twelve 1" Button-head PB
Screws will be installed.
¡
With the help of a second person, carefully rotate
the Utility Bench back onto its casters.
STEP 8
Install the Buttresses
¡
First, align one Buttress with one hole in the Back Pan.
Install a Pan Screw through the Buttress and loosely
capture it using a Keps Nut.
¡
Next, position one Cross End Bracket on the other end
of the Buttress and install a Pan Screw and Keps Nut
in the same manner, but do not fully tighten.
¡
Now, rotate the Buttress to align the Cross End Bracket
with two openings on the Leg. Secure the Cross End
Bracket to the Leg using two Self-threading Screws.
¡
Finally, repeat for the other three Buttresses and
tighten all the fasteners.
Congratulations! Your assembly is complete!
Keps Nut
325-5130-03
Pan Screw
325-5003-00
Self-threading Screw
325-5010-00
Buttress
1/2” Button-head Screw
325-5003-00
1” Button Hd PB Screw
325-5580-00