Bill of materials, Mounting hardware installation drawing – SaltDogg 92420, -30 Series Under Tailgate Spreader User Manual
Page 2
Quality since 1946
9049 Tyler Blvd. • Mentor, Ohio 44060
Phone (440) 974-8888 • Fax (440) 974-0165
Toll-Free Fax 800-841-8003 • buyersproducts.com
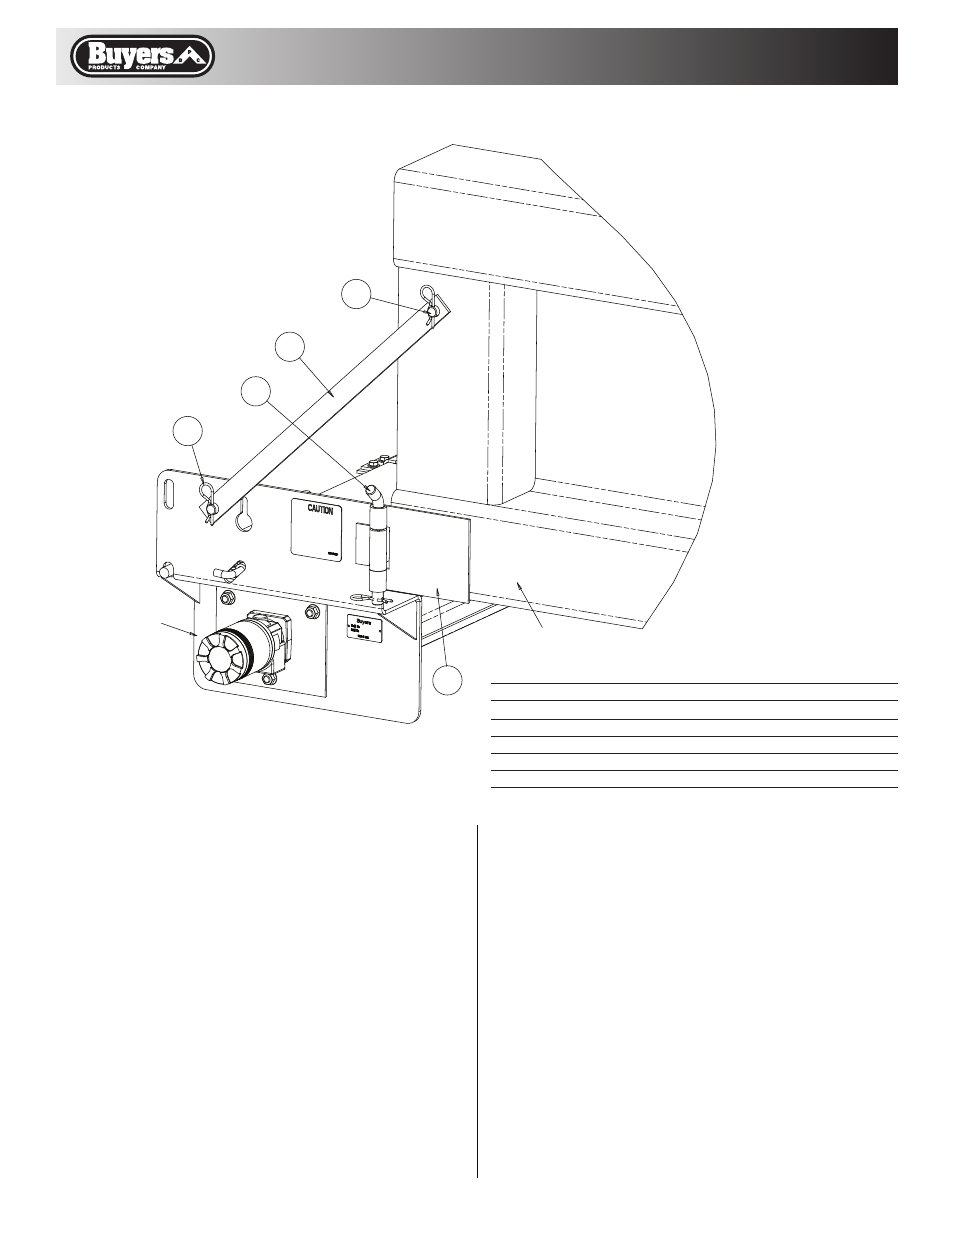
B. Position the (2) quick detach plates over the
dump body rub rails and flush with rear edge of
dump body.
C. Weld the (2) quick detach plates to the dump
body rub rails. Weld the plates continuously around
(3) sides of each plate. Do not weld along the edge
of the plates next to the attachment pin.
D. Align the pin brace (Item 4) on the dump body
using the iron brace (Item 3) for exact positioning.
For proper fit, hanger iron brace may require some
minor bending.
E. Weld the (2) pin braces (Item 4) to the dump
body sides, all around.
F. Attach the iron braces (Item 3) to the pin braces
on the sides of the dump body and the sides of the
spreader using (2) hairpin cotter pins (Item 5).
G. If there is a gap between the spreader and the
dump body, weld or bolt a steel strip to the forward
edge of the spreader to cover the gap.
H. If you have purchased the tailgate side shields
(purchased separately as P/N 924F0106), bolt or
weld them to the inside of the tailgate to prevent
material spillage at the ends of the spreader.
1
2
3
4
5
DUMP BODY
SPREADER
FRAME
Bill of Materials
1
924F0102
2
Quick Detach Plate
2
924F0103
2
Hinge Pin
3
924F0101
2
Hanger Iron Brace
4
9240021B
2
Pin Brace
5
HP12
6
Hair Pin Cotter 5/32"
item
part no.
qty.
description
Mounting Hardware Installation Drawing