Installation instructions – SaltDogg 1400701SS Self-Contained Stainless Steel Hopper Spreaders User Manual
Page 2
22
TM
SAE GRADE 2
SAE GRADE 5
fT-LBS fT-LBS
1/4-20
6 9
5/16-18
11
18
3/8-18
19
31
3/8-24
24
46
7/16-14
30
50
1/2-13
45
75
9/16-12
66
110
5/8-11
93
150
4. Recommended Fastener Torques:
Maintain all fastener torques as shown in the following
table. Failure to do so may cause injury to persons.
WARNING
Observe the following Safety Precautions before,
during and after operating this spreader. By follow-
ing these precautions and common sense, possible
injury to persons and potential damage to this
machine may be avoided.
Safety Precautions
WARNING
The lifting device must be adequately rated to lift
a payload equal to or greater than the spreader
weight. See page 1 for spreader weights. Empty
spreader before lifting.
1. Read this entire Owner’s Manual before operating this
spreader.
2. Read all safety decals on the spreader before operating the
spreader.
3. Check to make sure all safety guards are securely
mounted into place before operating this spreader.
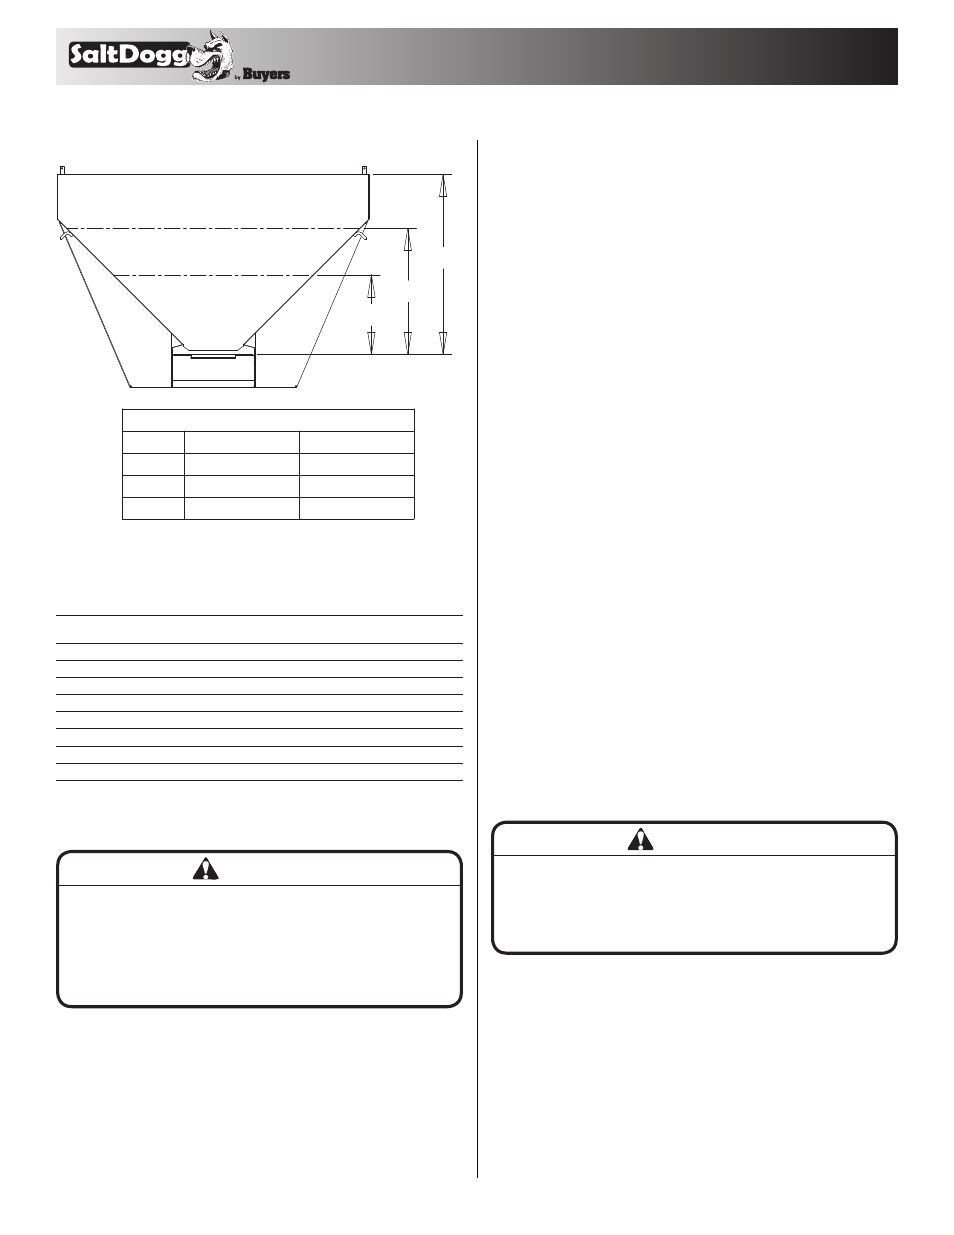
HOPPER CAPACITIES
12"
.50 CU-YD
96”
19"
1.0 CU-YD
27"
1.80 CU-YD
.36 CU-YD
72”
.77 CU-YD
1.36 CU-YD
"
12
"
19
"
27
3. Hopper Storage Capacity
4. Make sure the motor cover is securely fastened to the
spreader before operating the spreader.
5. Verify that all personnel are clear of the spreader spray
area before starting or operating this spreader.
6. Keep all loose clothing, hair, jewelry and limbs clear of the
spreader before starting or operating this spreader.
7. Do not over-load your vehicle beyond payload limits. If
there are any questions, contact the vehicle manufacturer.
8. Do not adjust, clean, oil or unclog material jams without
first turning off the spreader.
9. Do not climb on or in the spreader during operation. Do
not ride on the spreader while the vehicle is in motion.
10. Make sure the spreader is securely fastened to the
vehicle in accordance with this manual.
11. Do not operate a spreader that is in need of maintenance
or repairs.
12. Always disconnect the wire harness before removing or
replacing any electrical components.
Installation Instructions
1. Mounting the Spreader onto the Vehicle:
A. Remove the tailgate from the vehicle.
B. Lift the spreader by lifting loops on side of hopper.
C. Elevate the spreader off the vehicle with lumber. Place
lumber under the side gussets of the spreader. This will help
with removal of excess material that accumulates under the
spreader.
D. Center the spreader on the vehicle with the end of the
gear mount 14" to the rear of the nearest vertical obstruction
(bumper, trailer hitch, etc). Attach chute to spreader, check
for interference between the vehicle and the Spinner/Chute
Assembly.