Spreader operation – SaltDogg SHPE2000 Series Electric Drive Poly Hopper Spreader v.3 User Manual
Page 4
4
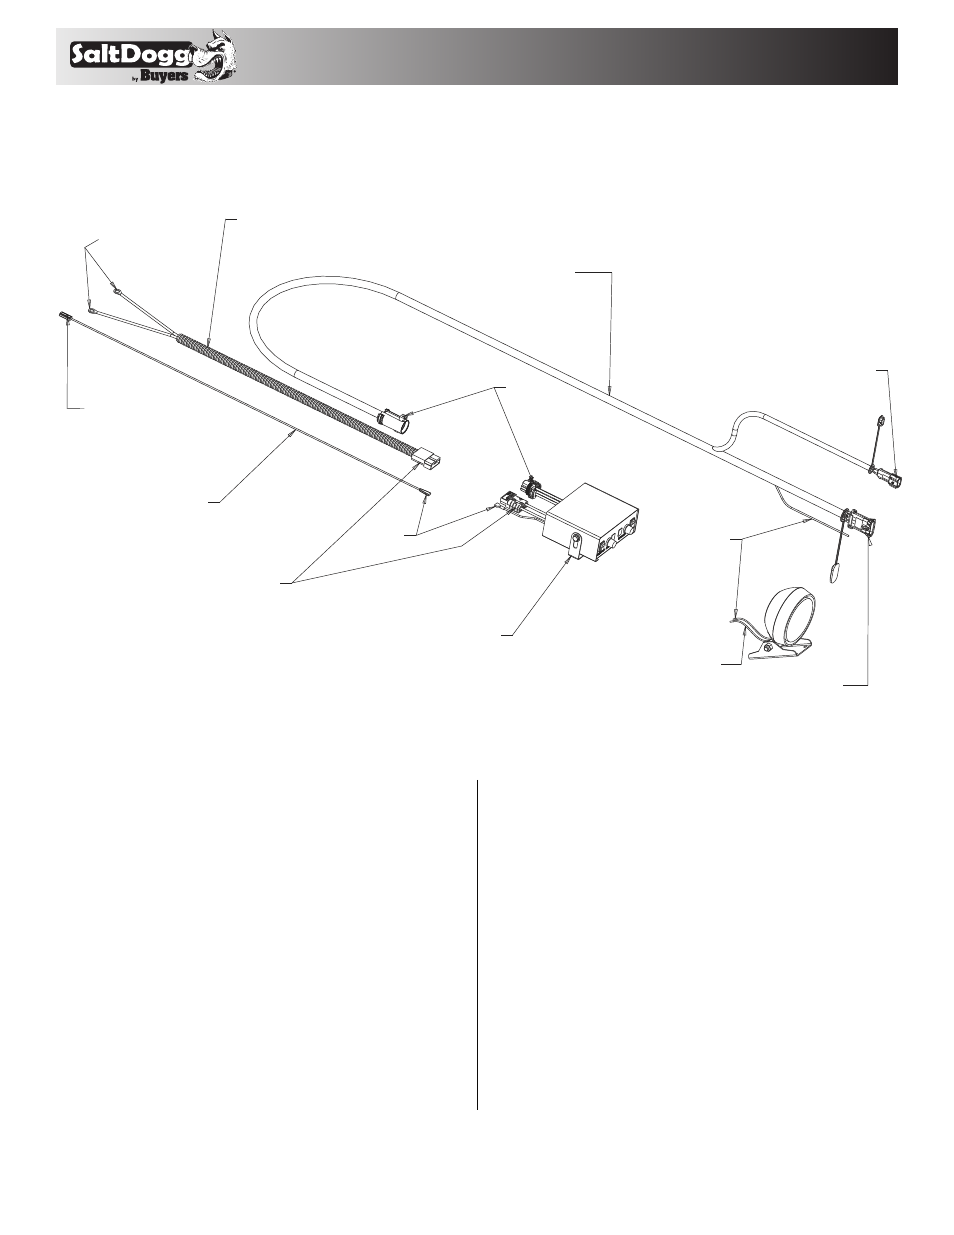
Fig. 7
3. Material must never be left in hopper for an extended
period of time. Material will absorb moisture, bind, harden
and could prevent spreader from proper operation or may
damage the spreader.
4. The SHPE2000 spreader is equipped with a dual
independent speed controller with warning indicators
and a vibrator switch. To start the spreader, press the
ON-OFF switch. Switch will illuminate. The auger will
accelerate to full speed for 2 seconds, then slow down to
dialed speed. The spinner will accelerate to full speed for
2 seconds, then slow down to dialed speed.
5. To activate the vibrator press the vibrator switch ON.
Vibrator switch will illuminate.
6. To stop the spreader, push ON-OFF switch to OFF position.
G. Make sure that the Controller is OFF. Connect the small
female terminal on the blue wire to the controller Ignition
(single red) wire. Connect the blue wire to an accessory
wire, terminal or fuse that is controlled by the vehicle’s
ignition switch located in the fuse panel inside the truck
cab.
Do not connect blue wire to high amperage fuse or
terminal.
H. Attach utility light kit (optional) to spreader hopper in
desired location. Connect as shown in Fig. 7. Use utility
light kit part number 3018009.
Spreader Operation
1. Different materials absorb moisture at different rates and
some materials may not perform as desired. Subsitution
of an alternative material may be necessary for optimum
performance.
2. When filling hopper use the supplied screen to prevent
large chunks of material and debris in the material to get
into hopper and cause damage.
CONNECT
CONNECT
CONNECT
CONTROLLER #3014199
WIRE 36" LONG
#0203700
POWER CABLE
#3006842
MAIN WIRE
HARNESS #3006724
FUSE CONNECTOR
CONNECT TO FUSE
TERMINAL OR
IGNITION SWITCH
CONNECT TO
BATTERY
CONNECT TO CHUTE
CONNECT TO MOTOR
OPTIONAL
#3018009
COMPARTMENT HARNESS
BROWN WIRE
CONNECT TO
UTILITY LIGHT
CONNECT TO
KNOWN GROUND