Installation instructions – SaltDogg SHPE1500 Series Electric Drive Poly Hopper Spreader v.2 User Manual
Page 2
2
WARNING
Do not drill holes into fuel tanks, fuel lines, through
electrical wiring, etc that may be damaged by drilling.
Installation Instructions
1. Mounting the Spreader onto the Vehicle:
A. Remove the tailgate from the vehicle.
B. Check truck’s bed for any sharp debris or foreign
objects. These can cut and seriously damage
poly hopper.
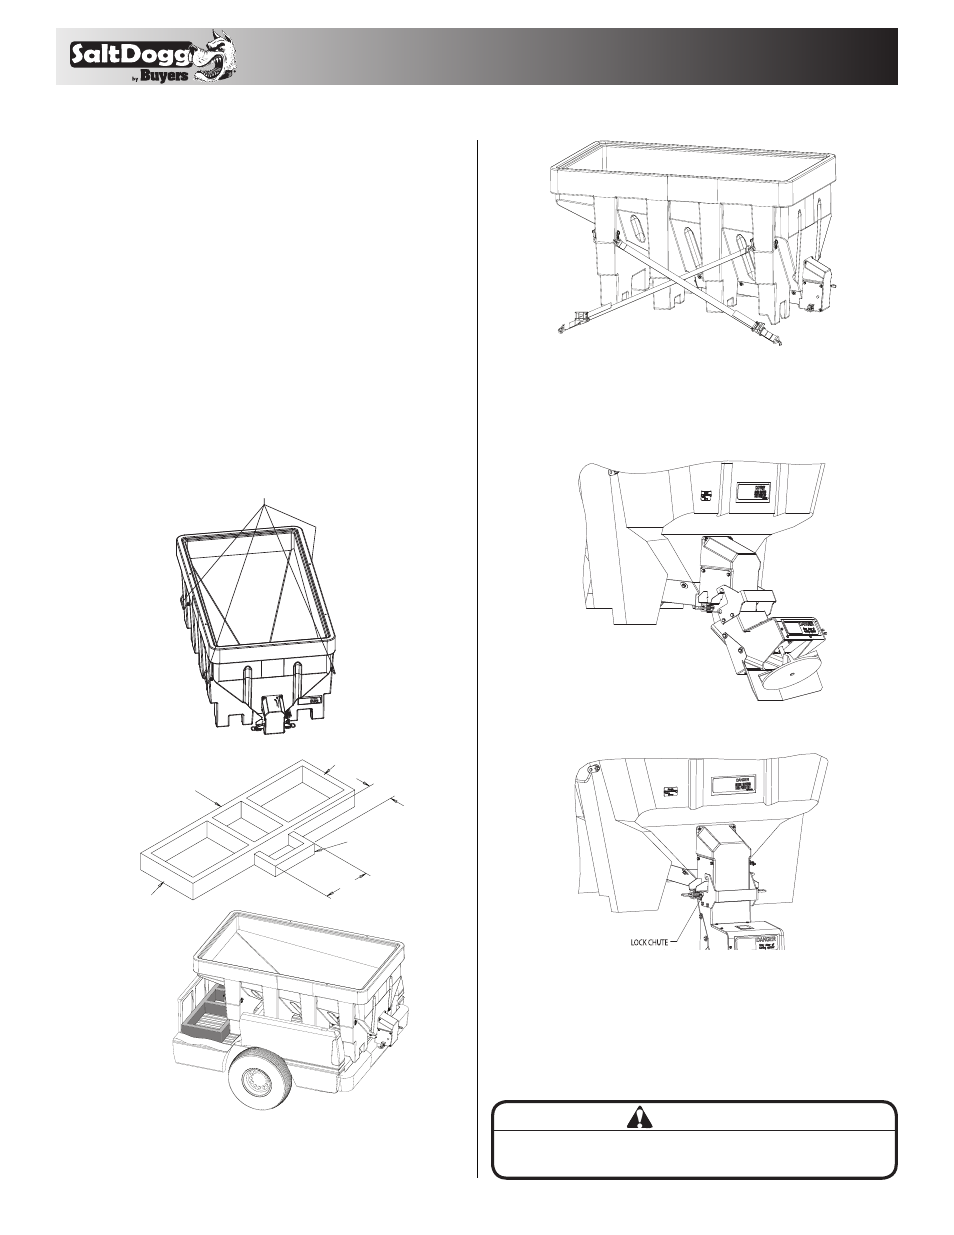
C. Lift spreader using tie downs. See Figure 1.
D. Slide spreader forward until the steps on rear
legs of the spreader make contact with truck’s
bed. Measure the distance from the front of
the truck bed to front of the hopper's front
legs. Fabricate spacer to fit between front of
the spreader and front of the bed as shown in
Figure 2.
E. Center the spreader from side to side on the
vehicle. Securely strap the spreader to the truck
using four ratchet straps as shown in Figure 3.
Fig. 2
Fig. 3
Fig. 4
Fig. 5
Verify with the vehicle’s manufacturer that the factory
installed anchor points are designed for tie-down such
load. Inspect straps and hardware after each time spreader
is loaded. Tighten straps and hardware if necessary.
2. Mounting the Spinner/Chute Assembly
A. Attach the Chute Assembly to the spreader.
First, hook the Chute to the spreader by open-
ings in the Chute’s handle.
B. Rotate the chute into operating position and
lock using the two spring latches.
3. Install Control Box and Vehicle Wiring Harness
(See Fig. 6).
NOTE: THIS IS A WIRE GROUND
ELECTRICAL SYSTEM! NO CONNECTIONS TO
TRUCK'S FRAME OR BODY ALLOWED!
Always disconnect battery before attempting to
install electrical components on your vehicle.
Use Tie Downs
Fig. 1
13.5
2" x 4"
2" x 6"
FIT TO BOX
FIT TO BOX
8"