3 basic installation, 1 so-dimm installation, 2 airflow – IEI Integration PCISA-PV-D4251_N4551_D5251 User Manual
Page 56: Asic, Nstallation, Figure 4-1: so-dimm installation
PCISA-PV-D4251/N4551/D5251 CPU Card
Page 43
4.3 Basic Installation
This section outlines the parts that must be installed for the system to function correctly.
4.3.1 SO-DIMM Installation
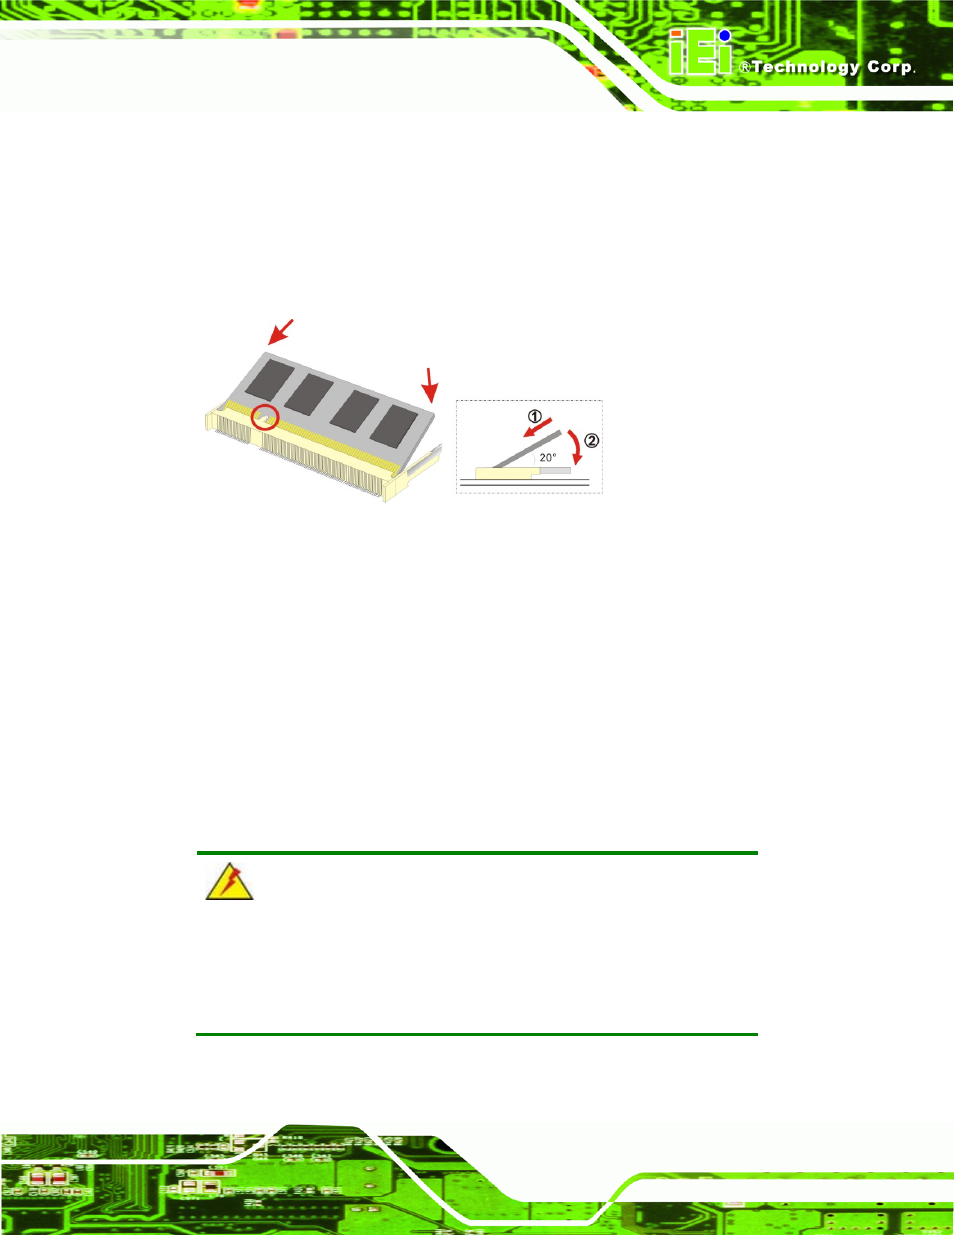
To install an SO-DIMM, please follow the steps below and refer to Figure 4-1.
Figure 4-1: SO-DIMM Installation
Step 1:
Locate the SO-DIMM socket. Place the board on an anti-static mat.
Step 2:
Align the SO-DIMM with the socket. Align the notch on the memory with the
notch on the memory socket.
Step 3:
Insert the SO-DIMM. Push the memory in at a 20º angle. (See Figure 4-1)
Step 4:
Seat the SO-DIMM. Gently push downwards and the arms clip into place. (See
4.3.2 Airflow
WARNING:
Airflow is critical for keeping components within recommended
operating termperatures. The chassis should have fans and vents as
necessary to keep things cool.
The PCISA-PV-D4251/N4551/D5251 must be installed in a chassis with ventilation holes
on the sides allowing airflow to travel through the heat sink surface. In a system with an