Vestil SLG-6 & SLG-10 User Manual
Page 7
Copyright 2012 Vestil Manufacturing Corp.
Page 7 of 12
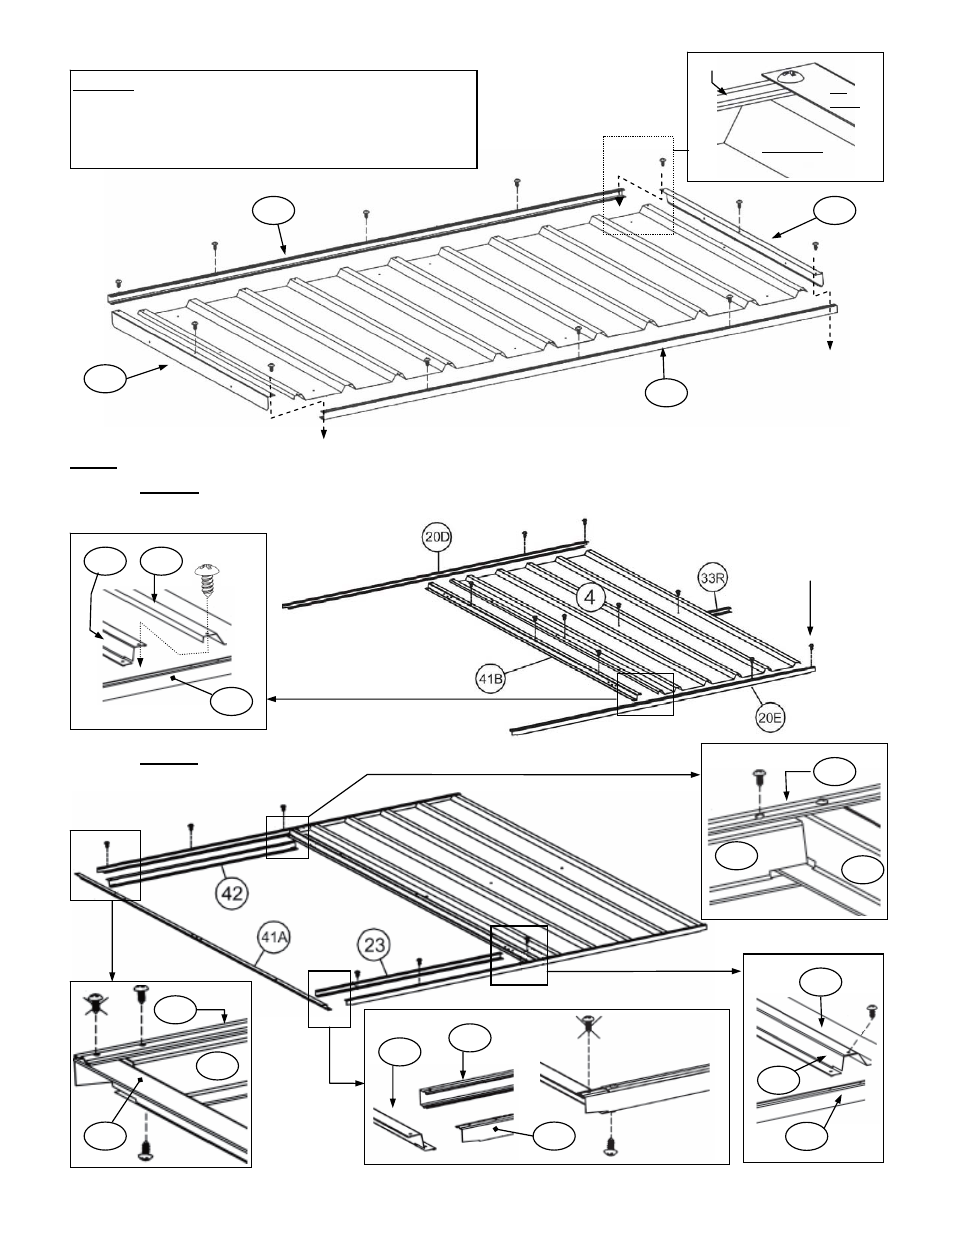
Step 6: Assemble the front wall.
Step 6A: Attach the front wall top channel (20D), front wall bottom channel (20E), door jamb (41B), and the
front wall brace (33R) to the front panel (4) with 10mm self-tapping screws.
Step 6B: Complete the door frame.
Step 5B: First, tap or slide the channels 20A and 20A
onto the top and bottom of the panel assembly; then lay
the lip pieces 50 and 50 in place on each side of the
panel assembly. Fasten the channels and lip pieces to the
panels with 10mm self-tapping screws.
Lip
piece
Channel
Roof Panel
20A
20A
50
50
Install a 10mm self-
tapping screw at each
location where this
symbol appears.
41A
42
20D
42
41B
20D
23
20E
41A
Install this screw
when shed fully
assembled
20E
4
41B
41B
20E
4