1r 1l – Vestil SLG-6 & SLG-10 User Manual
Page 6
Copyright 2012 Vestil Manufacturing Corp.
Page 6 of 12
Step 3: Fasten channel pieces 21A and 21B to the side panel 2L. Orient panel 2L so that corrugations face upwards
(outside surface is face up). Slide or tap channel 21B onto the bottom of panel 2L; then fasten the channel 32 to the
panel with three (3) 10mm self-tapping screws. Slide or tap channel 21A into place, but do not fasten it with screws at
this time. Attach channel 32 to the inside surface with three (3) 10mm self-tapping screws.
Step 4: Connect the 2 front panels 1R and 1L and then fasten channels 20B, 20C and 31 to the panels. Tap or slide
channel 20C into place along the bottom of the panel assembly, and then fasten it with 10mm self-tapping screws.
Fasten channel 31 to the middle of the panel assembly using six (6) 10mm self-tapping screws. Finally, tap or slide
channel 20B into place; then fasten it with 10mm self-tapping screws. Do not install screws at the locations circled
with double dotted lines.
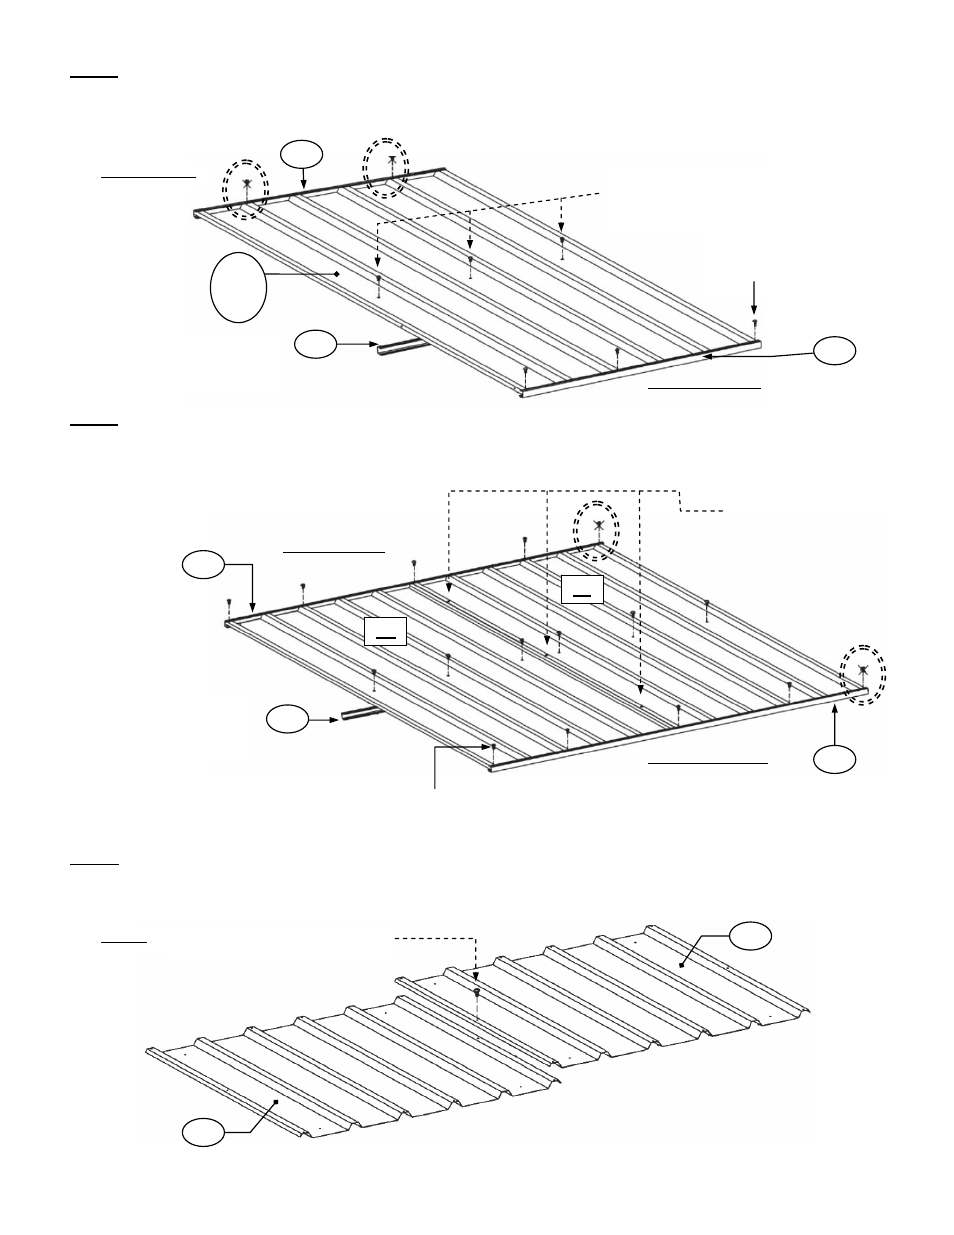
Step 5: Connect roof panels 3 and 3 with 10mm screws. Next, tap or slide channels 20A and 20A to the top and
bottom of the roof assembly; then apply lip pieces 50 and 50 to the sides of the roof assembly. Fasten the channels
and the lip pieces to the panels with 10mm self-tapping screws. NOTE: A single screw will fasten lip and channel to
the panels at each of the 4 corners as shown in the close-up views of the diagram on p. 7.
The slot of channel 38B
should face the bottom of
the panel assembly when
installed.
Fasten the panels together
with 10mm self-tapping
screws
20C
20B
Top of side panels
Bottom of side panels
31
Install a 10mm self-tapping screw at each
location where this symbol appears EXCEPT
those circled with double dotted lines
2L
and
2R
32
Bottom of side panel
Top of side panel
Fasten channel 32D to panel 2E
with 10mm self-tapping screws
The slot of channel 32D should
face the bottom of the panel
assembly when installed.
Install a 10mm self-tapping
screw at each location where
this symbol appears EXCEPT
those circled with double dotted
lines
3
3
Fasten the panels together with 10mm
self-tapping screws
Step 5A:
21B
21A
1R
1L