Vanguard ATO-600 User Manual
Page 38
ATO-400 / ATO-600 Operating Procedures
38
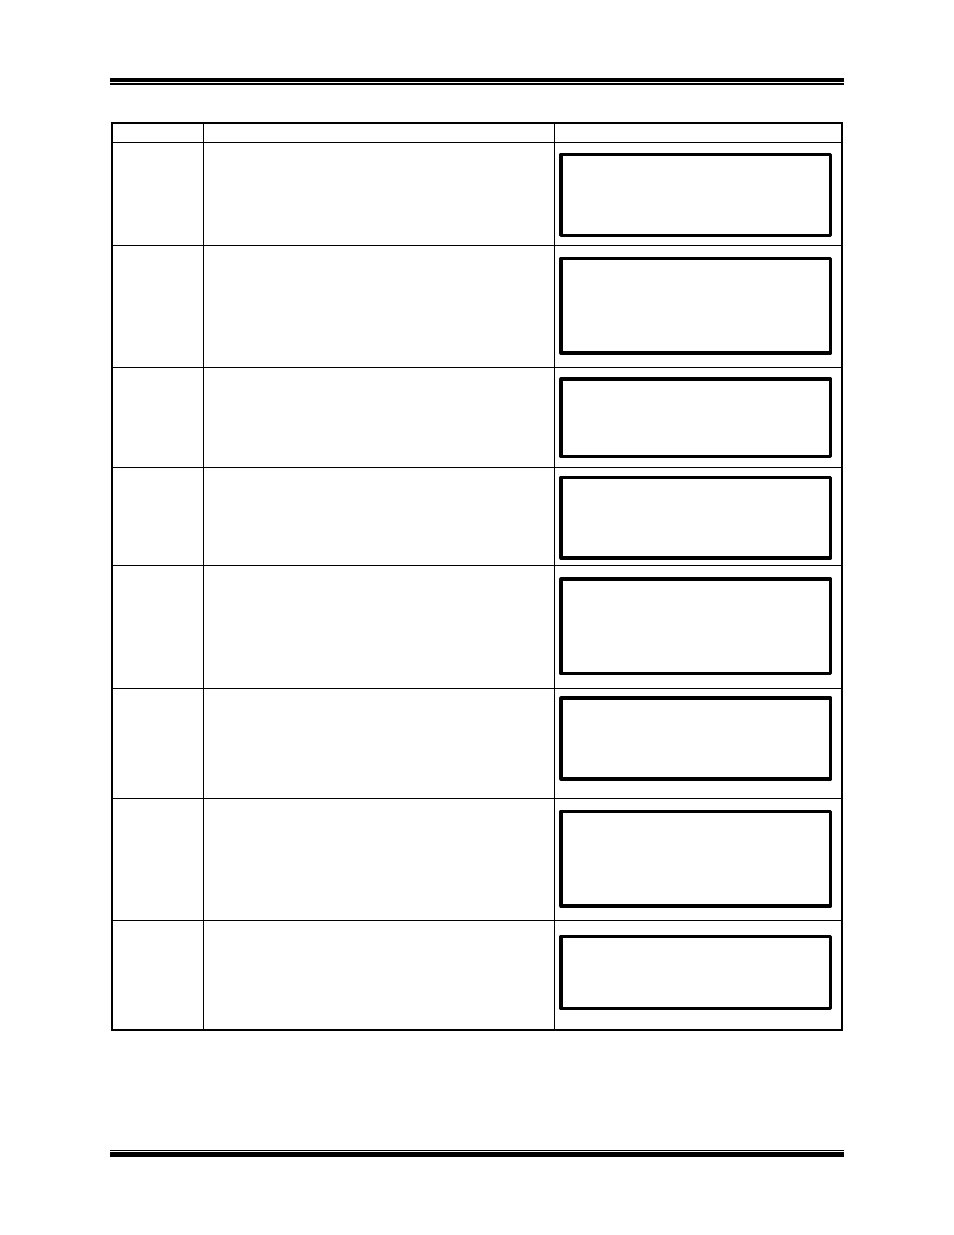
Table 12.0 Calibration Test Procedure (Continued)
STEP
ACTION
ATO DISPLAY
12-17
The ATO will measure the 500
?
-ohm shunt
using 100A test current.
12-18
Observe test results. Press “ENTER” key to
continue.
12-19
Connect the 1000 micro-ohm shunt to ATO.
Press “ENTER” key to start test.
12-20
The ATO will measure 1000
?
-ohm shunt
using 10A test current.
12-21
Observe test results. Press “ENTER” key to
continue.
12-22
The ATO will measure the 1000
?
-ohm
shunt using 100A test current.
12-23
Observe test results. Press “ENTER” key to
continue.
12-24
Connect the 1900 micro-ohm shunt to ATO.
Press “ENTER” key to start test.
CONNECT 1000
? -OHM
0.1% SHUNT NOW… .
“ENTER” TO CONTINUE
CURRENT: 10.0 AMP
BURN IN: 02 SEC
1000
? -OHM TEST
FINAL RESISTANCE
I= 9.8 AMPS
1000.1 MICRO-OHM
ANY KEY TO CONTINUE
CURRENT: 100.0 AMP
BURN IN: 02 SEC
1000
? -OHM TEST
FINAL RESISTANCE
I= 99.9 AMPS
1000.1 MICRO-OHM
ANY KEY TO CONTINUE
CONNECT 1900
? -OHM
0.1% SHUNT NOW… .
“ENTER” TO CONTINUE
CURRENT: 100.0 AMP
BURN IN: 02 SEC
500
? -OHM TEST
FINAL RESISTANCE
I= 100.0 AMPS
500.1 MICRO-OHM
ANY KEY TO CONTINUE