Steelcraft Automotive 80400 REAR BUMPER SPORT TUBES User Manual
Page 2
SINGLE TUBE REAR BUMPER GUARD
2010 EQUINOX/TERRAIN
Page 2 of 3
7/20/10 Rev1(DP)
between each Frame Bracket and Mounting Bracket to move the Mounting Brackets inward,
(Figures 4A & 4B). Bolt the Rear Bumper Guard to the Mounting Brackets with the included
(4) 8mm x 25mm Hex Bolts, (4) 8mm Lock Washers and (4) 8mm Flat Washers, (Figure 5).
8. Align and adjust the Rear Bumper Guard properly and tighten all hardware.
9. Do periodic inspections to the installation to make sure that all hardware is secure and tight.
To protect your investment, wax this product after installing. Regular waxing is recommended to
add a protective layer over the finish. Do not use any type of polish or wax that may contain abrasives
that could damage the finish.
For stainless steel: Aluminum polish may be used to polish small scratches and scuffs on the finish.
Mild soap may be used also to clean the Rear Bumper Guard.
For gloss black finishes: Mild soap may be used to clean the Rear Bumper Guard.
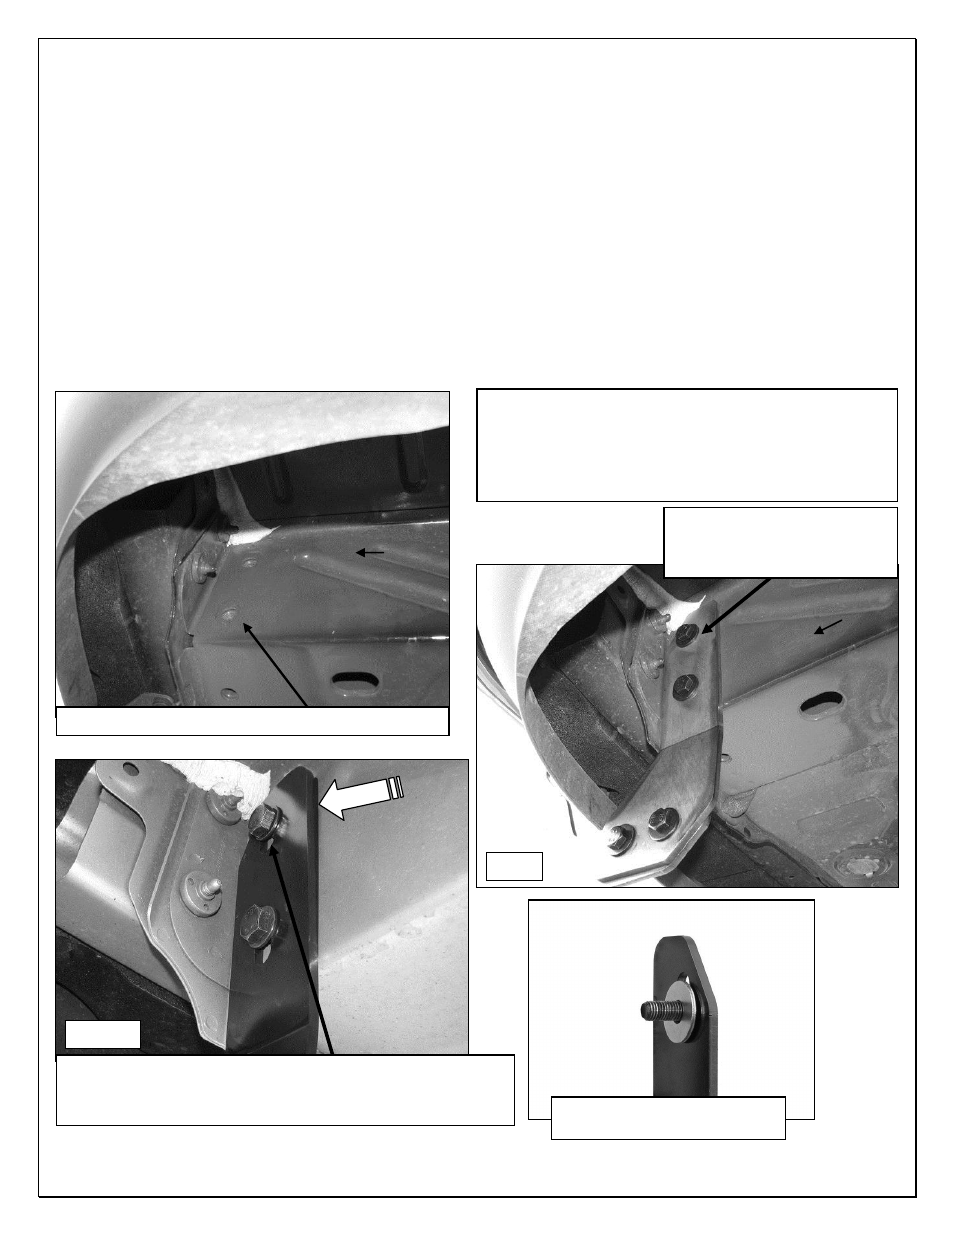
Passenger Side Installation Pictured
Muffler/Exhaust Pipe Warning:
IMPORTANT! Due to close proximity of the
Frame Bracket to the exhaust pipe, allow
exhaust pipe to cool before starting the
installation.
Fig 2
Fig 3A
(Fig 1)
Passenger Side Frame Bracket Location
(2) 12mm x 30mm Hex Bolts
(2) 12mm Lock Washers
(2) 12mm Flat Washers
Rear body well
Rear body well
Rear
Rear
For additional angle adjustment, insert (1) 12mm Flat
Washer (per side) into the top location onto the 12mm x
30mm Hex Bolt, between the Frame Bracket and the vehicle
Fig 3B (back of passenger
side Bracket pictured)