Steelcraft Automotive 412469p 5 PREMIUM OVAL SIDE BAR User Manual
Steelcraft Automotive For the car
5IN BENT END SIDEBAR
99-12 FORD F-250/450 SUPERDUTY CREW CAB
Page 1 of 2
1/5/12 (DP)
PARTS LIST:
1 Driver/Left Sidebar
1 Passenger/Right Sidebar
2 Driver/Left Mounting Brackets
2 Passenger/Right Mounting Brackets
8 8mm Clip Nuts
16 8-1.25mm x 30mm Hex Bolts
8 8-1.25mm x 25mm Hex Bolts
32 8mm ID x 24mm OD x 2mm Flat Washers
24 8mm Lock Washers
8 8mm Hex Nuts
PROCEDURE:
1. REMOVE CONTENTS FROM BOX. VERIFY ALL PARTS ARE PRESENT. READ INSTRUCTIONS
CAREFULLY BEFORE STARTING INSTALLATION.
2. Starting on the driver side-front of the vehicle, locate the 2nd set of factory holes in the body panel and
pinch weld directly under the center of the front door. Each mounting location comprises of a
rectangular hole with a round hole on each side and two holes through the pinch weld, (Figures 1 & 2).
3. Select (2) 8mm Clip Nuts. Insert Clip Nuts one at a time into the rectangular opening and slide the
threaded hole outward towards the round hole. Line up the threaded hole in the Clip with the round hole
next to the rectangular opening. NOTE: Threaded nut must go towards the inside of the side panel,
(Figures 1 & 2).
4. Partially attach the passenger side front Mounting Bracket to the Clip Nuts using the included (2) 8mm
x 30mm Hex Bolts, (2) 8mm Lock Washers and (2) 8mm Flat Washers, (Figure 3). NOTE: Cradles on
the Mounting Brackets should face the front of the vehicle.
5. Bolt the (2) bottom holes in the Mounting Bracket to the (2) holes in the pinch weld using the included
(2) 8mm x 30mm Hex Bolts, (2) 8mm Lock Washers, (4) 8mm Flat Washers and (2) 8mm Hex Nuts,
(Figure 3). Do not tighten hardware at this time.
6. Repeat Steps 2
– 5 for rear Mounting Bracket installation. NOTE: If you re not sure which sets of
mounting holes to use, (last set along cab), hold the driver Sidebar up in the approximate location and
line up the threaded inserts on the Sidebar with the holes in the pinch weld to determine the correct
mounting location.
7. Carefully unwrap and position the Sidebar onto the (2) Mounting Brackets. Bolt the Sidebar to the
Brackets with (4) 8mm x 25mm Hex Bolts, (4) 8mm Lock Washers, and (4) 8mm Flat Washers,
(Figures 3 & 4). Do not tighten at this time.
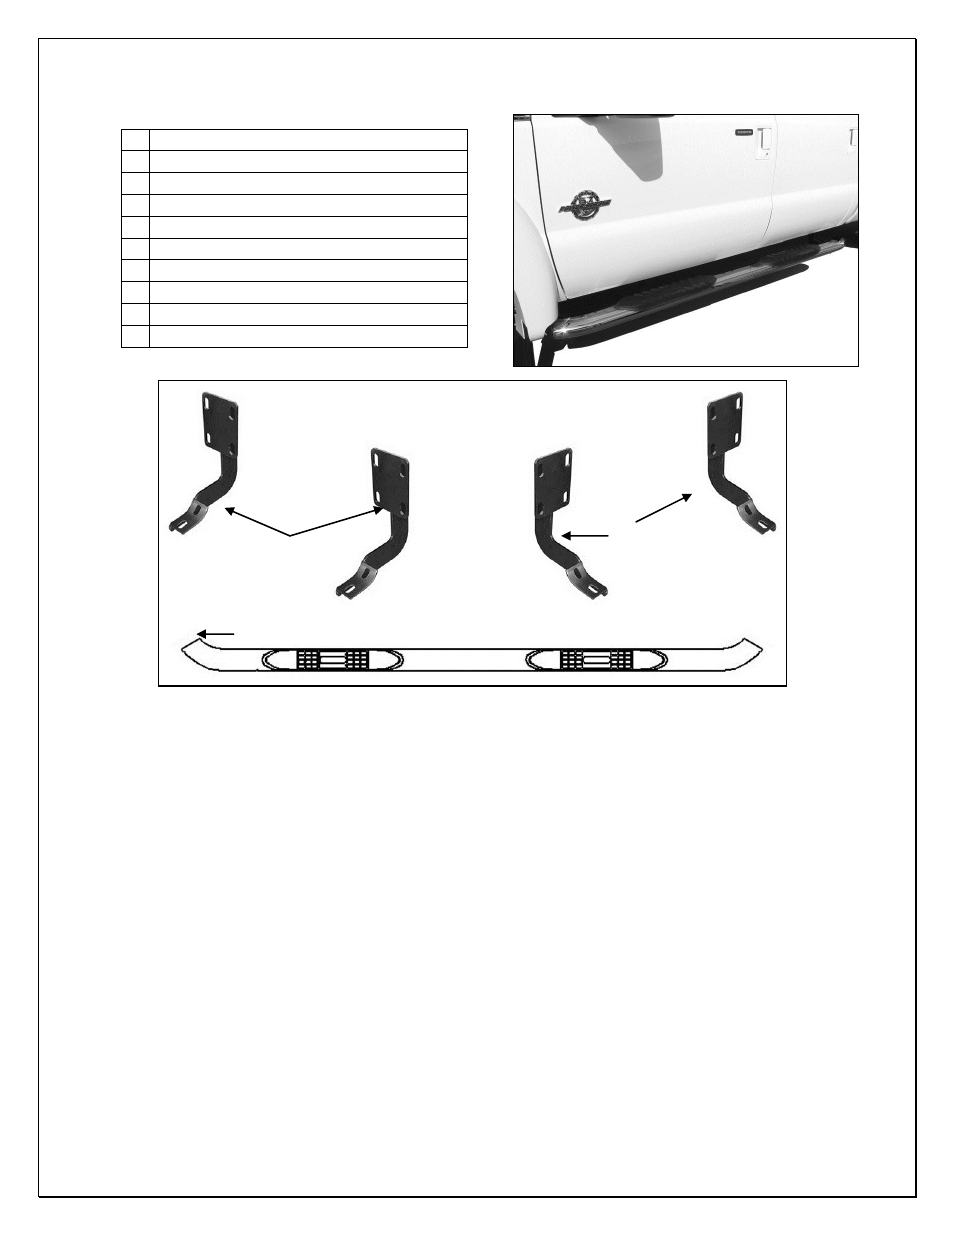
(2) Passenger/Right
Mounting Brackets
(2) Driver/Left
Mounting Brackets
Complete Installation
Driver/Left Sidebar illustrated
Front