Steelcraft Automotive 70400 SPORT BAR User Manual
Steelcraft Automotive For the car
SPORT BAR
2010 EQUINOX/TERRAIN
Page 1 of 4
8/17/10 (DP)
PARTS LIST:
PROCEDURE:
1. REMOVE CONTENTS FROM BOX. VERIFY ALL PARTS ARE PRESENT. READ INSTRUCTIONS
CAREFULLY BEFORE STARTING INSTALLATION. ASSISTANCE IS RECOMMENDED. CUTTING
IS REQUIRED
2. Remove the plastic front air dam/lower bumper cover. NOTE: From behind the bumper, locate and
remove the screws holding the air dam to the ends of the bumper cover, (Figure 1). Remove the
factory plastic clips securing the air dam at the fender well. Once all screws and clips have been
removed, hold the bumper cover in place and firmly pull the lower cover/air dam to release clips and
separate the air dam from the bumper cover.
3. Select the driver side Mounting Bracket. Insert the Bracket above the factory radiator bracket and line
up the (2) holes, (Figure 2), with the holes in the factory bracket. Secure the Mounting Bracket to the
radiator bracket with (2) 10mm x 35mm Hex Bolts, (4) 10mm Flat Washers, (2) 10mm Lock Washers
and (2) 10mm Hex Nuts. Snug but do not tighten hardware at this time. Repeat this Step for passenger
side Mounting Bracket installation.
4. Insert (1) 12mm Bolt Plate into the slot in the bottom of the frame, (Figure 3). Center the Bolt Plate in
the oval hole. Attach the flat end of the driver side Support Bracket to the Bolt Plate with (1) 12mm Flat
Washer, (1) 12mm Lock Washer and (1) 12mm Hex Nut, (Figure 4). Repeat this Step for passenger
side Support Bracket installation. Do not tighten hardware at this time.
5. With assistance, hold the Sport Bar up to the inside of the (2) Mounting Brackets. Line up the mounting
holes and insert the longer (2) 12mm x 40mm Hex Bolts with (2) 12mm Flat Washers through the (2)
rear mounting holes on the Mounting Brackets, the Sport Bar and through the Support Brackets,
(Figure 4 & 5). Secure the hex bolt with (2) 12mm Flat Washers, (2) 12mm Lock Washers and (2)
12mm Hex Nuts. Use the (2) shorter 12mm x 35mm Hex Bolts, (4) 12mm Flat Washers, (2) 12mm Lock
Washers and (2) 12mm Hex Nuts on the (2) forward mounting holes, (Figure 4).
Qty Description
Qty
Description
1
Sport Bar
10
12mm x 32mm OD x 3mm Flat Washers
1
Driver side/Left Frame Bracket
6
12mm Lock Washers
1
Passenger side/Right Frame Bracket
6
12mm Hex Nuts
1
Driver side/Left Support Bracket
4
10-1.5mm x 35mm Hex Bolts
1
Passenger side/Right Support Bracket
8
10mm x 27mm x 3mm Flat Washers
2
12mm x 40mm Special Bolt Plates
4
10mm Lock Washers
2
12-1.75mm x 35mm Hex Bolts
4
10mm Hex Nuts
2
12-1.75mm x 40mm Hex Bolts
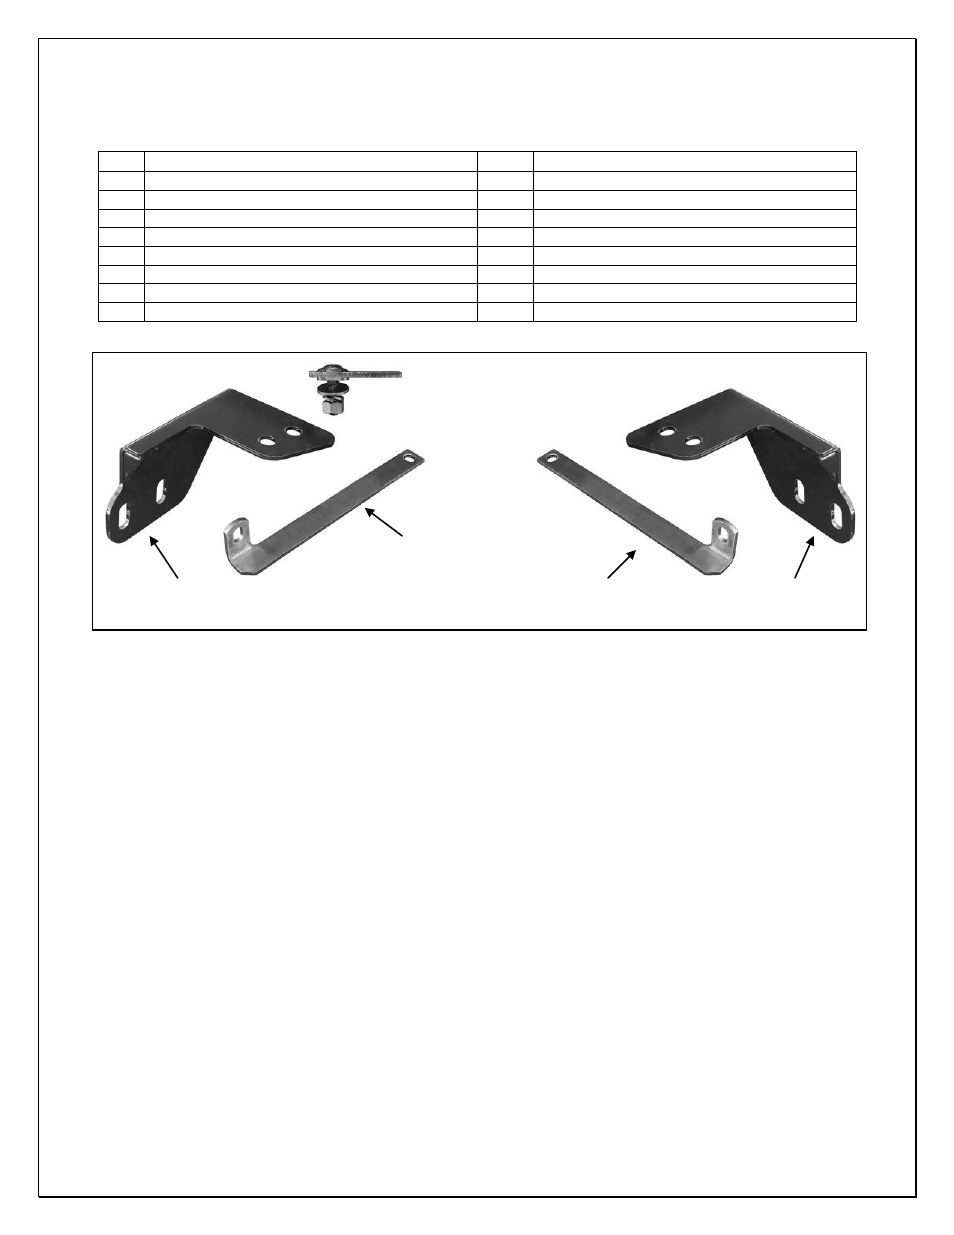
(2) 12mm x 40mm Bolt Plate
12mm Flat Washer
12mm Lock Washer
12mm Hex Nut
Passenger Side Frame
Mounting Bracket
Passenger Side
Support Bracket
Driver Side
Support Bracket
Driver Side Frame
Mounting Bracket