Crimp inspection – Harwin Z80-255 User Manual
Page 4
IS-27 Issue: 6 Date: 14.11.11 C/Note: 11542
Page 4 of 9
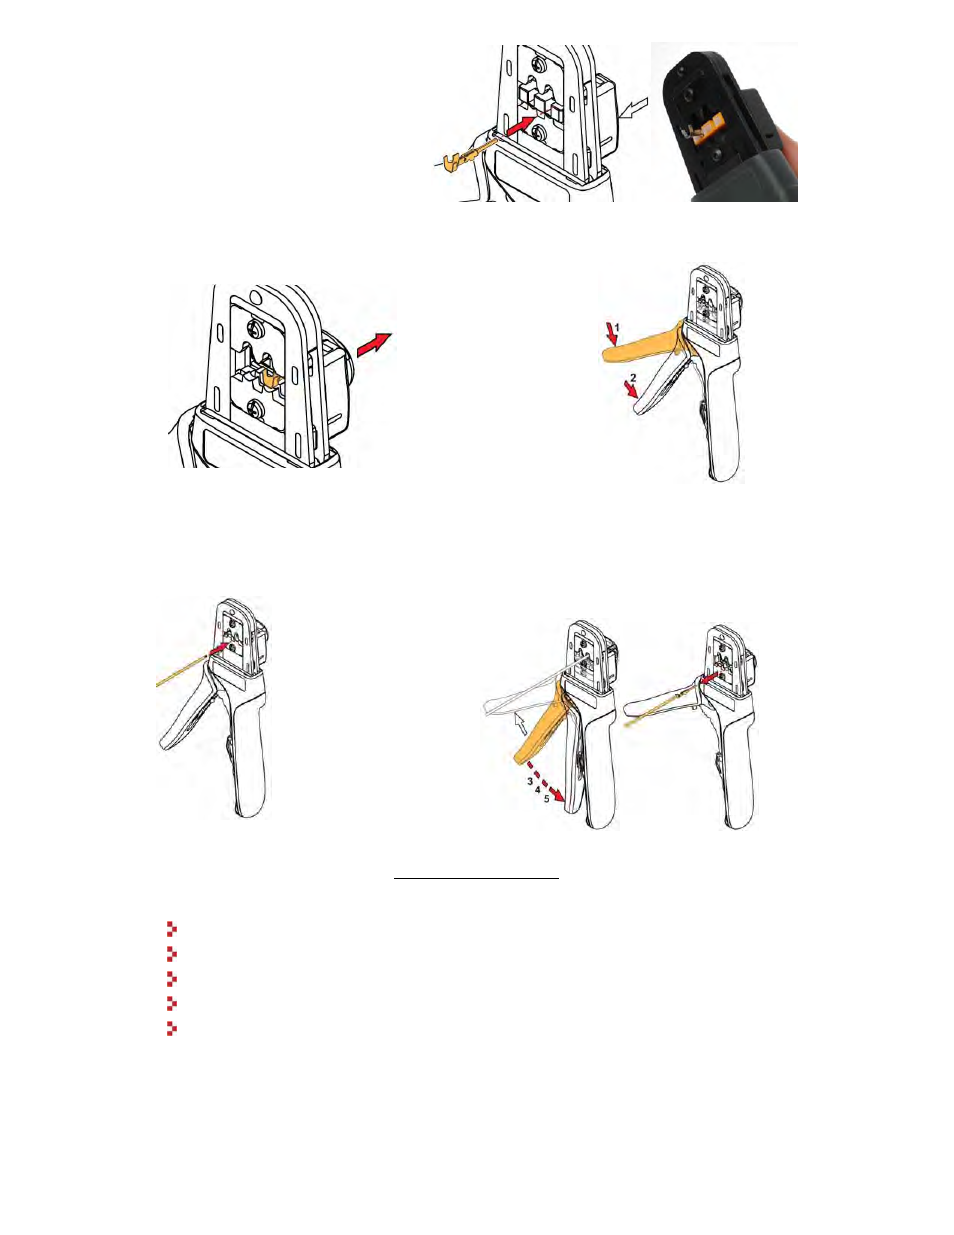
4.
Release the locator button, allowing
the crimp contact to move back
between the crimping jaws.
5.
Close the handle, until the second
ratchet position engages.
6.
Load the stripped wire
through the terminal, and
against the wire stop inside
the tool.
7.
Whilst holding the wire against the wire stop,
complete the crimp by squeezing the tool handles
together through the rest of the ratchet clicks –
another 3, to make 5 in total. The handles should
then be free to open. Remove the crimped wire.
CRIMP INSPECTION
Crimp joints should be checked for:
Correctness of form and location of crimp.
Freedom of fracture and rough edges.
Adequate insertion of all conductor strands in the crimp barrel.
Absence of damage to the conductor or the insulation.
Correct crimp height, as per crimp height values given on front page.
A destructive pull-off force test should also be performed occasionally, to confirm the hand crimp
tool is still operating correctly. The correct values for this test are given on the front page of this
instruction sheet. Insulation should be stripped back beyond insulation crimp area before
preparing samples for pull-off force test.