Harrington Hoists and Cranes RH Wire Rope Hoist User Manual
Page 62
62
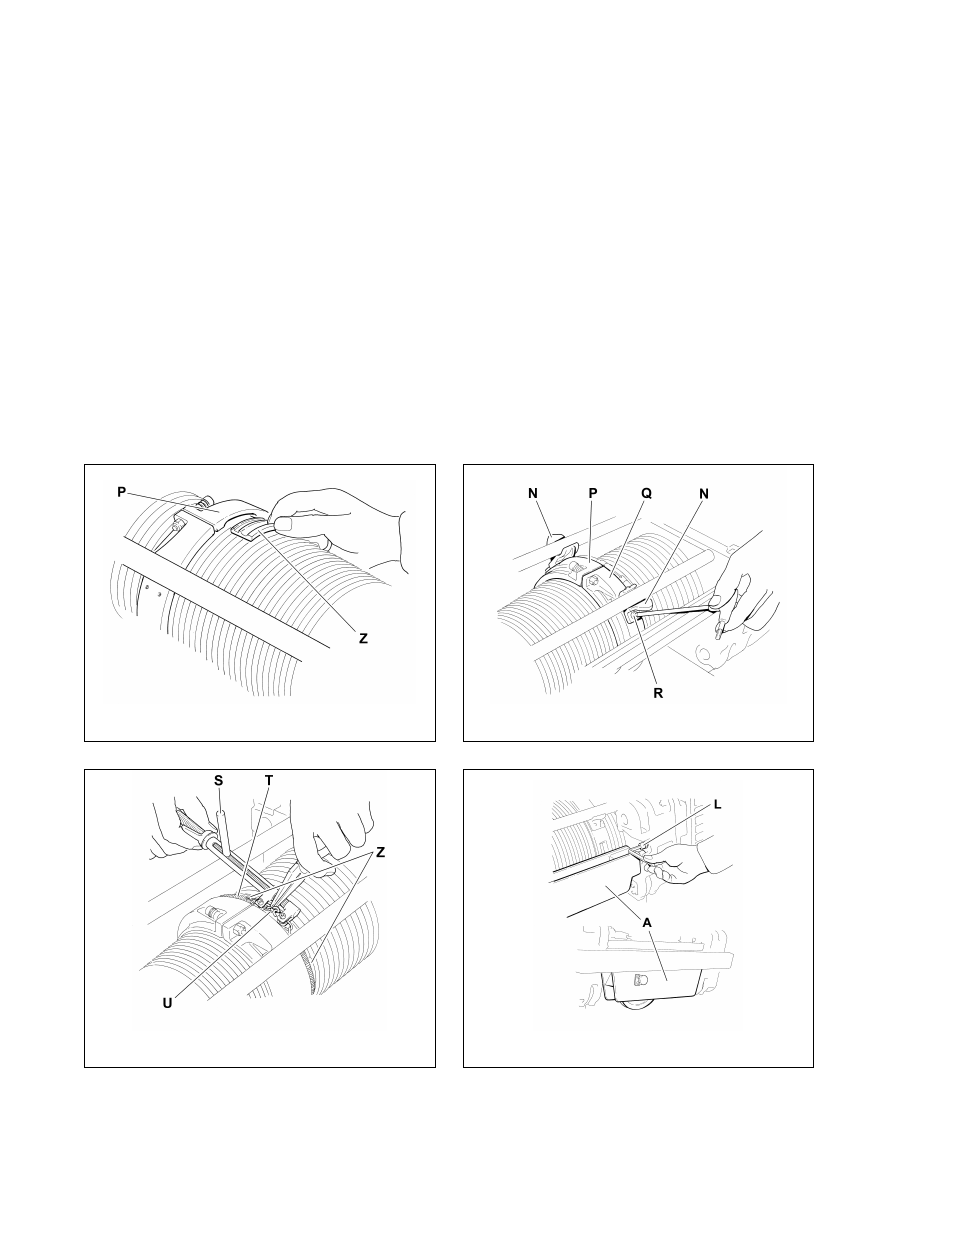
10) Insert the Wire Rope Clamp Runners (Z) piece by piece, into the slot on the side of the Rope Guide
Ring (P) (see Figure 6-28).
11) Reinstall the Limit Switch Actuators (N) onto the Rope Guide Ring Halves (P) and (Q) and tighten the
Screws (R) (see Figure 6-29).
12) Reposition the Wire Clamping Spring (T) on the Runners (Z). Use the Wire Rope Guide Clamping Tool
(S), to pull the Spring taut. Couple the ends of the Clip (U) onto the Spring using the pliers (see Figure
6-30).
13) Complete Reassembly:
For OTHER THAN 4/1 Ultra-Low Headroom Version: Re-seat the Anchorage Cross Head (A)
onto the hoist (includes the Sheave Cross Head for 4/1 part/reeved hoists). Reinstall and tighten
the Safety Screws (L) (see Figure 6-31). Reinstall the Dust Cover Halves (K) and tighten the four
(4) Screws (J) (see Figure 6-33).
For 4/1 Ultra-Low Headroom Version: Reinstall the Limit Switch Assembly (C1) and tighten the
Screws (D1). Do not disconnect or change the setting of the Limit Switches (see Figure 6-32).
Reinstall the Dust Cover Halves (K) and tighten the four (4) Screws (J) (see Figure 6-33).
Figure 6-28
Figure 6-29
Figure 6-30
Figure 6-31