Harrington Hoists and Cranes RH Wire Rope Hoist User Manual
Page 32
32
7)
When installing the trolley hoist on a beam, ALWAYS raise the hoist into position
with the trolley and hoist assembled together and securely attached to a pallet. Raise the trolley and
hoist with a forklift, lifting platform, or other similar means. NEVER use slings to raise and install the
trolley hoist onto the beam (see Figure 3-22).
8) Using a forklift or another suitable means, position the pallet so that the horizontal axis of the beam is
parallel to the horizontal axis of the hoist (see Figure 3-23).
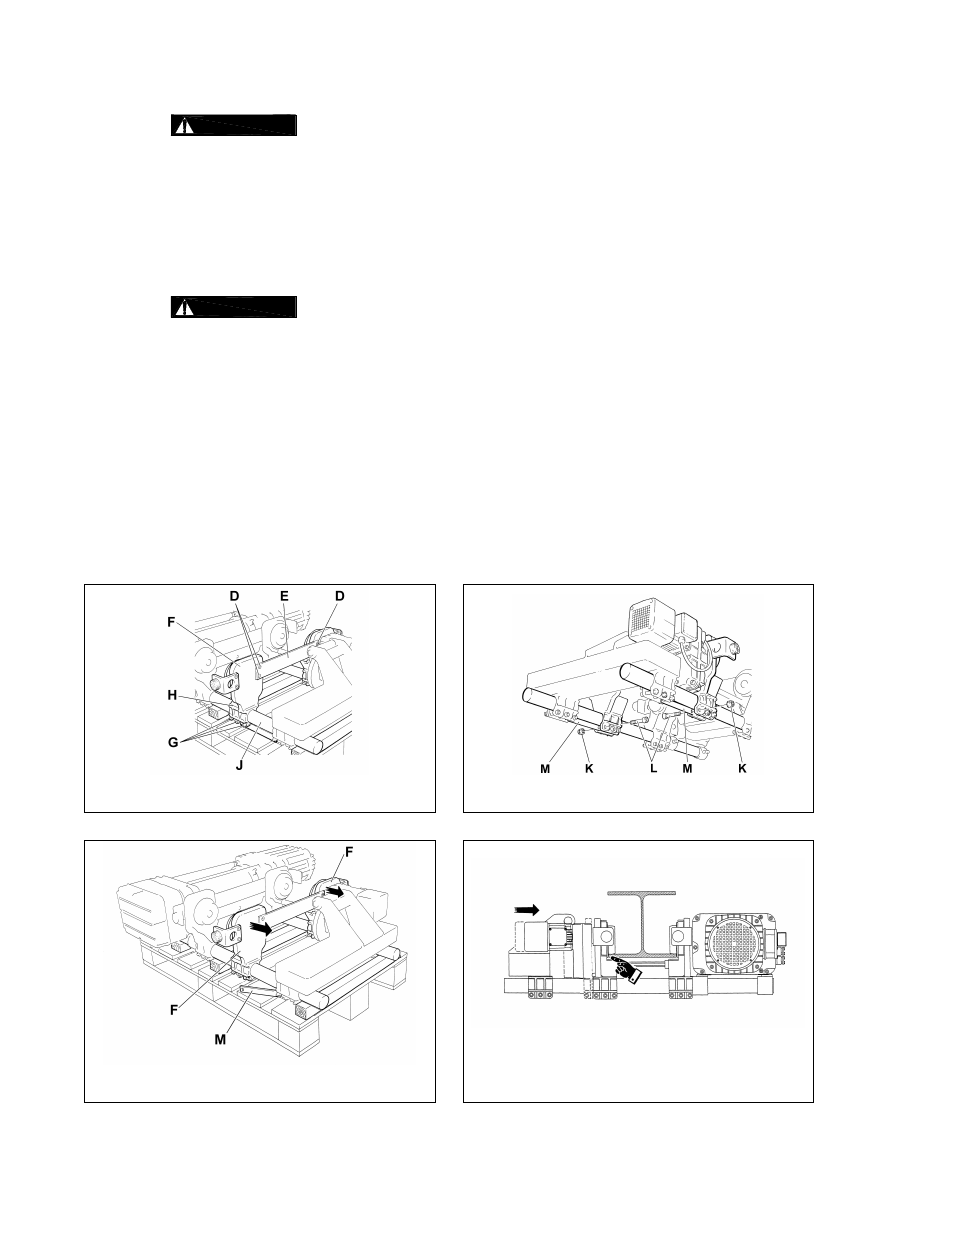
9) Temporarily slide the Side Plates (F) on the counterweight side along the Load Bars (J) so that the
distance between the faces of the trolley wheel is wider than the beam flange (see Figure 3-26).
10)
This applies to ultra-low headroom trolleys only. When preparing the trolley for
placement on the beam, ALWAYS move the Side Plates (F) on the counterweight side, DO NOT
remove the Side Plates (F) on the hoist side. DO NOT remove the counterweight.
11) Use a movable scaffolding or a lifting platform so that one person can reach the height of the beam and
guide the forklift operator. Raise the pallet slowly and carefully avoiding any swinging or oscillations
until the trolley hoist reaches the bottom flange beam.
12) Guiding the fork lift operator, slowly raise the pallet while keeping it level until the running surface of the
trolley wheels are above the bottom flange of the beam. Then move the pallet horizontally until the
trolley wheels on the hoist side are over the bottom flange.
13) From the scaffolding or lifting platform, slide the previously moved Side Plates (F) along the Load Bars
(J) until the trolley wheels are over the beam flange and the trolley wheel flanges of the Side Plates (F)
on the counterweight side are very close to the edge of the beam flange (see Figure 3-27).
Figure 3-24 Loosen Bolts
Figure 3-25 Disconnect Tie Bar
Figure 3-26 Slide Side Plates Out
Figure 3-27 Place Wheels on Beam