Harrington Hoists and Cranes RH Wire Rope Hoist User Manual
Page 26
26
3.4.3
Standard Headroom Trolley Installation
1) Make sure the mounting location complies with Section 3.3.
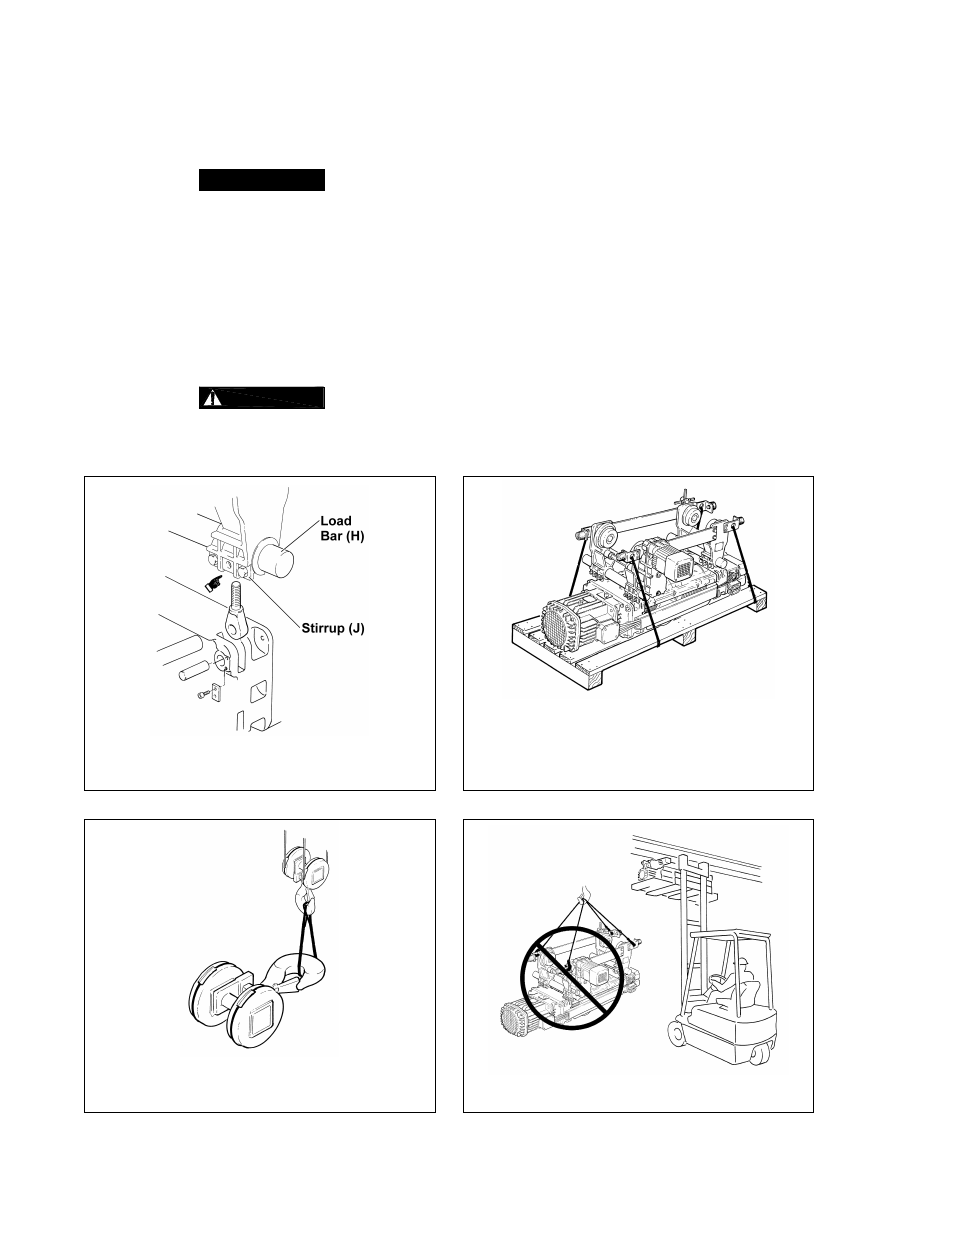
2)
Each Stirrups (H) has sufficient clamping force on the Load Bars (J) with only
two bolts. The third bolt cannot be installed in some cases because of interference with the
suspension of the hoist (see Figure 3-10).
3) Install any additional devices, if any (power supply cords or pendants, for instance – see Section
3.5) onto the trolley hoist. If the trolley hoist is not secured to a pallet, place and secure it to one
making sure that the trolley hoist is completely stable (see Figure 3-11).
4) Remove the Bottom Block from the pallet/packing and place it on the ground. Use a hoist or other
suitable lifting means to pickup the Bottom Block if it is heavier than 50 pounds (weight is written on
the container if it exceeds 50 pounds). Always lift/hold the Bottom Block from the Hook regardless
if it is lifted using a hoist or handled manually (see Figure 3-12).
5)
When installing the trolley hoist on a beam, ALWAYS raise the hoist into
position with the trolley and hoist assembled together and securely attached to a pallet. Raise the
trolley and hoist with a forklift, lifting platform, or other similar means. NEVER use slings to raise
and install the trolley hoist onto the beam (see Figure 3-13).
Figure 3-10 Adjusting Standard Headroom Trolley
for Beam Flange Width
Figure 3-11 Trolley Secured to Pallet for
Installation
Figure 3-12 Lifting Bottom Block
Figure 3-13 Proper Method for Lifting