Harrington Hoists and Cranes RH Wire Rope Hoist User Manual
Page 60
60
6.4.4
Wire Rope Installation
1)
The hoist must be properly powered and operational in order to perform the
following procedures.
2)
When replacing Wire Rope, check for wear on mating parts, i.e. Drum, Sheaves,
Hook Block Sheaves and replace if necessary.
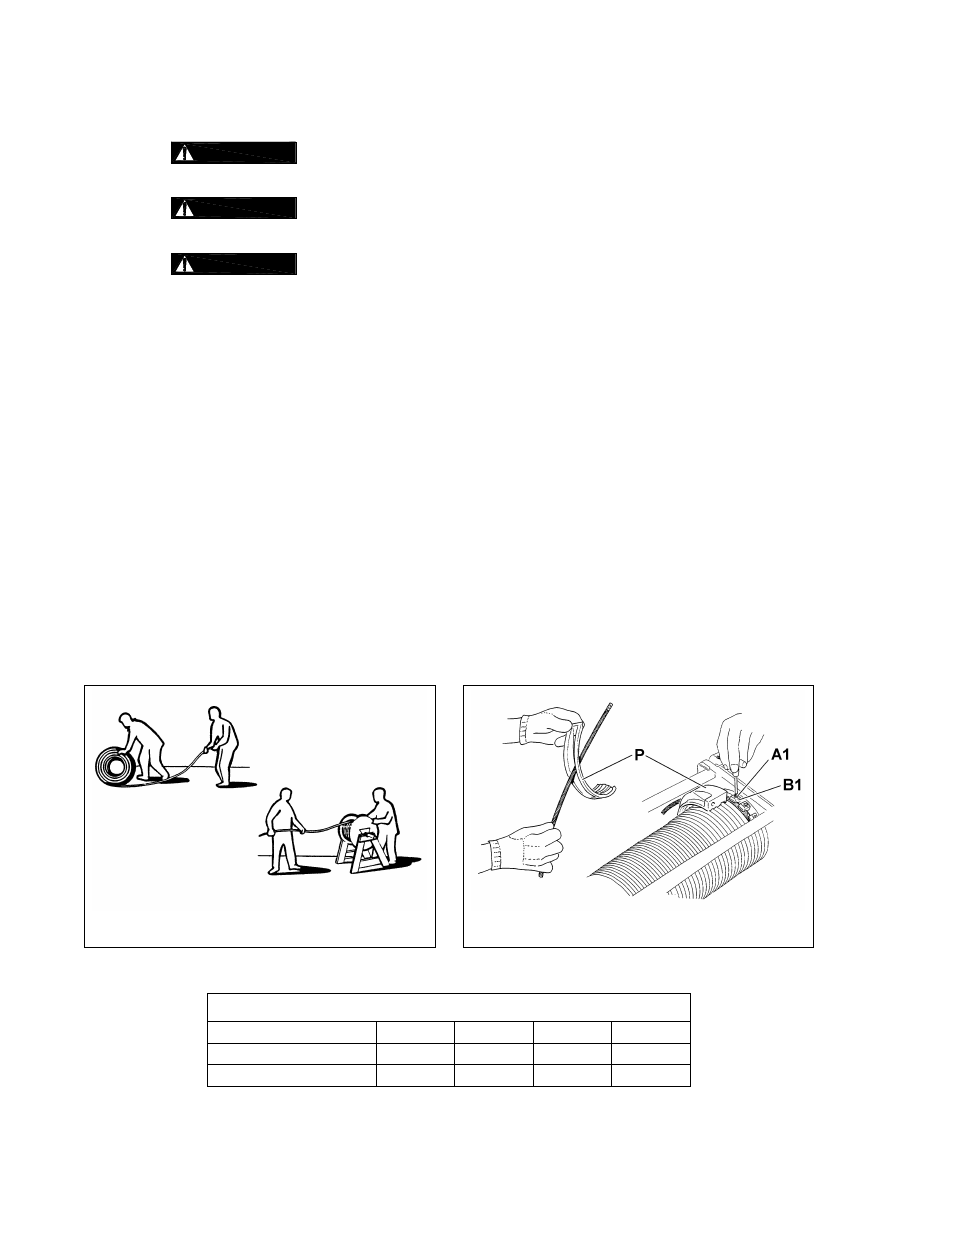
3)
ALWAYS unwind the roll of the new Wire Rope without kinks or bends (see Figure
6-22).
4) Examine the Wire Rope Guide Ring Halves (P) and (Q) and the Drum after cleaning/degreasing
thoroughly.
5) Verify proper fit of the Wire Rope Guide Ring Halves (P) and (Q) with the Drum, matching up the
respective grooves and check that there is no excessive clearance. Check for pointed or sharp crests
and heavy wear and tear. Where necessary assess the need for replacing the wire rope guides and the
Drum.
6) Securing the Wire Rope to the Drum:
For OTHER THAN 4/1 Ultra-Low Headroom Version: Insert the new Wire Rope in the “slit” of
the Rope Guide Ring Half (P) and secure the end of the Wire Rope with three (3) Wire Rope
Clamps (B1). Torque the Screws (A1) to the value shown in Table 6-1 for your hoist (see Figure 6-
23).
For 4/1 Ultra-Low Headroom Version: Pass the end of the new Wire Rope up between the
beam and the Drum, directly over the Drum, and insert it through the “slit” of the Rope Guide Ring
Half (P). Rotate the Rope Guide Ring Half (P) directly over the Drum into position between the
beam and Drum (see Figure 6-24). Secure the end of the Wire Rope to the Drum with 3 Wire
Rope Clamps (B1). Torque the Screws (A1) to the value shown in Table 6-1 for your hoist (see
Figure 6-23).
Figure 6-22
Figure 6-23
Table 6-1 Rope Clamp Torque Values
Hoist Size
1
2
3
4
Screw (A1) Dia (mm)
M5
M6
M8
M10
Screw (A1) Torque
45 in-lbs
71 in-lbs
15 ft-lbs
30 ft-lbs