Harrington Hoists and Cranes RH - Advantage Wire Rope Hoist User Manual
Page 15
15
3.4
Assembly, Adjustments and Mounting
3.4.1
RH Advantage Trolley Hoist Installation
1) Make sure the mounting location complies with
Section 3.3
.
2) Install any additional devices, if any (power supply cords or pendants, for instance – see
Section 3.5
)
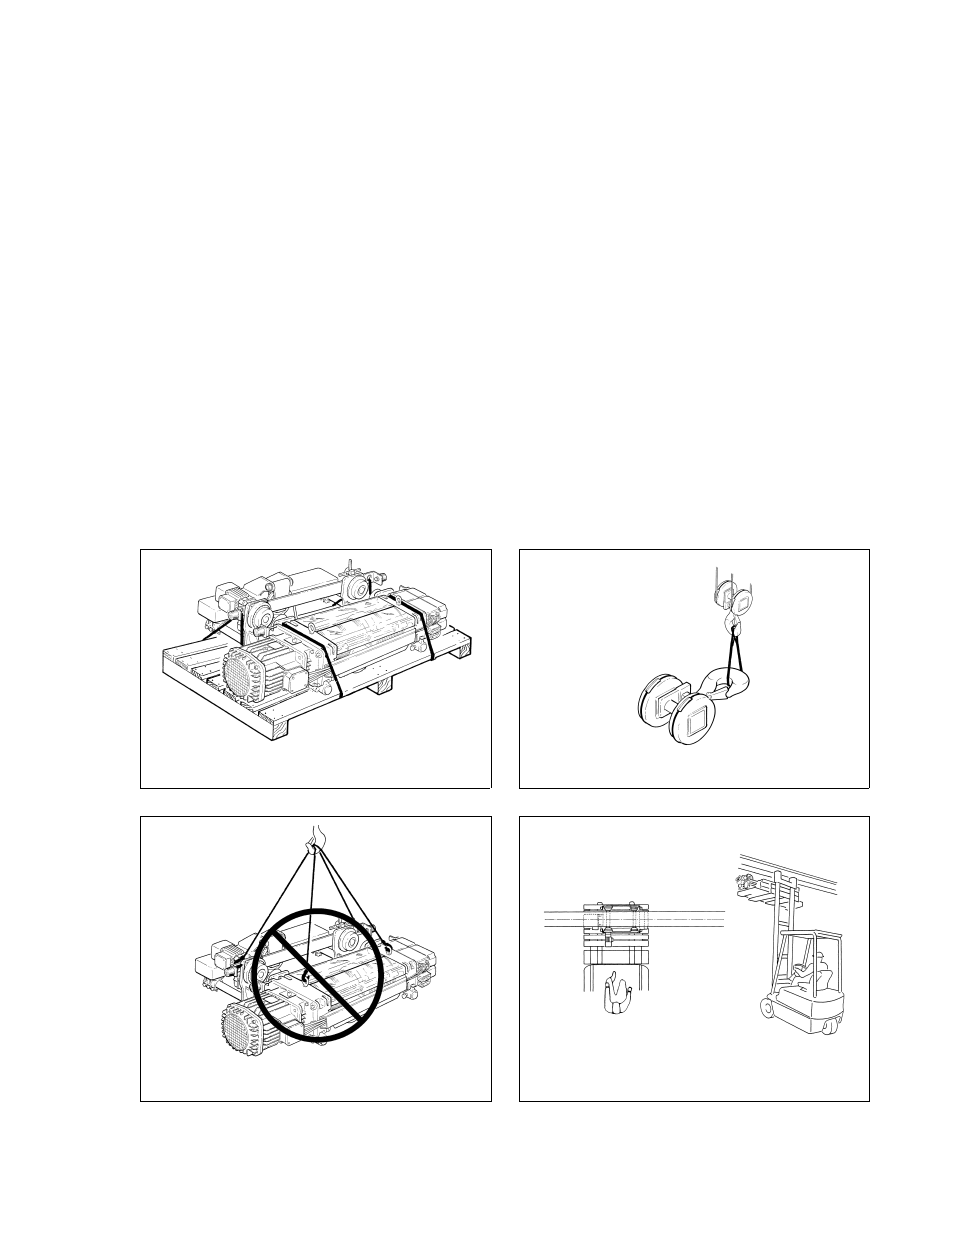
onto the trolley hoist. If the trolley hoist is not secured to a pallet, place and secure it to one making
sure that the trolley hoist is completely stable (see
Figure 3-6
).
3) Remove the Bottom Block from the pallet/packing and place it on the ground. Use a hoist or other
suitable lifting means to pickup the Bottom Block if it is heavier than 50 pounds (weight is written on the
container if it exceeds 50 pounds). Always lift/hold the Bottom Block from the Hook regardless if it is
lifted using a hoist or handled manually (see
Figure 3-7
).
4) On the counterweight side, loosen the Screws (D) that attach the Stiffening Plates (E) to Side Plates (F)
and loosen the Lock-Nuts (G) on the Stirrups (H) that secure the Side Plates (F) to the Load Bars (J)
(see
Figure 3-10
).
5) Remove the Nuts (K) and Socket Bolts (L) to remove the Spacers (M) from the Stirrups (H) so that the
Side Plates (F) on the counterweight side can move freely along the Load Bars (J) (see
Figure 3-11
).
6) For relatively small beam flange widths (at the lower end of the flange range – see
Table 2-3
), the
trolley Drive Shaft must be shortened to allow the Side Plates (F) to adjust close enough together as
required. Drive the Spring Pin attaching the Drive Pinion, slide the counterweight side Side Plates (F)
out and remove the Drive Shaft. After cutting the Drive Shaft, reinstall it onto the trolley and reattach
the Drive Pinion.
Figure 3-6
Trolley Secured to Pallet for Installation
Figure 3-7
Lifting Bottom Block
Figure 3-8
Improper Method for Lifting
Figure 3-9
Positioning the Trolley Hoist