RECON 264150 Backup Projector Lamps DIY User Manual
Page 3
Page 3
•
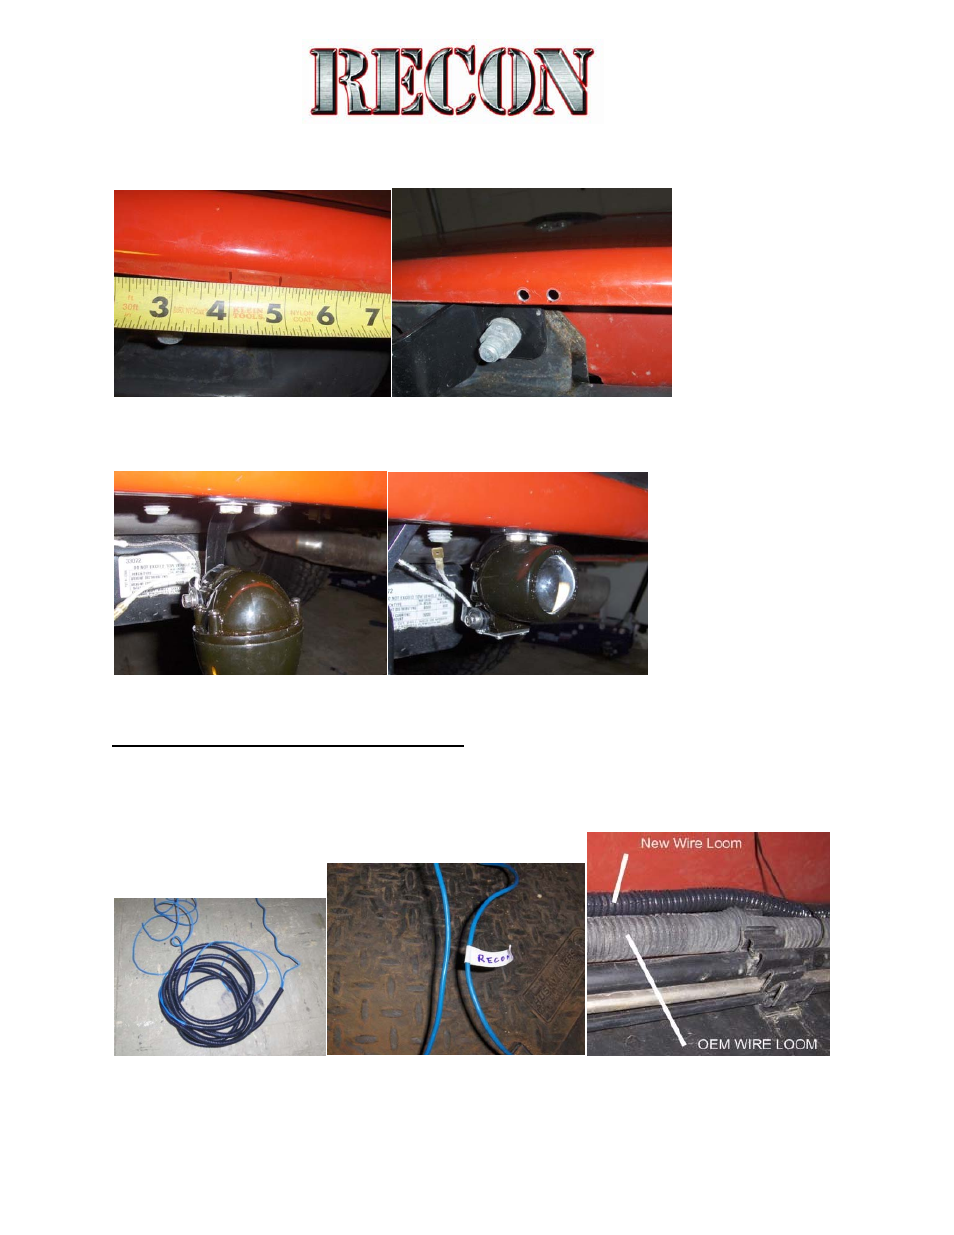
Find A Center Point To Measure Off Of.
•
Now, Make Two Marks Per Projector Lamp - 7/8" Apart
•
With The Holes Laid Out, Drill Using Proper Drill Bit (According To Bolt Diameter)
•
You Can Now Mount The Projectors, Flip Down The Bracket To Allow Hardware To Slip In (Make Sure The Bolt Head Is On The
Bottom Side)
•
With The Hardware Installed - Flip The Projector Up and Tighten The Hinge.
You Are Now Set To Wire - Running Wires - Front To Back
I Have Found It Easier To Prepare The Wire & Loom First - Then Run It Along The Frame Rail.
•
Stretch Out Approx. 15ft Of Wire Loom
•
Run 2 - 15' Lengths of Wire Through The Loom (One Will Be For The Reverse Lamp Wire, One For The Projectors)
•
Be Sure To Mark Each End Of The Wires. Label One Wire: Backup Lamps - and Label The Other: Reverse Light
•
With The Pre- Wired Loom, Run It From The Rear To The Front - Along The OEM Wire Loom. Tie Up Loom.