Rma-303 direct charge - maintenance – Ransburg RMA Direct A12867 User Manual
Page 75
RMA-303 Direct Charge - Maintenance
LN-9266-11.3
72
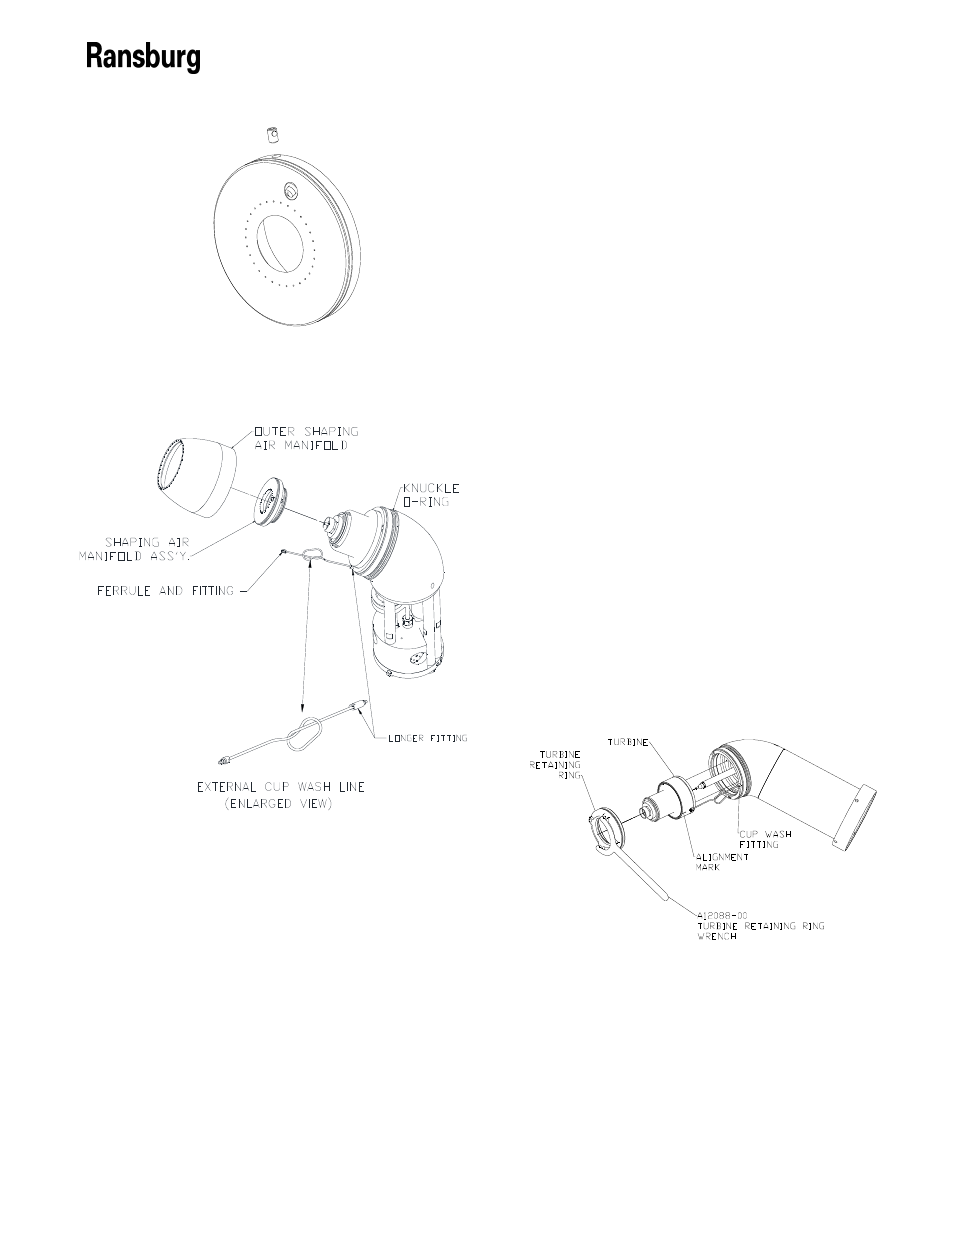
Inner/Outer Shaping Air Manifold, Solvent
Tube Removal/Replacement (55mm)
Interior/Exterior Shaping Air Manifold for
55mm Bell Cup
Shaping Air Manifold Reassembly
(Lightly lubricate all O-rings prior to assem-
bling.) Carefully install the inner shaping air
ring onto the turbine threads. Tighten in a
clockwise direction until it seats against the
turbine. Install set screw and tighten until it
stops on the turbine body, then tighten to 5
lbs•in (0.564 Nm) torque to prevent shaping
air ring/manifold from rotating. Do not over-
tighten! If replacing the solvent tube, install
longer fitting into the atomizer body first and
tighten with a 3/16” end-wrench. Install fitting
into atomizer body until ferrule is seated to a
stop. Test by pulling/pushing tube, tighten
until no movement then 1/8 turn more. Before
installing the other end into the inner shaping
air ring, check the position of the 1/4-20
threaded hole. If it is less than 180° from the
fitting installed in the atomizer body, you must
install a loop (as shown in “Interior/Exterior
Shaping Air Manifold for 55mm Bell Cup” fig-
ure) to prevent tube from becoming pinched
when outer shaping air ring is installed. Do
not kink the tube when installing loop (see
“Interior/Exterior Shaping Air Manifold for
55mm Bell Cup” figure). Turbine Removal /
Replacement
Removal
Remove the turbine retaining ring by using the
strap wrench (A12088-00), turning the turbine
retaining ring in a counter-clockwise direction.
Pull the turbine out while rocking it from side
to side.
Turbine Removal
Replacement
Apply a light coating of O-ring lubricant to all
the O-rings and the threads of the turbine and
turbine retaining ring prior to assembly. Push
the turbine down into the cavity in the atomiz-