Rma-303 direct charge - maintenance – Ransburg RMA Direct A12867 User Manual
Page 73
RMA-303 Direct Charge - Maintenance
LN-9266-11.3
70
!
C A U T I O N
•
Failure to replace a damaged bell cup will
cause vibration of the applicator and/or
premature turbine failure.
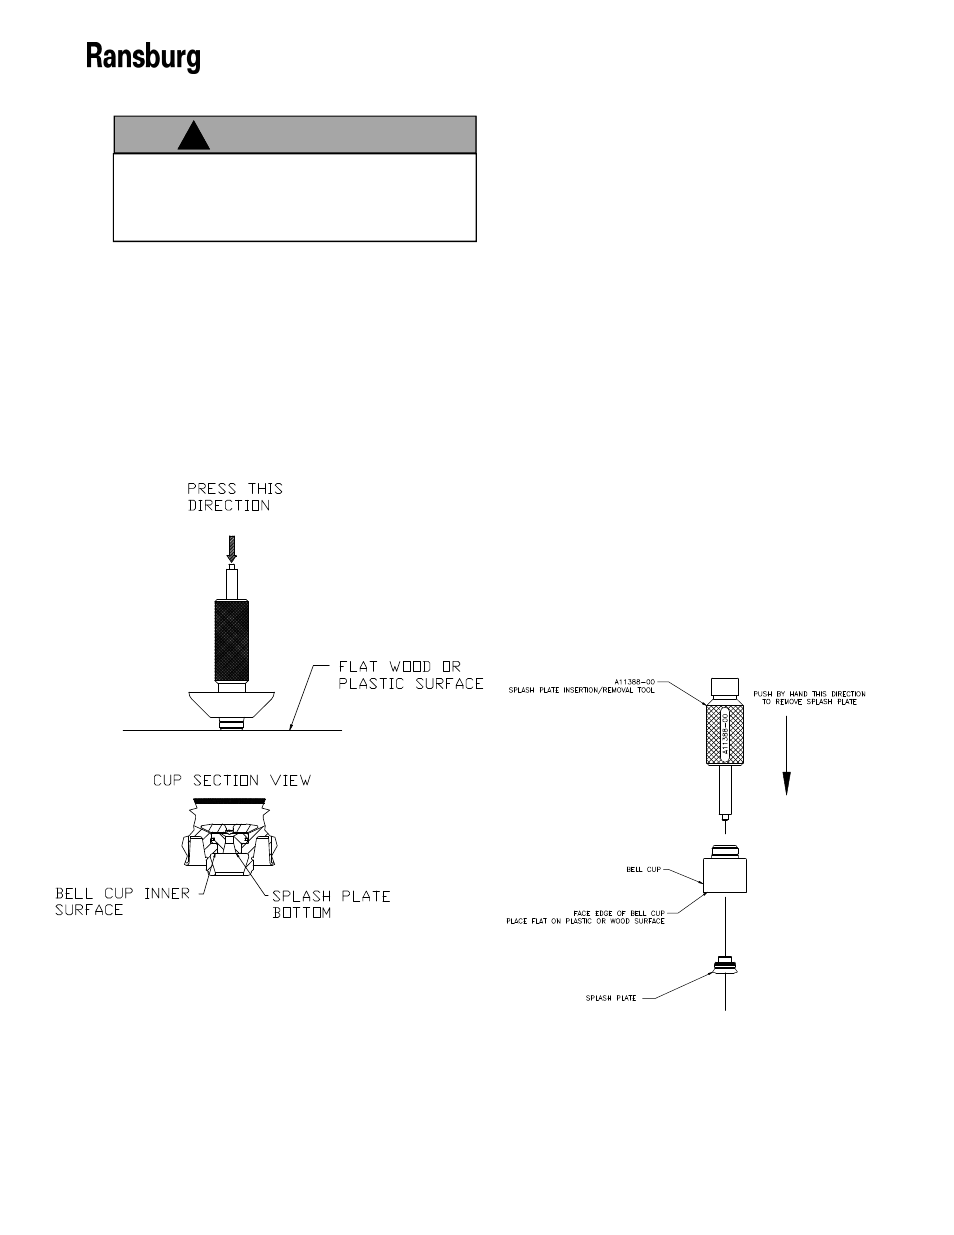
Splash Plate Insertion (55mm and 65mm
Bell Cups)
Turn the splash plate removal tool over and
use the large diameter end to press the splash
plate back in place by hand. It may be neces-
sary on occasions to use an arbor press to in-
stall the splash plate. Press splash plate to a
hard stop (see “Splash Plate Insertion” figure).
Splash Plate Insertion
A11968-01/02 Bell Cup and Splash Plate
Assembly
Splash Plate Removal
After removing the bell cup from the applica-
tor, put it on a plastic or wood surface to pre-
vent damage to the edge of the cup. Using
the splash plate removal tool (A11388-00),
insert the small end of the tool into the end of
the splash plate assembly. Press the splash
plate out. It may be necessary to tap lightly
with a hammer.
Splash Plate Insertion (55mm and 65mm
Bell Cups)
Turn the splash plate removal tool over and
use the large diameter end to press the splash
plate back in place by hand. It may be neces-
sary on occasions to use an arbor press to
install the splash plate. Press splash plate to
a hard stop. Face of bell cup should line up
with undercut as shown on tool (see “Splash
Plate Insertion” figure).
Splash Plate Removal