Kasco Marine 4400EJ User Manual
Page 5
5
cushion
logo
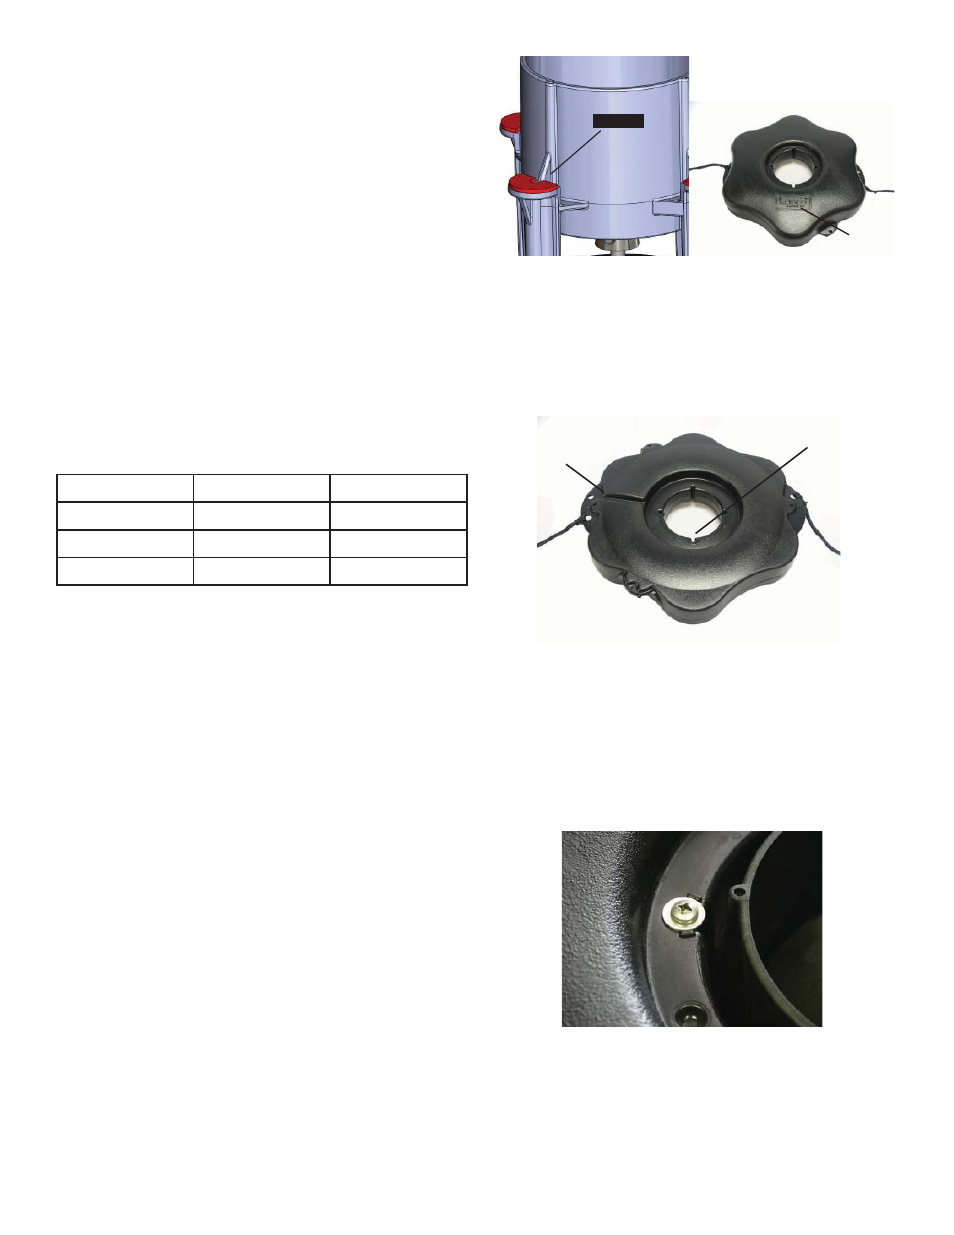
STEP THREE
Ensure correct alignment by twisting the fl oat gently
around the motor housing until the fl oat “locks” into
place, the bolt holes in fl oat line up with bolt recep-
tacles on unit and power cord guide lining up with the
cord. See diagram below of bottom side of fl oat.
Bolt holes
power cord
guide
STEP FOUR
Use one of the 1/4”-20 x 3-1/4” Phillips Pan Head
Screws (Part C), one 1/4” split washer (Part N), and
a 1/4” Flat Washer (Part D) to secure the fl oat. Make
sure the split washer goes between the bolt head and
the fl at washer. Insert screw with washers through
bolt hole in fl oat
STEP FIVE
Turn secured assembly upside down so the top of the
fl oat (logo side) is face down on the fl at surface. Place
Bottom Screen (Part J) onto the bottom side of the
fl oat. Make sure the wide opening of the screen is
Also included: (not pictured)
L. Cushions for fountain housing legs (4)
M. Cushions for bottom screen (3)
N. 1/4” split washers (4)
TOOLS & SUPPLIES NEEDED
A. Anchors or stakes for installing unit (2)
B. # 2 Phillips head screw driver
C. 208-240V Electrical Supply near pond on a post
D. Two 30cm pieces of 2.54cm galvanized pipe for
weighting ropes (optional)
E. 9/16” (14mm) Socket and Ratchet
F. 9/16” (14mm) Wrench
EVFX Pattern Size Chart
All produce a V-shaped display.
Model
Height
Width
2400EVX
1.15 m
4.3 m
3400EVX
1.7 m
6.1 m
4400EVX
1.7 m
6.7 m
2400EVX, 2400EJ, 3400EVX,
4400EVX Assembly Instructions
STEP ONE
Make sure you have all the parts needed. If any short-
ages are found, contact your Kasco representative
immediately.
STEP TWO
Set motor housing upright (stainless steel can down)
on a fl at surface.
Peel off the adhesive on one of the cushions (Part L)
for the fountain housing legs. Stick to the top of the
fountain housing leg and repeat for the other three
cushions and legs. Slide fl oat (Part B) over pump
housing and rest the fl oat on the 4 legs of the housing
making sure the Kasco logo is up.