Nozzle options and assembly – Kasco Marine 2400SF xStream User Manual
Page 5
5
All other nozzle options require the following
assembly:
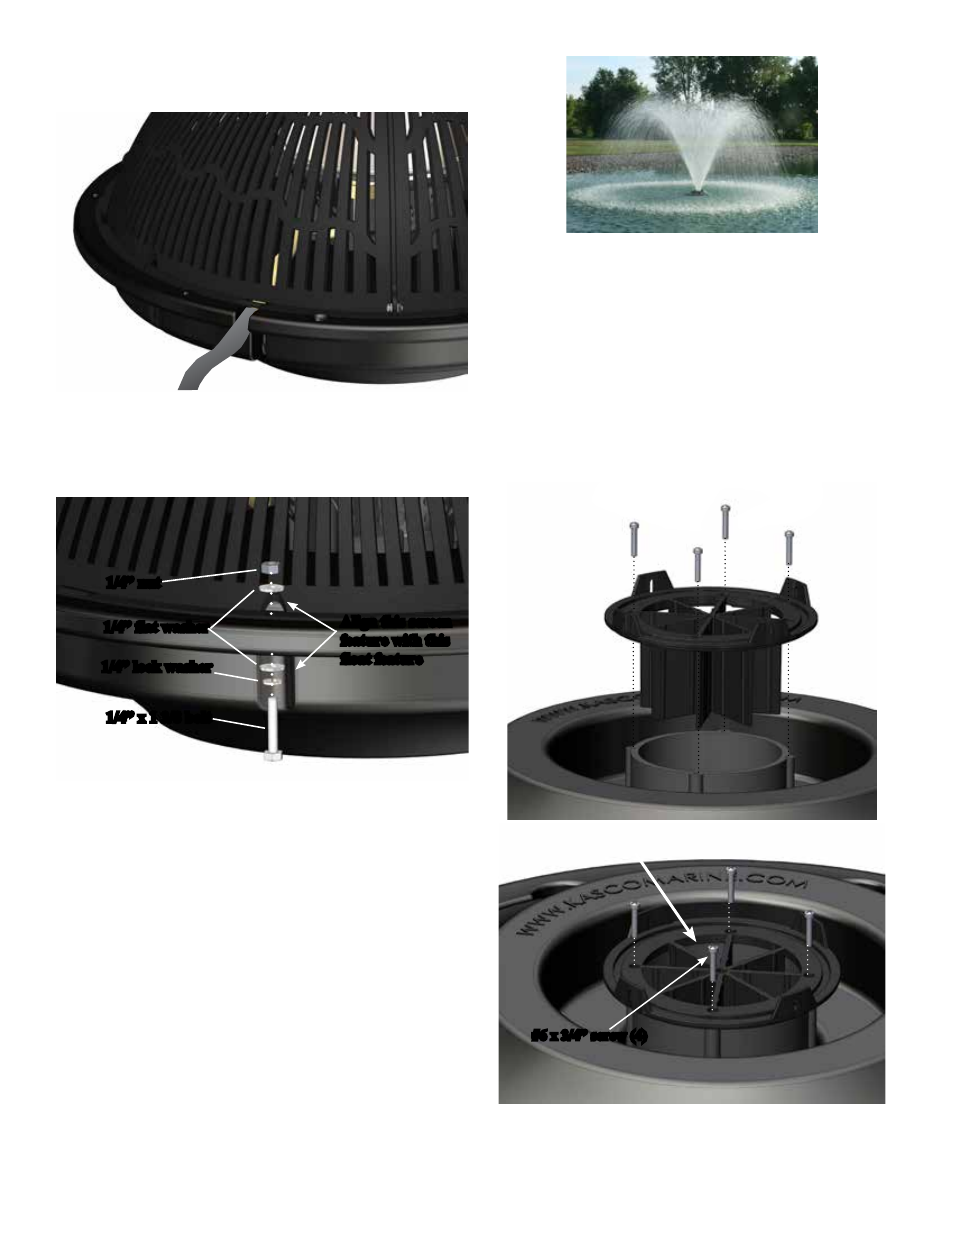
1. Place the flow straightener in the fountain tube
making sure it rests securely against the tube and the
holes line up. Attach the straightener using four #6 x
3/4” screws.
IMPORTANT: Make sure there is no gap between
the tube and flow straightener and that the screws
are tightened down securely. Loose screws or a gap
can lead to reduced performance.
#6 x 3/4” screw (4)
Make sure there is no gap
2. Place the oring in the oring groove on the flow
straightener.
7. Make sure the cord is coming out of the notch in the
float before attaching the screen to the float.
8. Align the screen to the float using the picture to guide
you. Attach the screen to the float in 3 places using 1/4”
x 1 3/8” bolt, 1/4” lock washer, two 1/4” flat washers, and
1/4” nut. Do not overtighten.
1/4” flat washer
1/4” nut
1/4” lock washer
1/4” x 1 3/8 bolt
Align this screen
feature with this
float feature
9. Flip the unit back over so that the stainless steel can is
resting on a flat surface. Use the Nylon Cable Tie included
to secure the power cord to a molded hole in the float to
prevent cord damage if there is no strain relief on the cord.
If you purchased the 150’ or 200’ cord, the cord contains
a metal strain relief, you can use the chain connector and
attach it to one of the rope loops by the float. If installing
a new Quick Disconnect, refer to Quick Disconnect
Instructions included in the cord box. The unit is now
ready for nozzle choice and assembly.
Nozzle Options and Assembly
V shaped pattern:
Requires no flow straightener or nozzle assembly.
Store those parts in a safe place for future use. This
V pattern provides the highest flow rate and aeration.
Pattern size is 6’ High by 13’ diameter.