Hauler Racks Hauler II Camper Shell Racks User Manual
Page 13
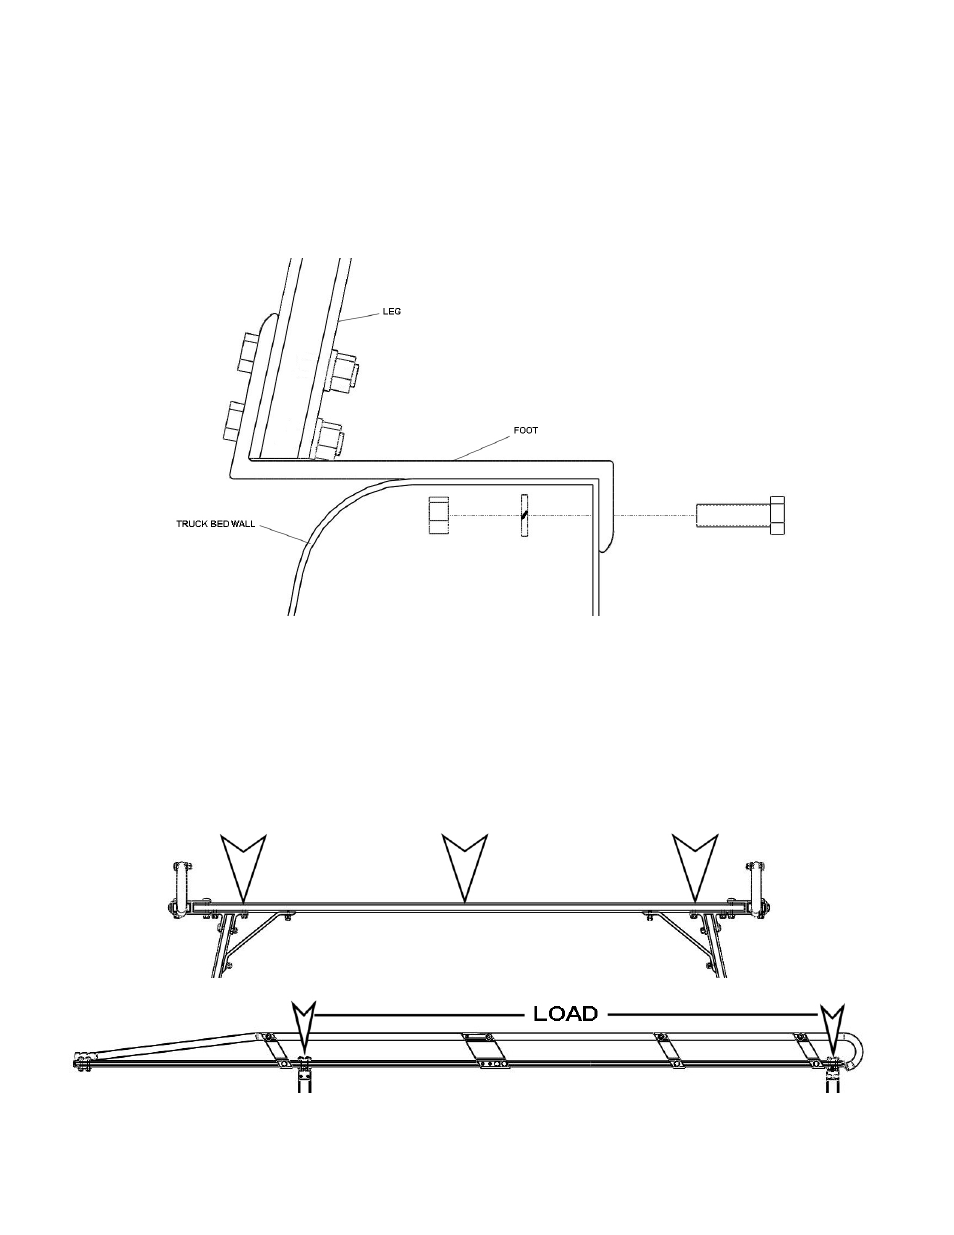
10. Drill and attach rack brackets to truck bed.
Ensure legs and rack are square and rack is positioned correctly on the truck bed rails.
Mark the hole positions on all four legs (the hole on the inside of the foot) and drill 3/8” holes in all
locations. Using (4) 3/8-16 x 1-1/4” hex bolts, (4) 3/8” split lock washers and (4) 3/8”-16 nuts, secure the
rack to the truck.
Note: Some vehicles may not allow access to the underside of the bed to attach nuts to bolts. In this
case 3/8” self tapping bolts with lock washers may have to be used.
11. Tighten all nuts and bolts
Tighten the rack attachment bolts installed in step 9 first before tightening any other rack bolts. Proceed
next to the HD brace nuts and tighten until the flat ends of the HD braces are flush with the legs and
crossbar. Continue around the rack and tighten all remaining nuts and bolts securely.
Tighten until lock washers are flat but DO NOT OVERTIGHTEN!
12. Check all rack hardware to make sure all nuts and bolts have been tightened.
For best use, spread the load out evenly across the crossbars.
Place the load over the legs between the rear and middle crossbars.
HAULER RACKS, INC.
Toll Free: 1-800-843-5445
7109 31
st
Avenue North Phone: 763-546-5620
Minneapolis, MN 55427-2848 Fax: 763-546-0933
Page 13 of 14 WWW.HAULERRACKS.COM