General Tools and Instruments DCS1600 User Manual
Page 11
The default factory settings are: 00 for Brightness, 40 for Contrast, 00 for Hue, and 50 for Saturation.
To change the value of any attribute, navigate to its line and press the OK button once its name
begins flashing in green. The screen will then go dark except for the name of the attribute at the top.
To increment the value from the factory default value, press the ▼ button (the opposite of what you’d
expect). To decrement the value, press the ▲ button (again, the opposite of what you’d expect).
There are 256 options for the value of each video attribute, and the attributes are identified and
ordered by hexadecimal (base 16) numbers. For example, pressing the ▼ button to increment the
value 09 produces 0A (the number 10 in base 16 notation); further increments yield 0B through 0F
(the numbers 11 through 15). Incrementing 0F produces the value 10 (the number 16 in hexadecimal
notation). Similarly, incrementing 19 produces the value 1A; further increments yield 1B through 1F.
Incrementing 9F produces A0, further increments produce A1 through A9, and further increments
produce AA through AF. Incrementing AF produces BA, and so on, through FF (the number 255 in
hexadecimal notation). Incrementing FF completes the cycle, producing a value of 00.
The AUTO POWER OFF line of the main menu is not visible on the screen that first appears after you
press the OK button to put the H16 into Menu mode. To show the line, scroll down past the VIDEO
FORMAT line. When the AUTO POWER OFF line appears, flashing in green, press the OK button.
By default, the AUTO POWER OFF function of the H16 is disabled. To enable it, and to choose how
quickly to power off the instrument following a period of inactivity, navigate to one of the four options
(5, 10, 15 or 30 minutes) and press the OK button. To re-disable the function later, enter Menu mode,
scroll down to the AUTO POWER OFF line, press the OK button, select DISABLE and press the OK
button again to save the setting.
ATTACHING A MIRRORED VIEWING TIP (OPTIONAL)
The DCS1600 system includes three mirrored viewing tips that screw onto the end of the supplied
probe or any other compatible probe. To attach any of these tips:
1. Pull off the probe’s rubber protective cap.
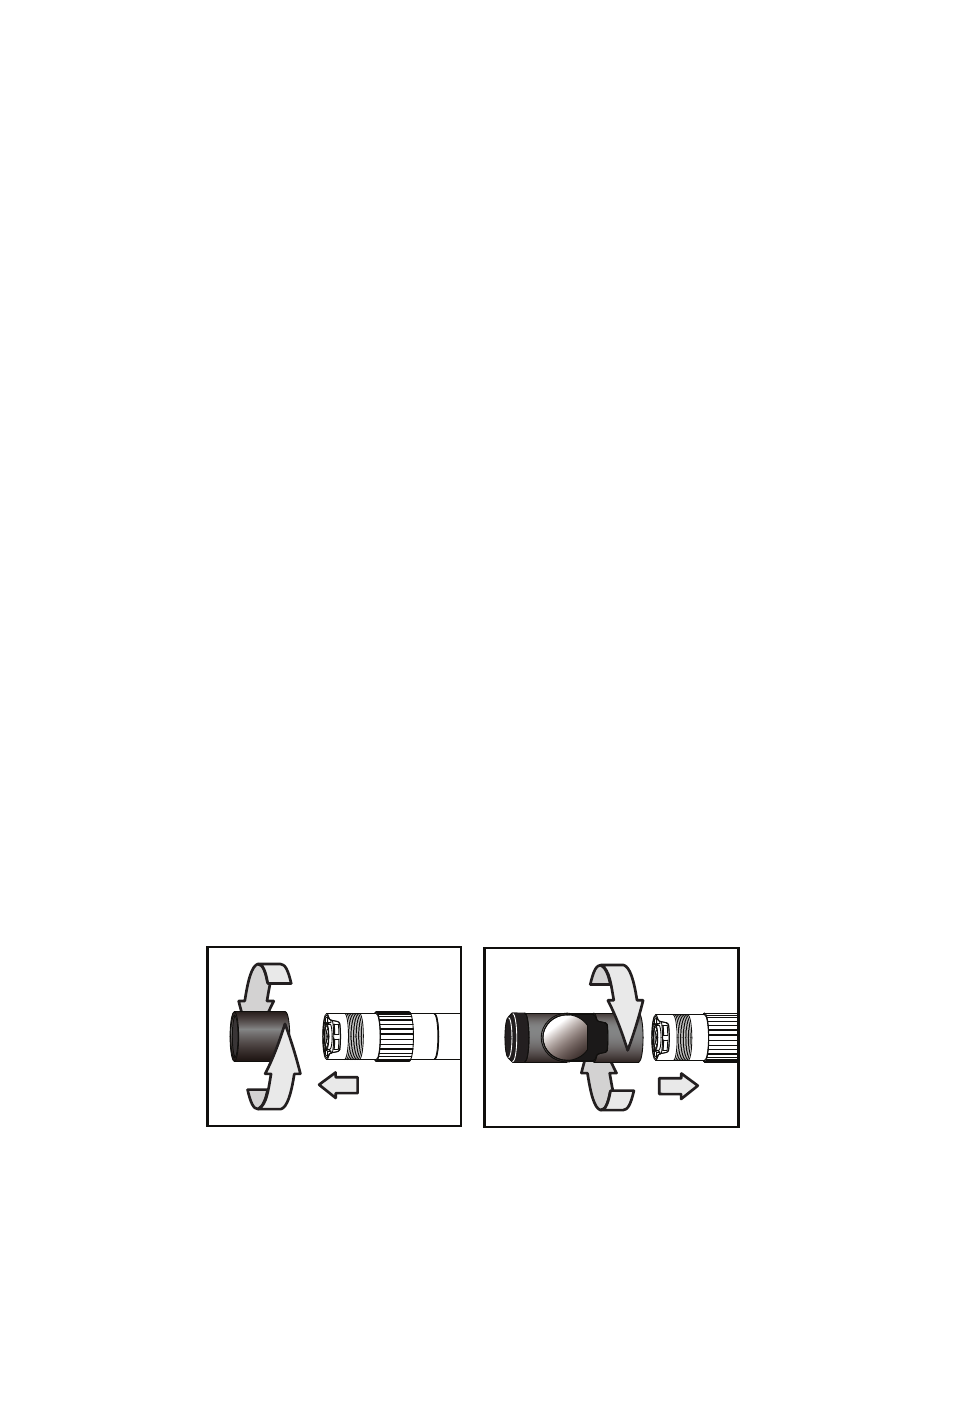
2. Unscrew and remove the black metal thread protector ring, as shown below at left.
3. Remove the blue circular protective film from the mirrored viewing tip by pulling on its tab.
4. Screw the viewing tip onto the camera head by turning it clockwise, as shown below at right.
Keep turning until the tip can travel no further.
5. After using and removing the mirrored viewing tip, remember to reinstall the black metal thread
protector ring by screwing it onto the camera head.
11