General Tools and Instruments DCS100 User Manual
Page 7
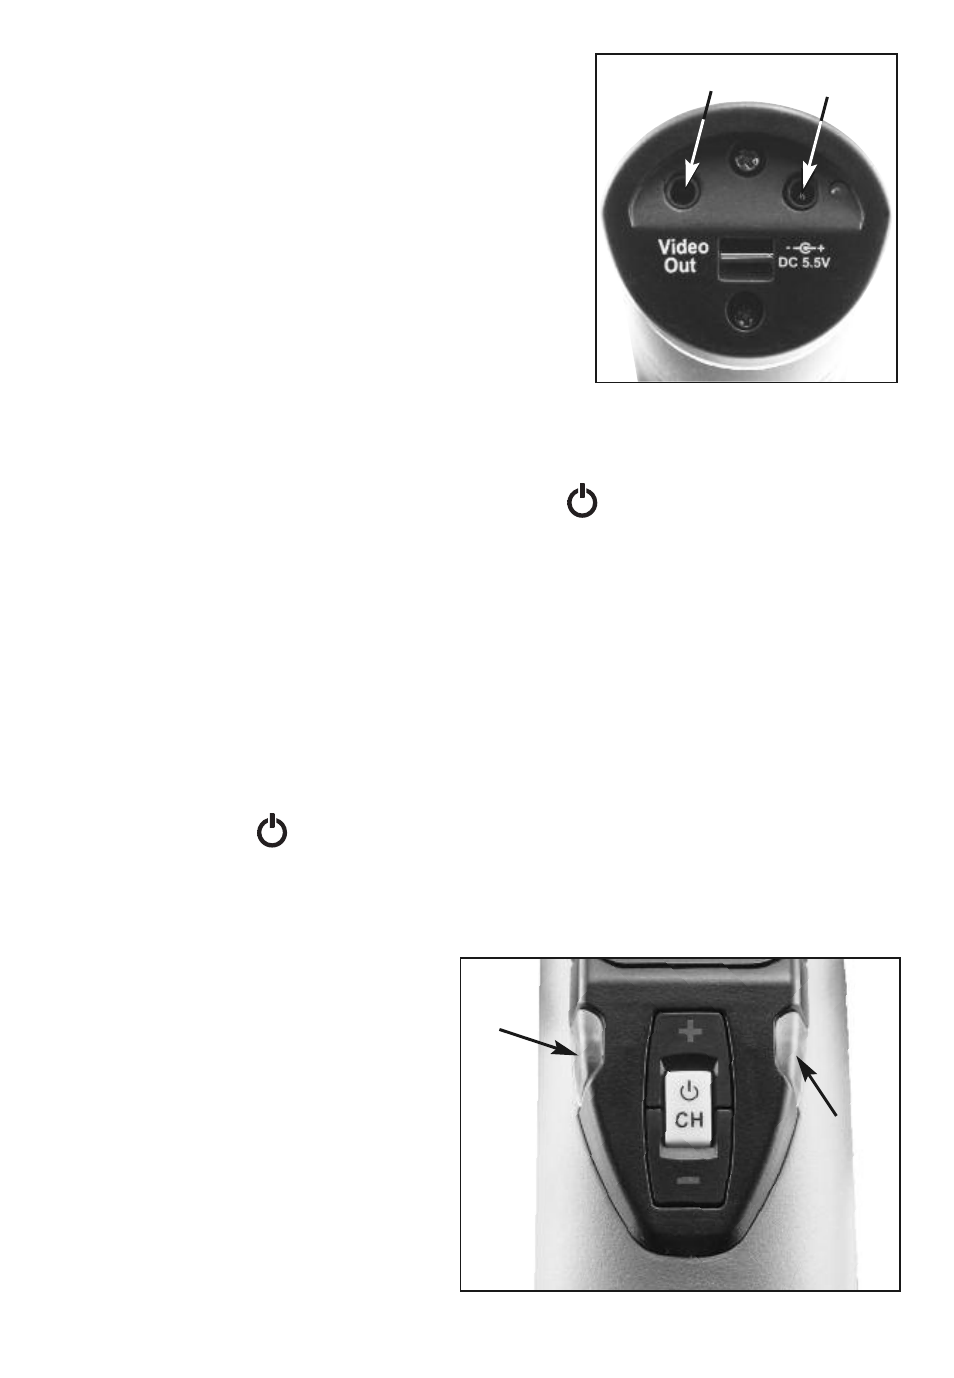
The battery of a new Seeker 100 is
possibly in a fully discharged state. To
charge it, plug one end of the supplied AC
adapter into a 120-V socket and the other
into the jack at the upper right of the base
of the grip labeled “DC 5.5V” below it
(Fig.1).
Unlike other electronic devices, a fully
discharged Seeker 100 cannot be run on
AC power. The battery in the grip must be
at least partially charged for the system to work. When you plug in a
Seeker 100 grip “right out of the box”, the only control on its front
panel that will generate a response is the “
CH” button (Fig.2). If you
press that button, a light to the right of the front panel will briefly flash
red. This indicates that the system is not yet ready for use. Keep the
grip plugged in. If the LED just to the right of the jack on the bottom of
the grip continues to glow red, the battery still needs charging. Keep
the adapter plugged into the power outlet until the LED on the bottom
of the grip turns green. This may take as little as 15 to 30 minutes, or
as much as four hours.
Once the Seeker 100 has been assembled and fully charged, turn it on
by pressing the “
CH” button on the grip’s front panel and holding it
for five seconds. Now you’re ready for installation/setup, which is a
two-step procedure. It requires that you:
1. Copy the ScopeView
software on the CD for the
RCV100 to your computer’s
hard drive.
2. Plug the RCV100 into a USB
2.0 or 3.0 port on your
computer.
7
FIG.2
GREEN
LIGHT
RED
LIGHT
FIG.1
VIDEO PORT
CHARGING
PORT