Procedure, Safety reminders, Replacing the ring launcher fuse – PASCO EM-8661 Ring Launcher User Manual
Page 2
R i n g L a u n c h e r
EM -8661
2
www.pasco.com
Procedure
1.
In a spacious room, place the Ring Launcher on a stable sup-
port, such as the floor or a low table.
CAUTION: To prevent the rings from hitting other objects or
people, allow a one meter radius of space around the Ring
Launcher and a two meter distance above the Ring Launcher.
2.
Before launching, position yourself to the side of the
launcher and be prepared to catch the projected ring as it
falls.
3.
Slip one of the aluminum rings over the iron rod and copper
coil of the launcher.
WARNING: Do not place your face or any part of you body
directly over the top of the iron rod or anywhere in the launch
path.
4.
To launch, push down on the Launch Switch momentarily
and then release the switch.
•
The ring will jump about two meters.
SAFETY REMINDERS
•
Do not attempt to remove any portion of the back casing or
immerse the Ring Launcher in water. Doing so could cause
shock or injury.
•
Do not plug the Ring Launcher power plug into a
non-grounded electrical receptacle.
•
Do not plug the Ring Launcher power plug into an adapter
and then try to plug the adapter into an electrical receptacle.
PLUG THE RING LAUNCHER POWER CORD INTO A
GROUNDED 110V OUTPUT PORT ONLY.
•
Do not overheat the copper coil by holding the launch switch
down continuously for more than 20 seconds.
•
Do not use any rings that are different than the ones included
with the Ring Launcher or the Ring Launcher Accessory. For
example, do not use paper, plastic, or rubber items
NOTE: If the copper coil becomes overheated, the red High
Temperature Warning Light will come on, and the launcher will
not function. Wait until the red warning light turns off before try-
ing more launches.
•
If the green Power Light goes out at any time, replace the
Ring Launcher’s fuse. Always unplug the launcher before
replacing the fuse, and use only the same type of fuse as a
replacement (8A, 250V Type F).
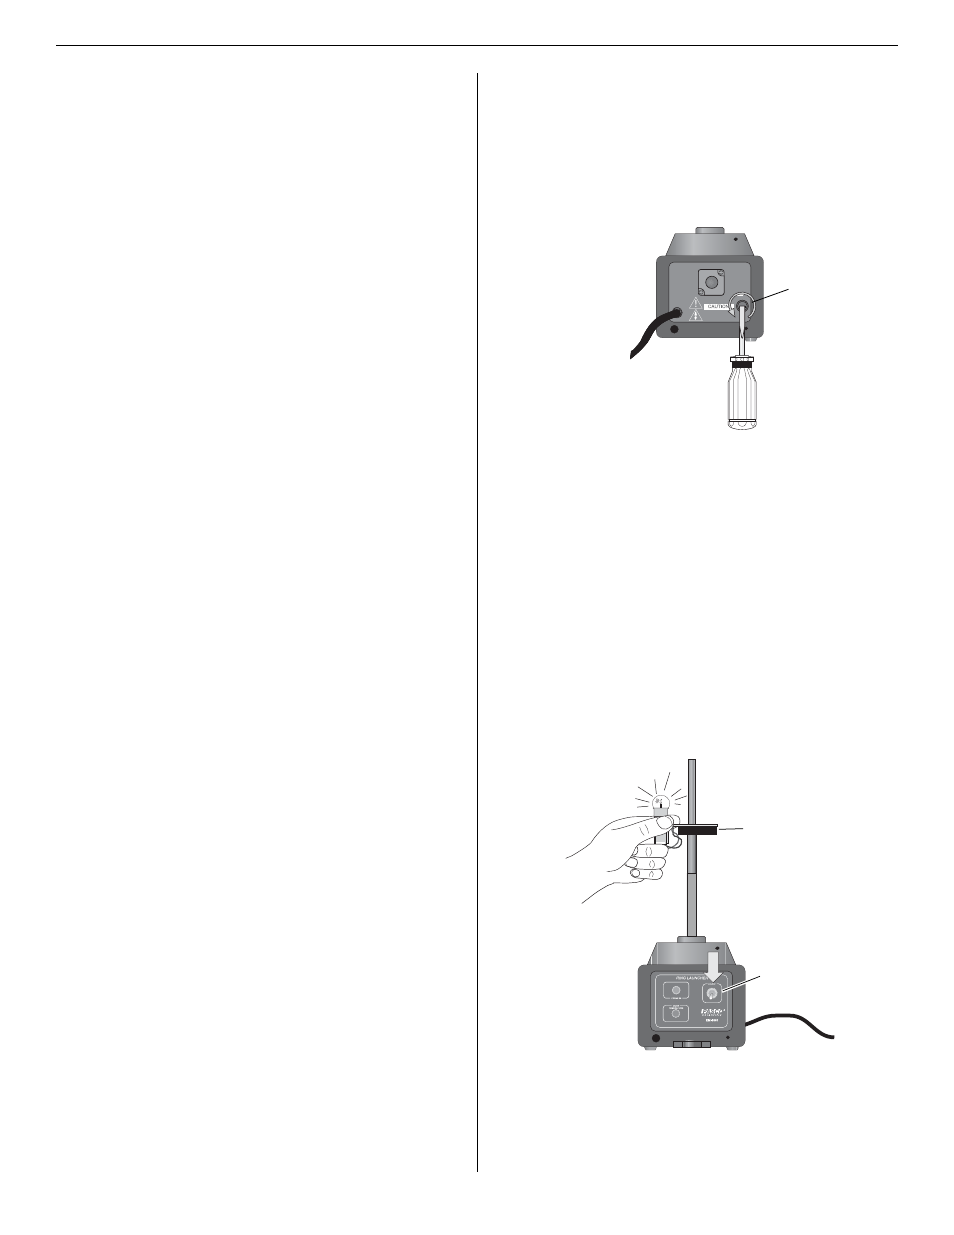
Replacing the Ring Launcher Fuse
1.
Unplug the launcher’s power cord. Insert a flat bladed screw-
driver into the slotted fuse cap on the back of the launcher
and turn counterclockwise to remove the fuse holder.
2.
Replace the fuse in the fuse holder, put the fuse holder back
into the launcher, and turn the fuse cap clockwise to tighten.
Using the Induction Bulb (part of the optional
EM-8662 Ring Launcher Accessory)
The Induction Bulb in the optional EM-8662 Ring Launcher
Accessory allows you to show how voltage induced from the
copper coil on the launcher can light the bulb.
Hold the plastic base of the induction bulb over the iron rod so
that the copper coil on the plastic base is near the copper coil on
the Ring Launcher. While holding the induction bulb near the
copper coil, use the other hand to briefly hold down the Launch
Switch.
•
The small light bulb will light up..
RISK OF ELECTRIC SHOCK
DO NOT OPEN
DISCONNECT
INPUT
POWER
BERFORE REPLACING FUSE
FOR CONTINUED FIRE
PROTECTION. REPLACE
ONL
Y
WITH 8A, 250V
,
TYPE F FUSE,
(PER IEC 127-2/III)
TO
A
VIOD
ELECTRIC
SHOCK
THE
POWER
CORD GROUNDING CONDUCT
OR MUST
BE
CONNECTED
TO
GROUND.
DO NOT
REMOVE COVER REFER
SER
V
ICING
TO
QUALIFIED PERSONNEL.
Replacing the Ring Launcher fuse
Fuse
Cap
Induction Bulb with the Ring Launcher
Copper
Coil
Induction
Bulb
Launch
Switch