Part ii: ballistic pendulum, Setup, Procedure – PASCO ME-6814 Mini Catcher Accessory User Manual
Page 10
Mini Catcher Accessory
012-06293A
6
Alternate Method: Determining the Muzzle Velocity with Photogates
➀
Attach the Photogate Bracket to the launcher and attach two Photogates to the bracket. Plug the
Photogates into a computer or other timer.
➁
Put the ball into the Mini Launcher and cock it to the long range position.
➂
Run the timing program and set it to measure the time between the ball blocking the two
Photogates.
Shoot the ball three times and take the average of these times.
Record in Table 1.2.
Use a distance between the Photogates of 10 cm, to calculate the initial speed and record it in
Table 1.2 and Table 1.4.
Setup
➀
Find the masses of the ball and the catcher and
record in Table 1.3.
➁
Suspend the ball catcher as a pendulum as
explained in the general instructions.
➂
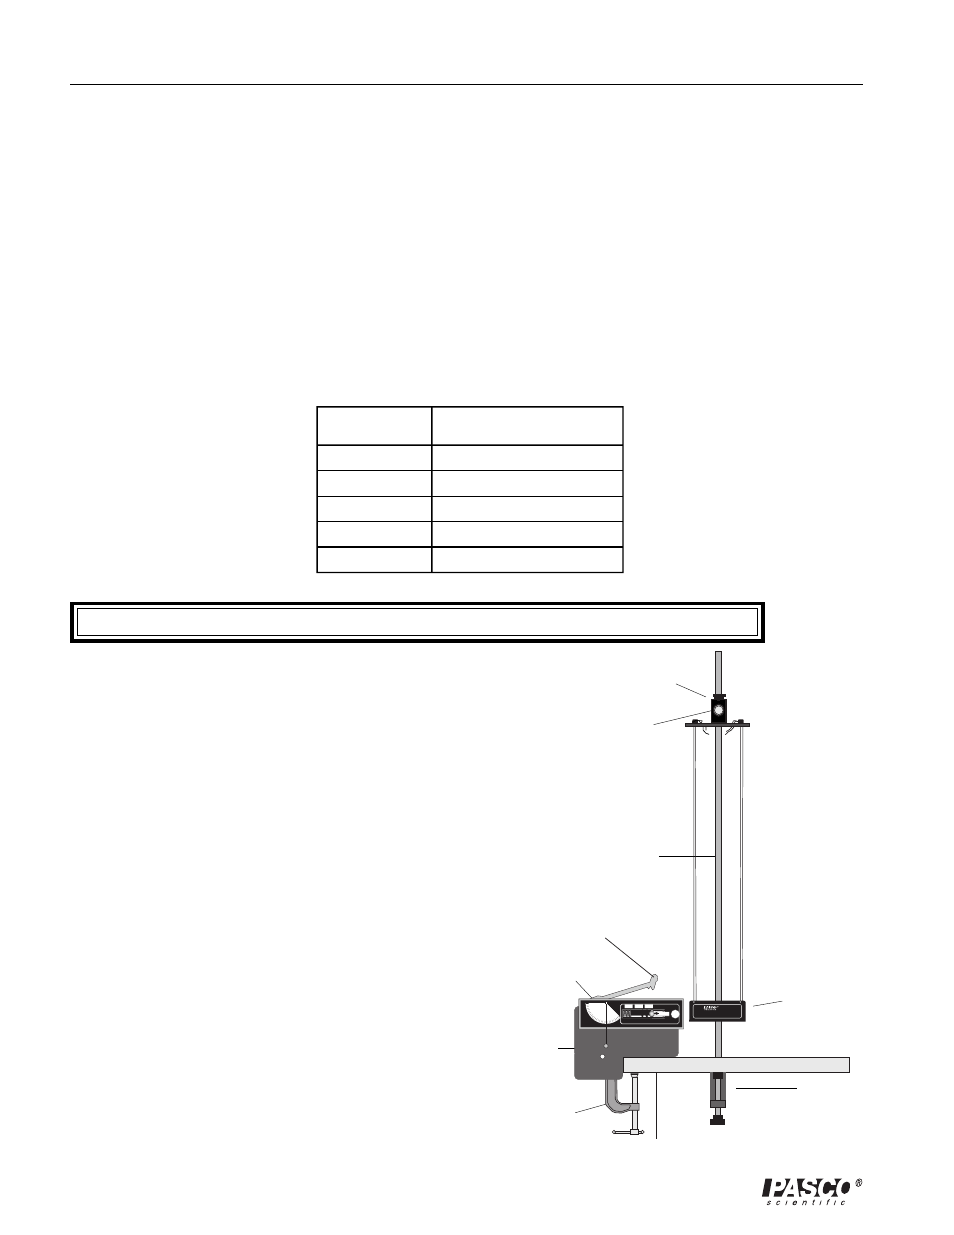
With the Mini Launcher mounted as in Figure
1.4, clamp the suspended ball catcher directly in
front of the muzzle.
➃
Attach a thread to the ball catcher and string it
through the Velcro assembly (see the general
instructions) on the base of the Mini Launcher.
Procedure
➀
Load the Mini Launcher with the steel ball on
the long range setting. Fire a test shot to see how
far out the thread is pulled. Pull a few centime-
ters of the thread back through the Velcro,
leaving the rest of the thread slack between the
Mini Launcher and the catcher. When the ball is
shot into the pendulum again the thread will
Table 1.2 Initial Speed Using Photogates
Part II: Ballistic Pendulum
1
Time
2
3
Trial Number
Average Time
Initial Speed
Figure 1.4. Setup for Part II
table clamp
clamp
Mini Launcher
base
Mini Launcher
Mini Catcher
horizontal rod
rod clamp
90 cm steel rod
9
8
7
6
5
4
3
2
1
0
1
2
3
4
MINI LAUNCHER
ME-6825
CAUTION
WEAR
SAFETY
GLASSES
WHEN IN USE.
DON’T PUSH
PISTON
WITH
FINGER!
ME-6814
MINI CATCHER
ACCESSORY