Set up the equipment, Collect the data – PASCO ME-6694 TORSION PENDULUM User Manual
Page 13
012–06339A
Torsion Pendulum
9
Part B: Determining the Moment of Inertia (I) of a Disk Using Two Methods
Set Up Science Workshop
1.
Use the setup detailed in Part A. Save As a different file name, and delete all data sets
(Runs 1 - 3) and the Graph display.
(Note: The Force Sensor will not be used in Parts B and C.)
2.
Click the Sampling Options button and set the sampling rate to 200 Hz.
3.
Click and drag a Graph display to the RMS icon and choose Angular Position (ang
Pos) from the pop-up menu. (This will set input for the y-axis.)
Set Up the Equipment
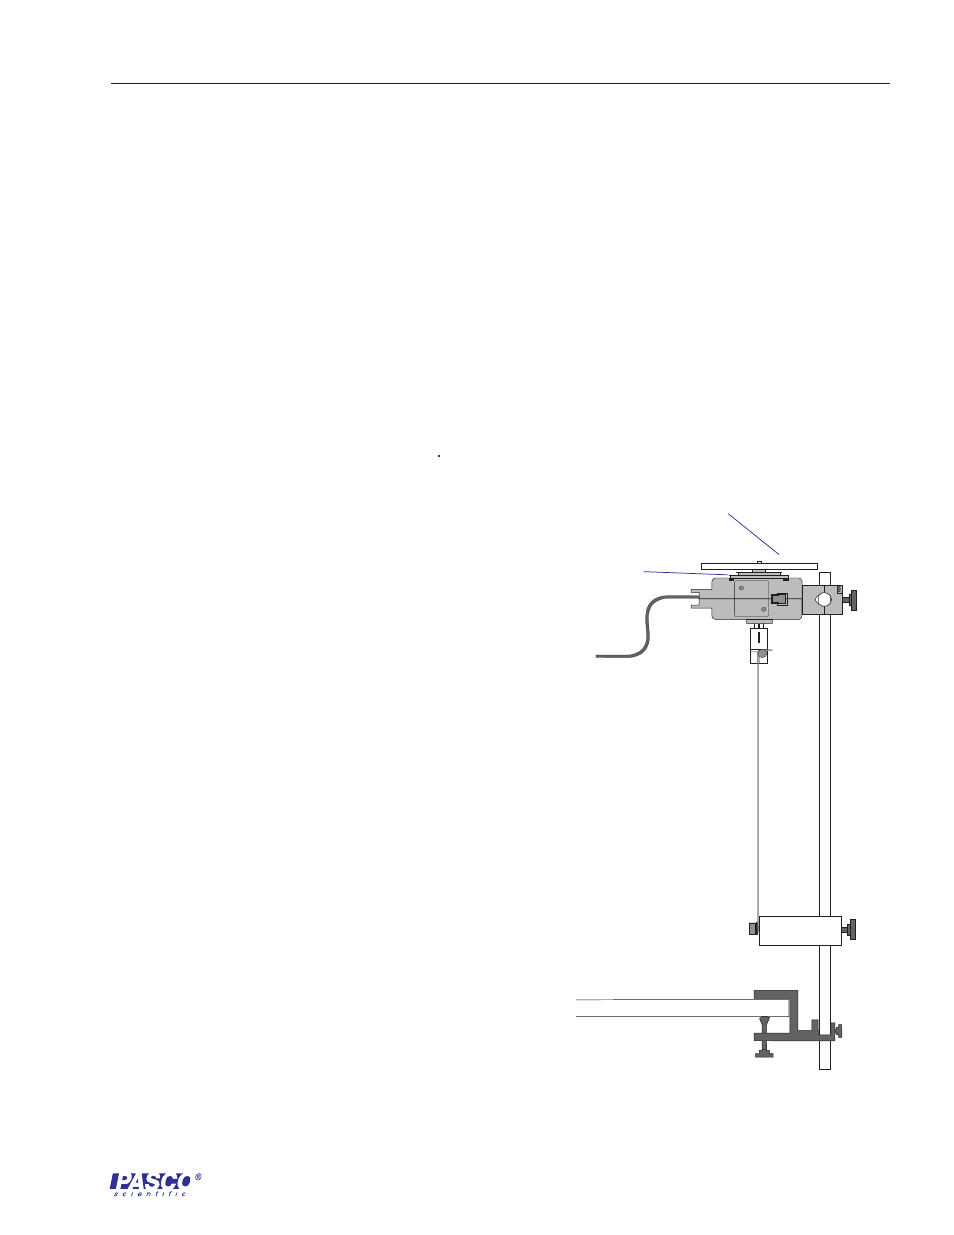
1.
Attach the disk from the Mini-Rotational
Accessory to the 3-step pulley with the
thumbscrew (Figure 1.2).
2.
Check the thumbscrews holding the wire to be
sure they are tight.
Collect the Data
1.
Put your safety glasses on.
2.
Twist the disk 1/4 turn clockwise.
3.
Begin recording data, release the disk, and record
for about 3 5 seconds.
4.
Stop recording data.
5.
Click on the Autoscale button to resize the graph,
if necessary.
6.
Use the Smart Cursor to determine the time for
each period of oscillation (T) of the pendulum
(measure the time between adjacent maxima of
the angular position vs. time graph). Record in
Table 1.2.
7.
Change the wire to the 0.047 inch diameter wire
and repeat steps 26.
Figure 1.2
Experimental setup
disk from Mini-Rotational
Accessory
3-step pulley