PASCO SE-8685 Pulley Demonstration System User Manual
Page 10
Pulley Demonstration System
10
®
Experiment 2: Determining the Work/Energy of a Pulley System
*
PASCO’s PASPORT sensors (with PS- prefix) require a PASPORT interface for operation.
PASCO’s
ScienceWorkshop sensors (with CI- prefix) require a ScienceWorkshop
interface for operation.
Students can quantitatively find the work done on a pulley system by using
PASCO's Rotary Motion Sensor simultaneously with a Force Sensor.
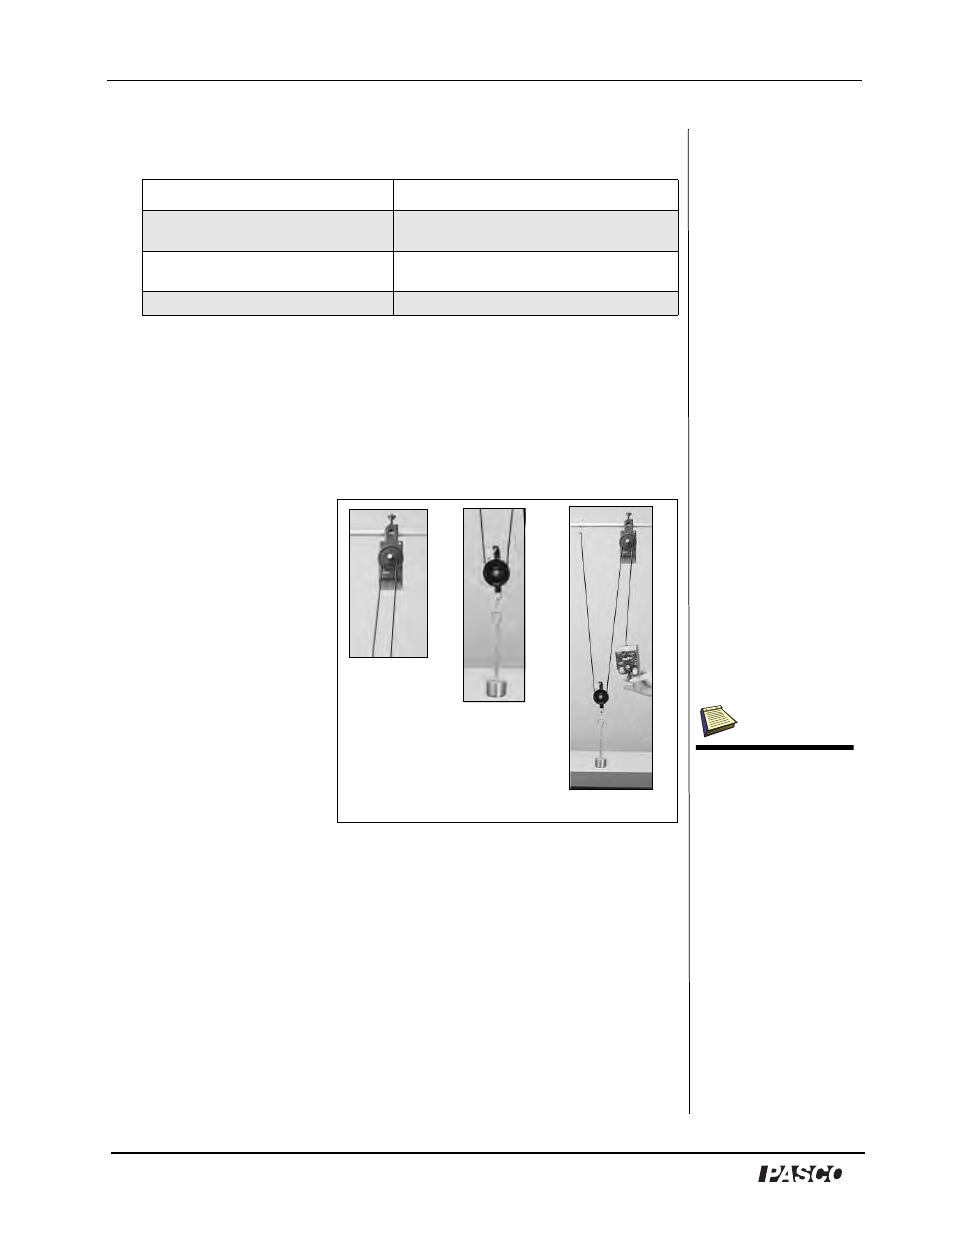
1. Attach a hook collar and
clamp a Rotary Motion
Sensor to the horizontal
rod.
2. Tie one end of string to
the hook collar and loop
the string underneath a
pulley. Hang a mass
from this pulley.
3. Loop the remaining
string around the inside
groove of the Rotary
Motion Sensor.
4. Tie the other end of the
string to the Force Sensor.
5. In DataStudio, click the Start button and pull on the Force Sensor. The
work done can be calculated by finding the area in a Force versus Position
graph.
Alternatively, students can compare the work done on just one pulley. Hang
the same mass from just the Rotary Motion Sensor. Pull the Force Sensor
until the work done is the same as with two pulleys. Students will find that
the force applied doubles while the distance pulled is decreased by half.
Equipment required:
Pulley Demonstration System (SE-
8685)
Rotary Motion Sensor (CI-6538 or PS-
2120)
Force Sensor (CI-6746 or PS-2104)
Computer Interface (1
ScienceWorkshop
or 1-2 PASPORT)*
DataStudio software
Figure 2.2
Figure 2.1-3: Setup
for Experiment 2
Figure 2.3
Figure 2.1
Note: To create a Force
vs. Position graph: In
DataStudio’s Experiment
Setup window, go to the
Rotary Motion Sensor and
click the Linear Position
option. From the Data
list, drag the position icon
over the x-axis in the
Graph display.