Setup the sensor, Calibrating the sensor – PASCO PS-2125 Temperature Sensor User Manual
Page 2
T e m p e r a t u r e S e n s o r
I n t r o d u ct i o n
2
Setup the Sensor
•
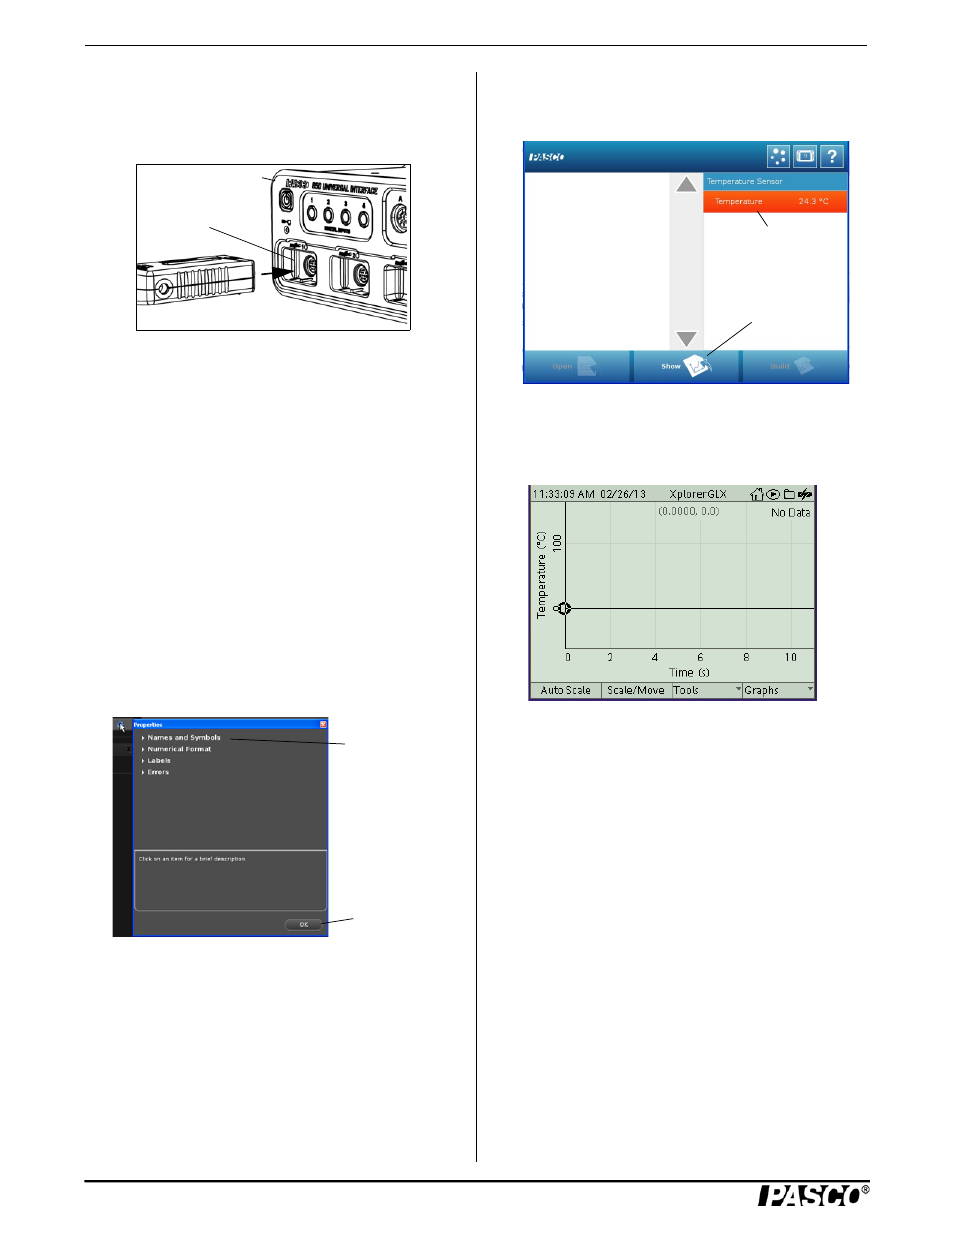
Plug the sensor into a PASPORT input port of a PASCO
PASPORT-compatible interface.
NOTE: If more distance is needed between the sensor and
the interface, plug the sensor into a Sensor Extension Cable
(PS-2500), and then plug the cable into the interface.
•
Connect the temperature probe to the sensor box.
•
Start the PASCO data acquisition software. Set up a data
display in the software.
Using PASCO Capstone Software
•
Click the “Hardware Setup” icon in the Tools palette to
open the “Hardware Setup” panel. Confirm that the
Temperature Sensor icon appears with the interface’s
icon.
•
Click the “Data Summary” icon in the Tools palette to
open the “Data Summary” panel.
•
Click the “Properties” icon (that looks like a small gear)
in the “Data Summary” panel to see the “Properties”
panel. Click “Names and Symbols” to change the
default unit from degrees celsius.
•
Click one of the display templates in the Capstone work-
book page, or double-click an icon in the “Displays”
palette to select a specific data display.
Using SPARKvue Software
•
Connect the sensor to a SPARK Science device and start
the software. In SPARKvue, the sensor parameter screen
opens and shows the list of measurements for the sensor.
•
In the sensor parameter screen, touch a measurement to
highlight it, and then touch ‘Show’ to open a graph dis-
play.
Using Xplorer GLX Datalogger
•
When you connect the sensor to the Xplorer GLX Data-
logger, a Graph display of temperature versus time auto-
matically opens.
Record Data
•
Click “Record”, touch ‘Start’, or press the ‘Record’ but-
ton to begin recording data.
Calibrating the Sensor
The Temperature Sensor is factory calibrated, but it can be
calibrated using the following: ice water, hot water, ther-
mometer.
Using PASCO Capstone Software
•
Click the “Calibration” icon in the Tools palette to open
the “Calibration” panel. For step 1, confirm that “Tem-
perature” is selected and click “Next”.
•
For step 2, confirm that the selected probe is “Tempera-
ture Measurement” and click “Next”.
•
For step 3, confirm that “Two Standards” is the type of
calibration, and click “Next”.
•
For step 4, put the probe and the thermometer in ice
water. When the temperature on the thermometer is at or
close to 0 °C, enter the thermometer reading in the
“Standard Value” text box. Click “Set Current Value to
Standard Value” and click “Next”.
Sensor
PASPORT
Input Port
Interface
Click “Names
and Symbols” to
change the
default unit.
Click “OK” to close
the Properties
panel
Touch a
measurement
Touch “Show”