Setup, About the digital indicator, Measurement setup – PASCO PS-2204 Displacement Sensor User Manual
Page 3
®
Model No.PS-2204
Setup
3
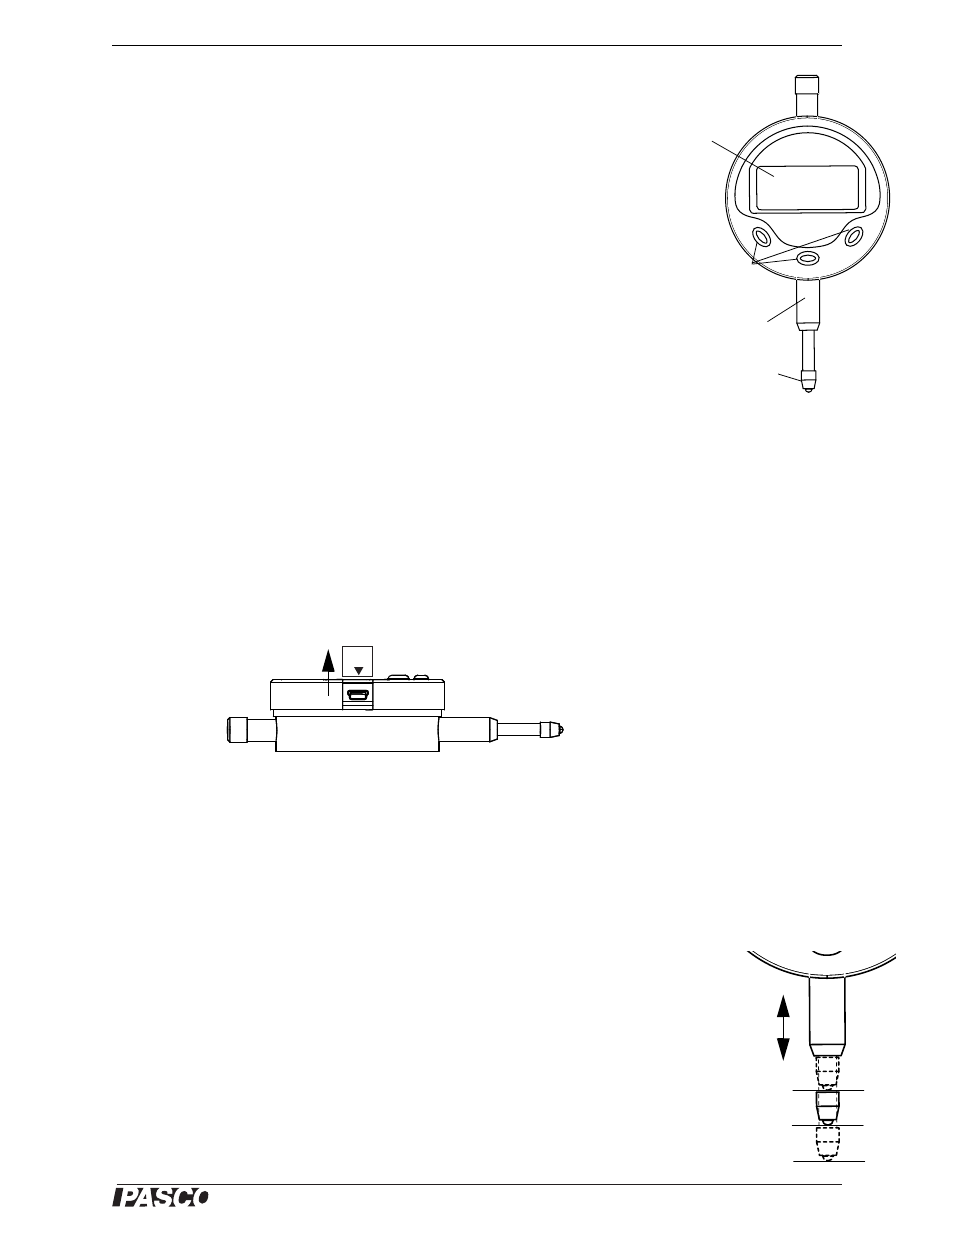
About the Digital Indicator
The Digital Indicator has a four and one-half digit liquid crystal display (LCD), a
measuring head, lower sleeve, and three function buttons (ON/O, M, and mm/in).
Zero-setting can be done at any position of the measuring head to allow differential
measurement..
Function Buttons
ON/O: This is the “On-Off” and zero-setting button. If the indicator is off, press and
hold the ON/O button to turn the indicator on. Press and release the ON/O button to
set the zero point. Press and hold the ON/O button for several seconds to turn the indi-
cator off. (Note: The Digital Indicator has an automatic power off feature.)
M: This is the data hold button. Press and release to turn data holding ‘on’ and press
and release again to turn it off. (The interface software will continue to show the cur-
rent position of the measurement head.)
mm/in: This button toggles between measurements in millimeters and measurements
in inches. The default setting is ‘mm’. Press and release the button to switch to ‘inch’.
Press and release again to switch back to ‘mm’. Note that the DataStudio software
program used with a PASPORT interface is set to show millimeters (mm) or mils
(thousandths of an inch). Open the Experiment Setup window in DataStudio to select
the proper unit of measure.
Data Port
The data port is located on the left side of the Digital Indicator behind a small cover
labeled DATA. Slide the cover up to remove it (but don’t lose it). The data port
accepts the plug on the end of the Displacement Sensor cable.
Battery
Flashing digits show that the battery is very low. The Digital Indicator uses a 1.55 volt
SR44 silver oxide battery. To replace the battery, use the screwdriver to remove the
four small screws on the back panel and then remove the back panel. The battery is
under a circular cover. Loosen - but do not remove - the small screw that holds the
cover in place. Rotate the cover to the side and replace the battery (+ side facing up).
While holding the battery down, rotate the cover back into place. Tighten the screw,
put the back panel on, and install the four small screws.
Setup
Measurement Setup
Mount the Digital Indicator so that it is in contact with the object whose displacement
will be measured. Arrange the indicator so that the measurement head and lower
sleeve are aligned with the direction of the displacement.
LCD
Function
buttons
Lower
sleeve
Measuring
head
DATA
Data port
Slide cover up
Take out the battery if the
Digital Indicator is not in
use for a long time.
Equilibrium
+ Displacement
- Displacement
Direction of
displacement