Interface and software configuration (optional), Data collection – PASCO PS-2174 Weather_Anemometer Sensor User Manual
Page 2
®
W e a t h e r / A n e m o m e t e r S e n s o r
P S - 2 1 7 4
2
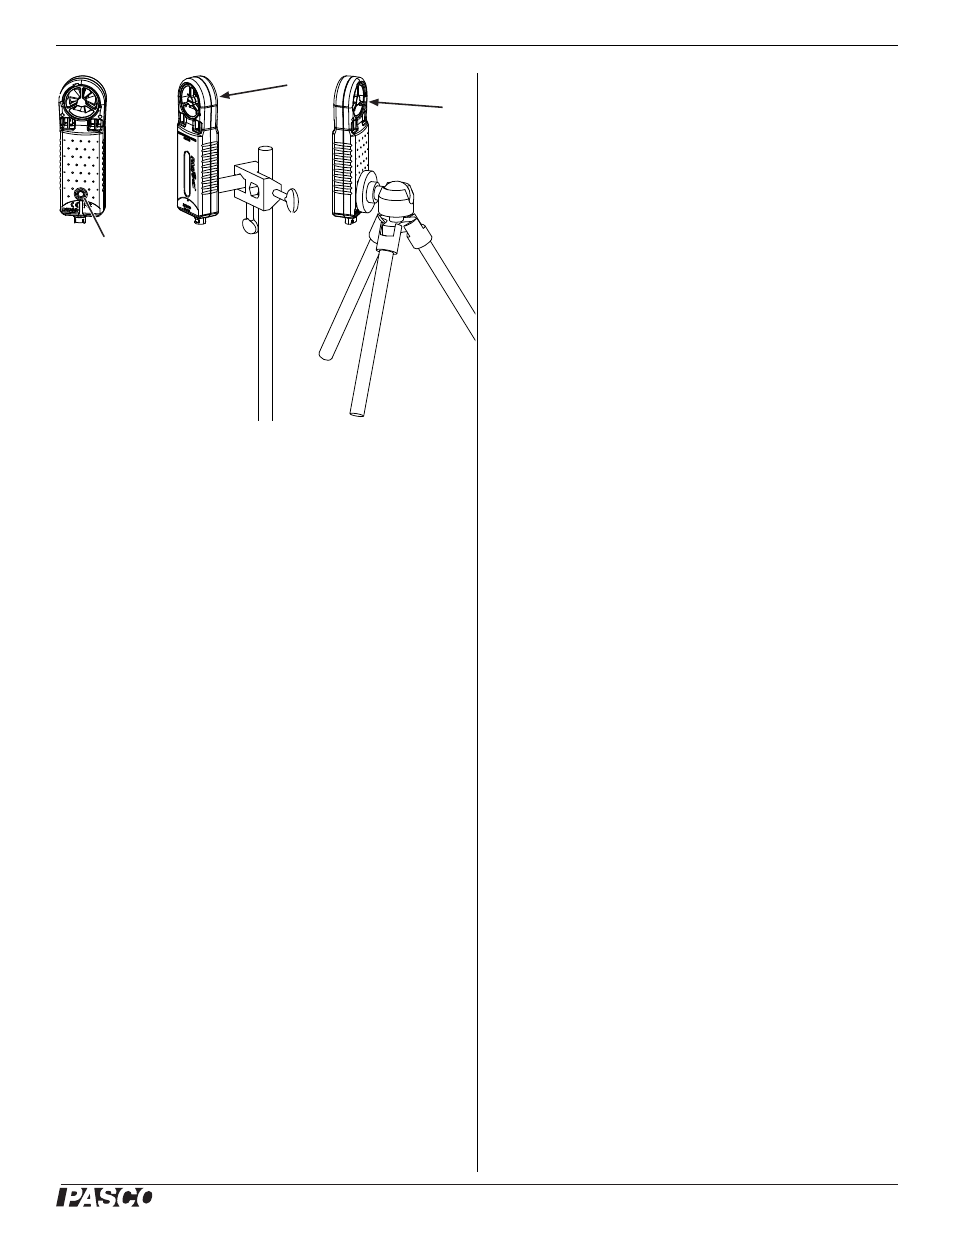
Figure 1: Mounting options and air flow direction
Interface and Software
Configuration (Optional)
The interface or software automatically prepares itself for data
recording when you connect the sensor. Follow the steps below to
change the default settings.
GLX Configuration (Standalone Mode)
To Add Measurements to the Digits Screen
In the Digits screen, press G, H, or I to display more measure-
ments.
To Change the Displayed Measurement
In any display screen, press c twice to open the data source menu,
from which you can select a measurement for display.
To Change Measurement Units
1. In any display screen, press c to light up the active fields.
2. Use the arrow keys to highlight the measurement unit.
3. Press c to open the units menu, from which you can select a
different unit.
To Change the Sampling Rate
1. Open the Sensors screen by pressing h + I.
2. Press c to open the Sample Rate Unit menu. For rates faster
than once per second, select samples/s. For slower rates,
Select seconds, minutes, or hours.
3. Press d to highlight Sample Rate.
4. Press + or - to change the rate or time between samples.
DataStudio Configuration
To Create a New Data Display
1. Double-click the Graph, Digits, or other display icon in the
Summary bar. A list of data sources appears.
2. Select the measurement that you want to display and click
OK.
To Change Measurement Units
1. Click Setup to open the Experiment Setup window.
2. Under the first or second Measurements tab, click the unit of
measure that you want to change. A menu opens.
3. Click the desired unit.
To change the sampling rate
1. Click Setup to open the Experiment Setup window.
2. Click the units next to the sample rate setting. A menu opens.
For rates faster than once per second, select Hz. For slower
rates, Select seconds, minutes, or hours.
3. Click the arrow buttons next to the Sample Rate setting to
change the rate or time between samples.
Data Collection
GLX (standalone mode)
To Display Data without Recording
Open the Digits or Meters screen. The GLX displays live data.
To Record Data
1. Press s. The GLX starts recording data.
2. Press s again to stop recording.
3. Press s again to start recording in a new data run.
DataStudio
To Display Data without Recording
1. Open the Experiment menu and select Monitor. DataStudio
displays live data.
Mounting Hole
Air Flow
Air Flow