Using the ph sensor – PASCO CI-6507A pH Sensor User Manual
Page 2
pH Sensor
012-06832A
2
Using the pH Sensor
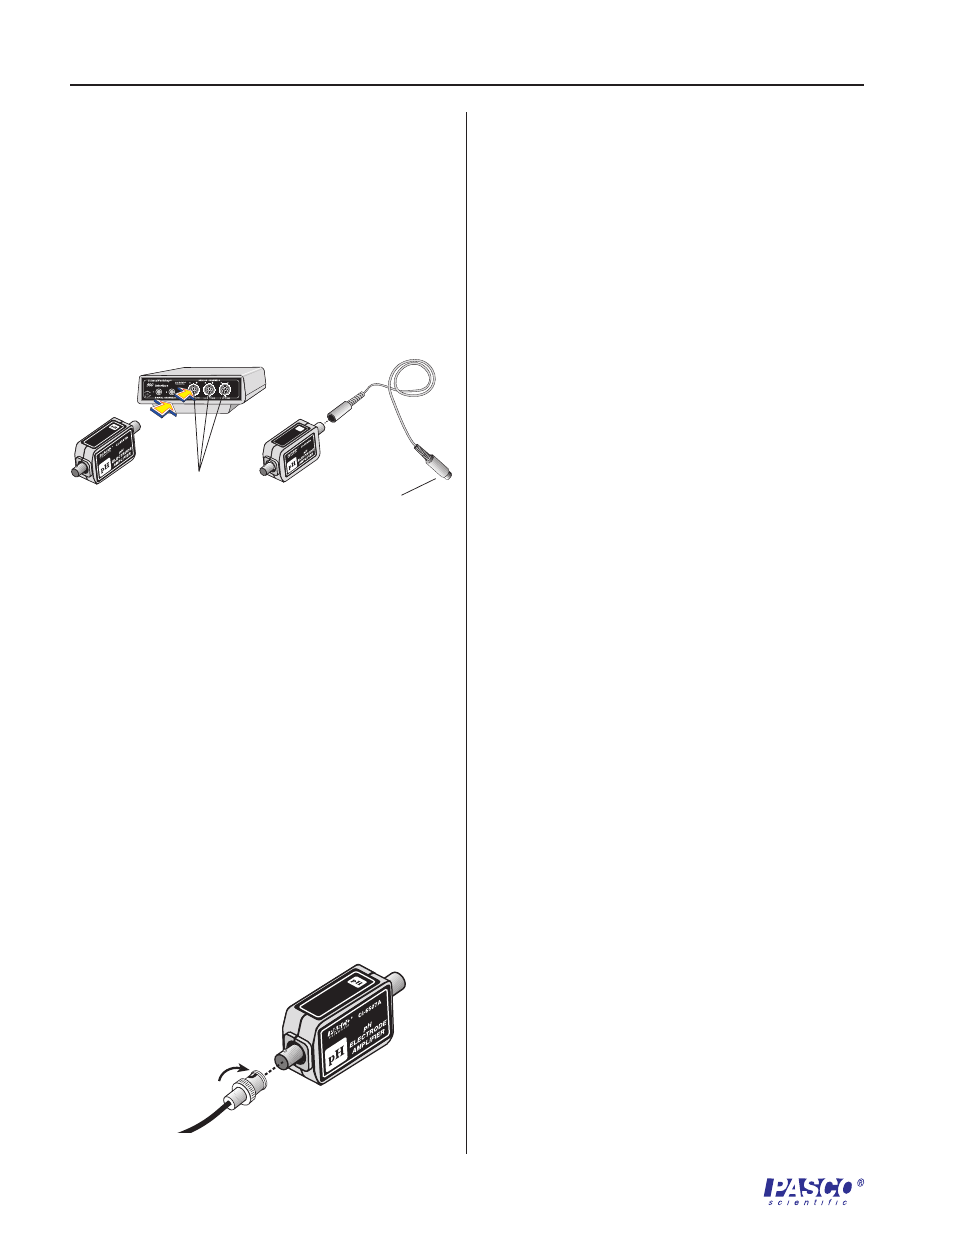
Connecting the pH Sensor to the interface box
1. Connect the 8-pin DIN plug of the pH Sensor
amplifier box into analog channel A, B or C of
the computer interface (Figure 1a).
or
Use the supplied cable to connect the pH
electrode amplifier box to the analog channel of
the interface box (Figure 1b).
Figure 2
Connecting the pH electrode to the amplifier
2. Unscrew and remove the protective soaker bottle
from the end of the pH electrode, leaving the O-
ring and cap in place on the shaft of the pH
electrode.
3. Rinse the electrode tip in distilled water. If
bubbles are seen in the pH electrode bulb, gently
shake the electrode downward (similar to
shaking down a thermometer) until the bubbles
disappear.
4. Connect the pH electrode to the BNC connector
of the pH electrode amplifier (Figure 2). Insert
the plug at the end of the electrode cable over the
BNC connector, and twist the plug one quarter
turn clockwise to lock it onto the BNC
connector.
Calibrating the pH Sensor
➤
Note: Use buffer solutions that are at a
temperature similar to the temperature of the
sample to be measured.
Two Buffer Method:
1. Run the ScienceWorkshop program. In the
Experiment Setup window, set up the
ScienceWorkshop interface and sensor so the pH
Sensor is connected into the correct analog
channel of the interface.
2.
In the Experiment Setup window, double-click
the pH Sensor icon to open the sensors setup
window. (Note: In ScienceWorkshop version 3,
click the Calibration tab located near the top of
the sensors setup window.
3. Place the pH electrode in a high pH buffer
solution and wait about 30 seconds for the
voltage readings to stabilize.
4. Once the readings have stabilized, click the Take
Reading button. Enter the pH value of the high
pH buffer solution in the High Value box.
5. Rinse the pH electrode with distilled water and
then place the pH electrode in a second solution,
such as a low pH buffer solution. Wait about 30
seconds for the voltage readings to stabilize.
Again, after the readings have stabilized, click
the Take Reading button. Enter the pH value of
the low pH buffer solution in the Low Value
box. Click OK to return to the Experiment Setup
window.
One Buffer Method:
1. Choose a buffer of known pH that is close to the
pH of the unknown.
2. Place the electrode in the buffer solution and
wait about 30 seconds for the voltage readings
stabilize.
3. Type the pH of the buffer solution in the High
Value box, and click Take Reading.
4. Type 0 in the Low Value box, and type 0 in the
Volts box next to the Low Value box.
ISE
a
b
Figure 1
Connecting the pH electrode amplifier to the computer
interface (two methods)
Plug into analog
channel A, B, or C
to analog channel
on the computer
interface