PASCO CI-6499 Drop Counter User Manual
Page 3
012-08549A
Drop Counter
3
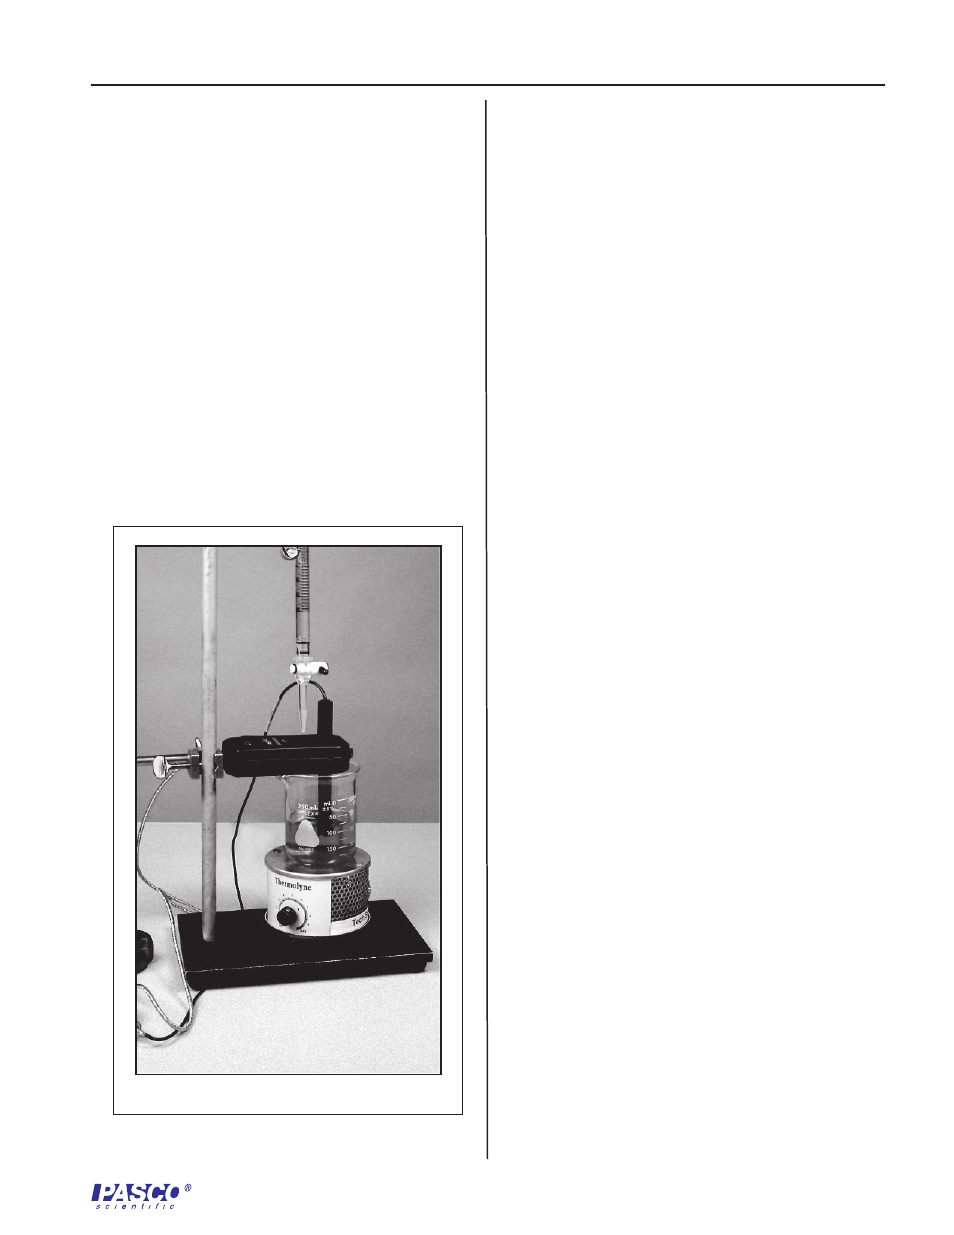
1. Using a right-angle clamp to horizontally mount the
Drop Counter to a rod stand (Figure 2).
2. Use a three-fingered clamp to mount an empty buret
or the included syringe apparatus above the
rectangular hole in the Drop Counter.
3. Connect the Drop Counter to a ScienceWorkshop
interface.
4. Place a 150 mL (or larger) beaker on the stirring
apparatus, but underneath the Drop Counter. Insert
a magnetic stirrer into the solution.
5. Insert the probes of any other sensors (i.e. pH
Sensor or Temperature Sensor) into the holes; hold
in place with the set screws on the Drop Counter.
Figure 2: Drop Counter Setup
Drop Counter Setup
Experiment Setup with DataStudio Software
1. Plug the Drop Counter into a digital channel on a
ScienceWorkshop interface.
2. Open DataStudio and double click “Create
Experiment.”
3. In the Experiment Setup window, scroll to the
Sensors list. Click and drag the Drop Counter icon
to a digital channel on the picture of the interface
(the same digital channel to which you have your
sensor connected.)
4. In the Setup window, double click on the Drop
Counter icon.
5. In the Measurement tab, place checks (or verify
that checks exist) in the boxes next to the drop
count and fluid volume. Click the OK button to
accept the changes.
6. Follow the calibration procedure instructions.
Note:
When using the Drop Counter with DataStudio,
DataStudio must be in automatic sampling mode (the
default mode). The Drop Counter does not operate in
manual sampling mode. To set DataStudio to
automatic sampling, open the Sampling Options dialog
(under Experiment>Set Sampling Options) and
deselect all options checked in the Manual Sampling
tab.