Firewall settings – Nitek MNG6448 User Manual
Page 14
14
Firewall Settings
Firewalls are configured to allow “desired” traffic in and to keep “undesired” traffic out. The BRIDGE access point is
also qualified for firewall management. Acting as a firewall, the Mesh unit will filter your undesired data and proto-
cols, only delivering the “wanted” data to your PC. Click on the firewall link to display Firewall Management inter-
face.
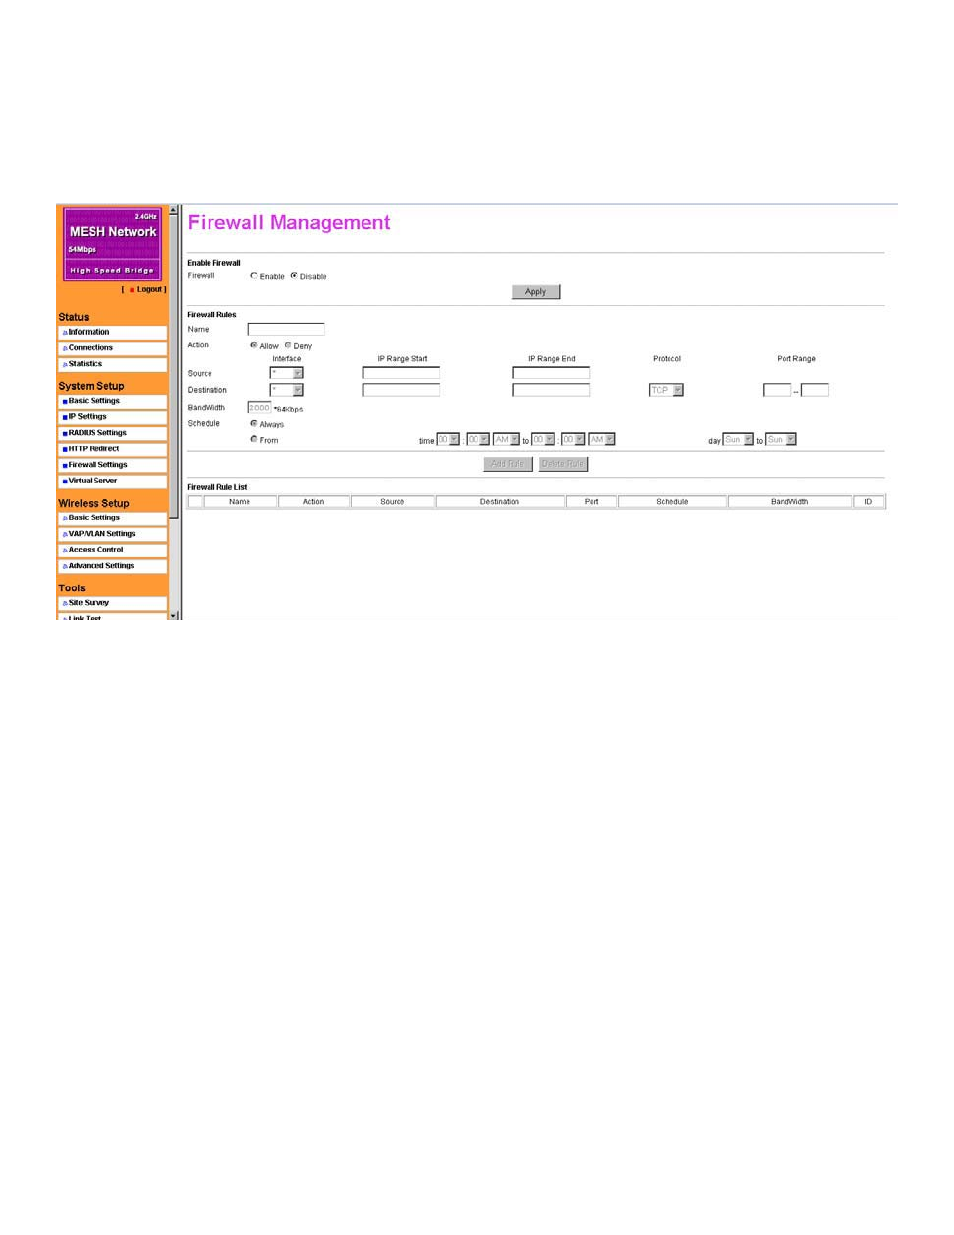
Figure 10 Firewall management
Enable Firewall: The firewall must first be enabled. Check “Enable” and click Apply.
Name: Enter a name for the firewall rules in the name field.
Action: Allow identifies which IP addresses, are allowed to transmit on the LAN.
Deny identifies which IP addresses, are banned from transition on the LAN.
Interface: This is optional, WAN or LAN.
Destination: This specifies where packets are bound for.
IP Range Start: This specifies the starting-point of your specific IP addresses.
IP Range End: This specifies the ending-point of your specific IP addresses.
Protocol: This is optional, TCP, DCP, ICMP or *. Select which protocol will perform “Allow” or “Deny”.
Port Range: This specifies your IP port range.
Schedule: Allow setting a time when the Mesh unit performs firewall management, by enabling “from” option.
“Always”, sets the Mesh unit to perform firewall management permanently.