Multichannel Systems USB-MEA256-System Manual User Manual
Page 20
USB-MEA256-System Manual
14
General Performance / Noise Level
Please use the provided test model probe to test the amplifier immediately after installation.
It simulates a MEA with a resistor of 220 k
and a 1 nF capacitor between bath and electrode.
Use MC_Rack or your custom data acquisition program to record from the test model probe and
to check the amplifier. Please see "Test Model Probe" in the Appendix.
Alternative to the test model probe you can use n 256MEA Signal Generator. 256MEA Signal
Generator is a convenient tool for USB-MEA256 System users. Use the 256MEA-SG instead of
setting up an experiment with biological sample for training, controlling, and troubleshooting
purposes. This reduces the number of animal experiments and saves laboratory equipment.
Please see the data sheet "256MEA-SG" in the Appendix
Setting up MC_Rack
Please refer to the MC_Rack manual for more information.
1. Start
MC_Rack.
2. Click “Data Source Setup” on the “Edit” menu. Select USB-MEA256.
3. Add USB-MEA256 as a data source to your virtual rack.
4. On the “Edit” menu, click “Add Data Display” to add a raw data display to your virtual rack.
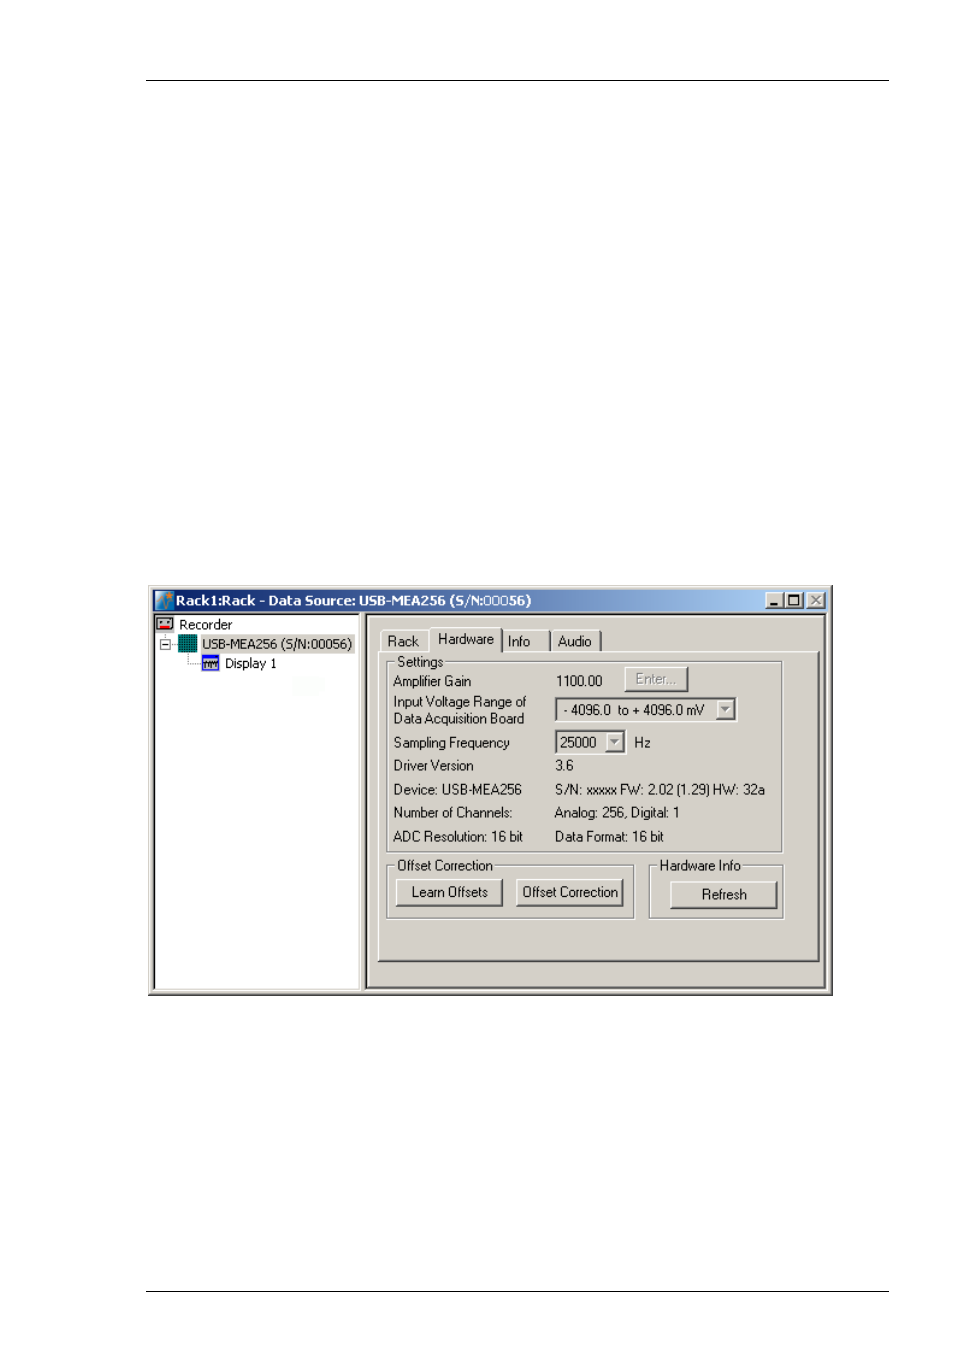
5. Click the “Hardware” tab of the USB-MEA256 and enter the sampling frequency in Hz.
Start the data acquisition
1. Click the “Start” button to start the data acquisition. No data is recorded. You see the raw data
streams of all 252 channels in the 16 x 16 MEA layout.
2. You may have to adjust the position and span of the axes until you can clearly see the noise level.
You should see the baseline with a maximum noise level of +/– 8 μV.