CNB SDF1212 User Manual
Page 19
19
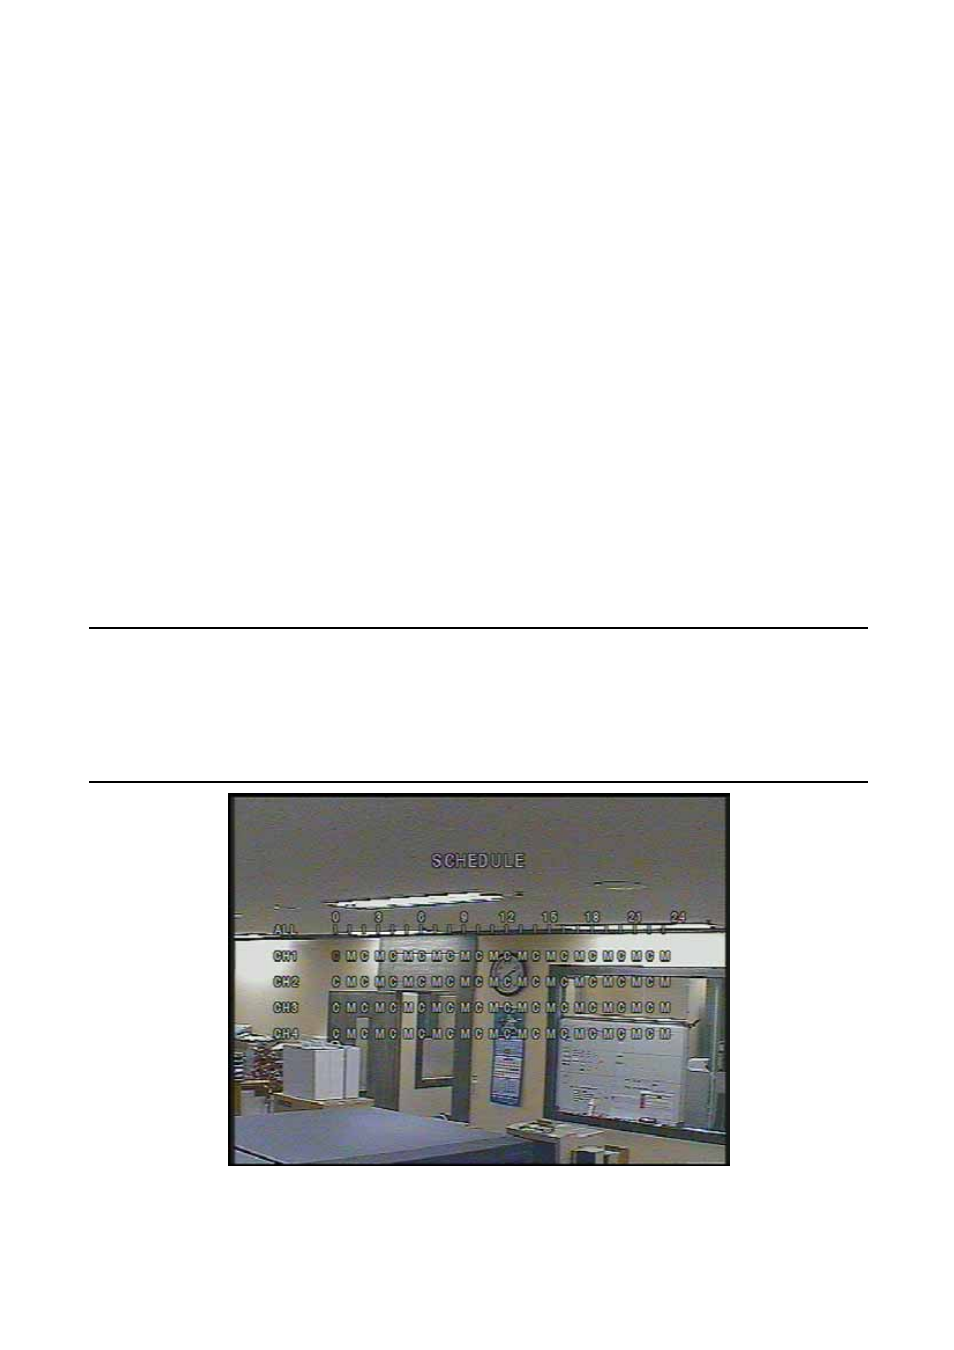
3-3-2. Recording Schedule
Select SCHEDULE in the RECORD menu to set up the recording schedule. Navigate through the items to
highlight using the 4 direction key buttons and set recording schedule using the SEL button.
[
ALL
]
: When ALL is highlighted, selected recording mode by pressing SEL button is applied to entire time
zone and channels.
[
CH_
]
: When a particular channel is highlighted, selected recording mode by pressing SEL button is
applied to entire time zone for the specified channel.
[
|
]
: When one of vertical bars “ | “ is highlighted, selected recording mode by pressing SEL button is
applied to 1, 2, 3, & 4 channels for the selected time zone. (Each vertical bar “ | “ corresponds with
one hour.)
[
CH_
]
and
[
|
]
Cross : When a particular intersection point is highlighted, selected recording mode by
pressing SEL button is applied to that channel and time zone.
Recording mode in schedule
[
C
]
: Continuous recording mode
[
.
]
: No recording mode(Display only).
[
M
]
: Motion detection triggered recording.
[
S
]
: Sensor triggered recording.
Figure 3.3.3. Schedule recording setup screen